


Do It Yourself (DIY)
 01-10-07 | 11:15 AM
#1

Thread Starter
Elitist
Joined: Jul 2005
Posts: 15,966
Likes: 94
From: Atlanta, GA
Do It Yourself (DIY)
(Please reply with links and I'll edit this top post and add them to the lists)
Bike Mechanicing so easy, a caveman can do it.
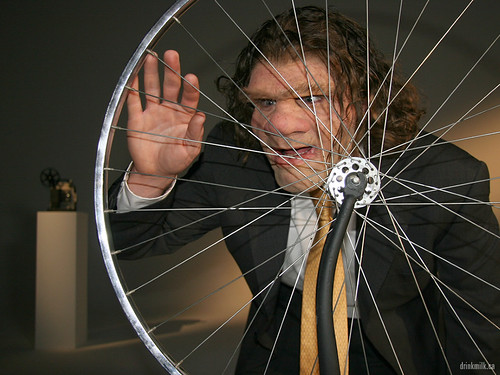
Photo by Neddd
Bike Mechanicing so easy, a caveman can do it.
Photo by Neddd
OK, kids. We are professional cyber-cyclists. Don't try this stuff at home. If you do, you do it at your own risk. Remember, these are the ramblings of wannabe know-it-alls who spend more time on the computer than our bikes...so we can't be held responsible if you lose a finger (or two).
Now that that is out of the way, on to the good stuff.
BFSSFG Do-It-Yourself (DIY) solutions:
Wheels:
- A Dial-Gauge Bicycle Wheel Building Stand for $100 by Chuck Connell
Hubs:
- Tighten and loosen a cog without a chainwhip AKA: Rotafixa Method
- How to mod a Surly Tuggnut chain tensioner to work with Campy 1010 or similar horizontal dropouts by mander
- Replace the bearings on your formula hub by dirtyphotons
Rims:
- Dropping nipples into deep v style rims by luvthemas
Headsets:
- Maintain that sexy (or not so sexy) track headset by [165]
Bottom Brackets:
- Maintain that sexy (or not so sexy) track BB by [165]
Handlebars:
- How to tape bullhorns (or any type bar, really) by c0urt
Cranks:
Pedals
- How to repack your pedals, especially if they are MKS Sylvans. by queerpunk
- DMR V8 - Pedal Rebuild by lymbzero
- KKT Top Run Pedal Rebuild - by Retem
- I made some Toshi-style double toe straps! by hockeyteeth
- DIY Double Strap Holders by dubteka
- Super Sketch Double Strap Holders by yellowjeep
Frames:
- Make yourself some track dropouts by AfterThisNap
- Spraypainting a frame
- Project Centurian to Barracuda Mk. I - Official Progress Thread. by cuda2k
Tools:
- essential tools for a fixie rider?
- Tools
- Tools YOU never bike without
- Convert a 3/32" Chain Whip to fit 1/8" AND 3/32" cogs by Carleton
- Homemade Lockring Tool by silent1
Buying the Right Bike:
- A discussion of budget fixed-specific frames/complete bikes
Miscellany:
- Karl's gear inch worksheet
- Skid Patch Theorem by Fraction
- How to not get your bike stolen... by Carleton
- De-anodising (anodizing - for the stateside) and polishing a Cinelli quill stem by jol
- Re-cover your saddle by SingleSpeeDemon
- DIY Toptube Pad by marqueemoon
- Give your back a break from those pointy objects in your bag by Gyeswho
- How To Make a Bike Polo Mallet by tink20seven
- Leather Saddle Restoration by VT tallbike
- DIY Beer opener by HandsomeRyan
- Polish Aluminum Parts by jol

Last edited by carleton; 02-08-09 at 11:44 PM.
 01-10-07 | 12:04 PM
#2
Thread Starter
Elitist
Joined: Jul 2005
Posts: 15,966
Likes: 94
From: Atlanta, GA
Added "Maintain that sexy (or not so sexy) track headset"
Thanks, OrgFarmCY
Thanks, OrgFarmCY
01-10-07 | 12:07 PM
#3

Senior Member
Joined: Aug 2005
Posts: 939
Likes: 0
From: brooklyn
Bikes: raleigh gran prix converted to fixed
how can i trap a child inside my wheel like that?
01-10-07 | 12:07 PM
#4


Good Afternoon!
Joined: Nov 2004
Posts: 2,352
Likes: 0
From: Rural Eastern Ontario
Bikes: Various by application
Originally Posted by carleton
 01-10-07 | 01:18 PM
#6

aka mattio
Joined: May 2005
Posts: 6,586
Likes: 58
Bikes: yes
How to repack your pedals, especially if they are MKS Sylvans.
MKS Sylvans are simple, solid, popular pedals. The bearing quality is fine, but found that my left pedal's bearings went downhill when I lost the dustcap due to pedal strike during an alleycat. It's a simple equation: dirt sticks to grease, which turns bearings from smooth surfaces into, well, sandpaper. You can hear it, you can feel it, and it's not pretty.
To repack my pedal, I found myself using some less than ideal tools for the job. Here's the list:
1. degreaser in a little bowl.
2. rag.
3. 15mm wrench. (campy peanut butter wrench, which is thin-walled, would work very well)
4. pliers on a multitool (or, even better, 12mm wrench - for the locknut).
5. phil wood's waterproof grease.
6. Pencil.
7. 15-30 minutes of your time.
Step 1: For me, step one was to hit my pedal against the asphalt in New Haven hard enough to shatter the dustcap, but for you, it might be as simple as removing the dustcap, or maybe even just wondering where your dustcap went and why a new one costs $5, which is about a quarter of the price of a set of pedals, new.
Step 2.a: Take your pedal apart. I generally don't like pliers, because they chew up nuts more than an appropriate-sized wrench does. However, I didn't have the right sized wrench, nor did I have a small, nimble adjustable that would fit the locknut. I used the pliers to loosen and remove the locknut. Being firm, gentle, and not slipping will lower your chance of slipping and gouging the nut unrecognizable. Then, I used the 15mm wrench to loosen and remove the cone. I had to stick the wrench in along the rotational axis and just nibble at the cone with it, because the cone is pretty well covered by the pedal body. A low-profile socket wrench would be a far superior tool here.
Step 2.b: Using a rag to make sure that the ballbearings don't fall all over the place, remove the pedal body from the spindle. You'll notice that, like a hub, the cone of the 2 bearing assemblies is part of the pedal body, and the cup on the inside bearing is just part of the spindle, meaning that one locknut and cone is what holds both bearing assemblies together. Gather all the ballbearings (you might need the pencil to poke them out) and let them sit in the degreaser with the locknut and cone.
Step 3: Dip your rag in degreaser and clean off the bearing surfaces. Remove all grease. I like to put the rag on the pencil and clean out the inside of the pedal, too, just to remove any grease that fell in there if the ballbearings decided to take the long way out.
Step 4: After those bearings and nuts have degreased, wipe them down with a rag to make sure you get rid of any clingy bits of old, gross grease.
Step 5: Using that delightful Phil Waterproof Grease, layer grease on the bearing surface on the inside (crankside) bearing assembly of the pedal. Plop a lot in there, but don't just squirt it in to the pedal - place it all in the cup there. One by one, but the bearings back in; you might use the pencil to push them into the grease just a bit so that they don't get in the way when you put the pedal back on to the spindle. If I recall correctly, each side has 11 bearings. When you're done with this, slide the pedal body back on to the spindle.
Step 6: repeat step 6, but for the outside bearing assembly.
Step 7: apply just a bit of crease on to the spindle threads. Gently screw the cone down until it gets snug against the bearings. Do the same for the locknut.
Step 8: now here's the tricky part - tightening the locknut and the cone at the right spot, so that there's no play in the pedal, but the bearings are not too tight. I found it worked to tighten the cone down, and then moderately tighten the locknut, and then back the cone off against the locknut. Any time you're moving one of them against the other, you'll need to hold both, lest they spin together. It was awkward with pliers and sticking the wrench in, but it worked. Make sure that the locknut and the cone are tight against each other, so that the pedal bearing assemblies won't loosen up while you're riding.
Step 9: Optional. Order a new dustcap from where ever, like Trackstar which I know sells them on their website. Furrow your brow over the $5 price. Wait patiently. When it comes, eagerly open the package, and then screw it on, protecting your pedal re-pack job. Put the pedal back on and ride.
NOTES:
Even with exposed bearings, I haven't repacked since July, and my bearings are as smooth as I need them to be.
If you're dealing with old pedals with some rusted parts, WD-40 might be a good idea to break up some of the rust so that you can loosen those nuts and take apart the pedal. Be sure to thoroughly clean, degrease, and regrease though.
I don't know of a wrench that can grab the cone nut and leave room for something to grab the locknut. I'm interested in hearing how other people might do this. EDIT: i'm told that the campy peanut butter wrench is good for this - it's thin-walled, so it will fit in the pedal to hold the cone, and then you can use a 12mm wrench for the locknut, through the hole in the campy pb wrench.
I'll add pictures when I do this again. Don't know when that will be since I did such a winning job the first time.
thanks thurstonboise.
Last edited by queerpunk; 01-12-07 at 10:37 AM.
01-10-07 | 01:39 PM
#7
yeahh, becky
Joined: Apr 2006
Posts: 1,395
Likes: 0
From: DC
Bikes: 1990 Kotter Albuch, 2005 Empella Spaar Select Cross, 2007 Ridley Aedon
LoFarkas' disc hub cog thread was awesome. Throw that in there.
Possibly dig up a thread about the rotafix? (Start debate HERE)
Possibly dig up a thread about the rotafix? (Start debate HERE)
01-10-07 | 01:42 PM
#8
aka mattio
Joined: May 2005
Posts: 6,586
Likes: 58
Bikes: yes
Originally Posted by fix
LoFarkas' disc hub cog thread was awesome. Throw that in there.
Possibly dig up a thread about the rotafix? (Start debate HERE)
Possibly dig up a thread about the rotafix? (Start debate HERE)
01-10-07 | 01:57 PM
#9
yeahh, becky
Joined: Apr 2006
Posts: 1,395
Likes: 0
From: DC
Bikes: 1990 Kotter Albuch, 2005 Empella Spaar Select Cross, 2007 Ridley Aedon
I really like this thread idea. Nice work Carleton.
Luvthemas just posted a "Avoid dropping nipples into Deep-V's"
Luvthemas just posted a "Avoid dropping nipples into Deep-V's"
01-10-07 | 02:02 PM
#10
Thread Starter
Elitist
Joined: Jul 2005
Posts: 15,966
Likes: 94
From: Atlanta, GA
Thanks guys!
I've located a few on my own. Please include links so I don't have to go hunting around.
I've located a few on my own. Please include links so I don't have to go hunting around.
01-10-07 | 02:04 PM
#11

(Uploader)
Joined: Jun 2006
Posts: 253
Likes: 0
From: SF, CA
Bikes: KHS Pursuit, Pink Soma Cross
There are probably a few on the subject of dropping nipples into deep v style rims. Here is mine https://www.bikeforums.net/showthread.php?t=259808
01-10-07 | 02:13 PM
#12
Senior Member
Joined: Sep 2006
Posts: 3,744
Likes: 1
From: Van BC
Requests:
I would like to see a picture of slipjoint pliers or visegrips converted into a lockring wrench.
Also I want to know how to take apart SPD's.
Also I know this is getting a little OT for this forum but if anyone has made DIY leather mudflaps a tutorial would be cool.
I would like to see a picture of slipjoint pliers or visegrips converted into a lockring wrench.
Also I want to know how to take apart SPD's.
Also I know this is getting a little OT for this forum but if anyone has made DIY leather mudflaps a tutorial would be cool.
01-10-07 | 06:39 PM
#13
Senior Member
Joined: Jun 2005
Posts: 218
Likes: 0
This is the pair of pliers that I used to build my lockring tool. If you look at the tool the ends are tapered to just about the same size as the notches on the lockring. All you have to do is use a metal file to file the edges so everything is square and the tool will not slip out of the notches. You want the plier ends to have as much contact with the notches as possible. Once you actually buy the pliers you will see how easy it is. I have never had mine slip and when I first started using them I just used the stock pliers, without the filing of the jaws, and never had a problem.
01-10-07 | 10:13 PM
#14
Senior Member
Joined: Feb 2006
Posts: 676
Likes: 0
From: Boise, Idyho
Bikes: '04 fisher 29er, NYC Bikes CityFixed
Originally Posted by queerpunk
How to repack your pedals, especially if they are MKS Sylvans.
MKS Sylvans are simple, solid, popular pedals. The bearing quality is fine, but found that my left pedal's bearings went downhill when I lost the dustcap due to pedal strike during an alleycat. It's a simple equation: dirt sticks to grease, which turns bearings from smooth surfaces into, well, sandpaper. You can hear it, you can feel it, and it's not pretty.
To repack my pedal, I found myself using some less than ideal tools for the job. Here's the list:
1. degreaser in a little bowl.
2. rag.
3. 15mm wrench.
4. pliers on a multitool.
5. phil wood's waterproof grease.
6. Pencil.
7. 15-30 minutes of your time.
Step 1: For me, step one was to hit my pedal against the asphalt in New Haven hard enough to shatter the dustcap, but for you, it might be as simple as removing the dustcap, or maybe even just wondering where your dustcap went and why a new one costs $5, which is about a quarter of the price of a set of pedals, new.
Step 2.a: Take your pedal apart. I generally don't like pliers, because they chew up nuts more than an appropriate-sized wrench does. However, I didn't have the right sized wrench, nor did I have a small, nimble adjustable that would fit the locknut. I used the pliers to loosen and remove the locknut. Being firm, gentle, and not slipping will lower your chance of slipping and gouging the nut unrecognizable. Then, I used the 15mm wrench to loosen and remove the cone. I had to stick the wrench in along the rotational axis and just nibble at the cone with it, because the cone is pretty well covered by the pedal body. A low-profile socket wrench would be a far superior tool here.
Step 2.b: Using a rag to make sure that the ballbearings don't fall all over the place, remove the pedal body from the spindle. You'll notice that, like a hub, the cone of the 2 bearing assemblies is part of the pedal body, and the cup on the inside bearing is just part of the spindle, meaning that one locknut and cone is what holds both bearing assemblies together. Gather all the ballbearings (you might need the pencil to poke them out) and let them sit in the degreaser with the locknut and cone.
Step 3: Dip your rag in degreaser and clean off the bearing surfaces. Remove all grease. I like to put the rag on the pencil and clean out the inside of the pedal, too, just to remove any grease that fell in there if the ballbearings decided to take the long way out.
Step 4: After those bearings and nuts have degreased, wipe them down with a rag to make sure you get rid of any clingy bits of old, gross grease.
Step 5: Using that delightful Phil Waterproof Grease, layer grease on the bearing surface on the inside (crankside) bearing assembly of the pedal. Plop a lot in there, but don't just squirt it in to the pedal - place it all in the cup there. One by one, but the bearings back in; you might use the pencil to push them into the grease just a bit so that they don't get in the way when you put the pedal back on to the spindle. If I recall correctly, each side has 11 bearings. When you're done with this, slide the pedal body back on to the spindle.
Step 6: repeat step 6, but for the outside bearing assembly.
Step 7: apply just a bit of crease on to the spindle threads. Gently screw the cone down until it gets snug against the bearings. Do the same for the locknut.
Step 8: now here's the tricky part - tightening the locknut and the cone at the right spot, so that there's no play in the pedal, but the bearings are not too tight. I found it worked to tighten the cone down, and then moderately tighten the locknut, and then back the cone off against the locknut. Any time you're moving one of them against the other, you'll need to hold both, lest they spin together. It was awkward with pliers and sticking the wrench in, but it worked. Make sure that the locknut and the cone are tight against each other, so that the pedal bearing assemblies won't loosen up while you're riding.
Step 9: Optional. Order a new dustcap from where ever, like Trackstar which I know sells them on their website. Furrow your brow over the $5 price. Wait patiently. When it comes, eagerly open the package, and then screw it on, protecting your pedal re-pack job. Put the pedal back on and ride.
NOTES:
Even with exposed bearings, I haven't repacked since July, and my bearings are as smooth as I need them to be.
If you're dealing with old pedals with some rusted parts, WD-40 might be a good idea to break up some of the rust so that you can loosen those nuts and take apart the pedal. Be sure to thoroughly clean, degrease, and regrease though.
I don't know of a wrench that can grab the cone nut and leave room for something to grab the locknut. I'm interested in hearing how other people might do this.
I'll add pictures when I do this again. Don't know when that will be since I did such a winning job the first time.
1. The locknut is 12mm.
2. A thin walled 15mm socket is good for getting the cone out easily.
3. You are correct, 11 bearings per race.
Sylvans are nice but the outer bearing races were dry when I cracked them open. I guess it's pretty common. A grease gun with a needle tip will fit in if you don't want to take them apart.
Oh yeah, the campy peanut butter wrench is the correct tool for holding the cone while you tighten the locknut.
01-10-07 | 10:34 PM
#15

blah
Joined: Oct 2005
Posts: 5,573
Likes: 6
From: Oakland, CA
whipped this up today at work. (HAH. i made a punny)
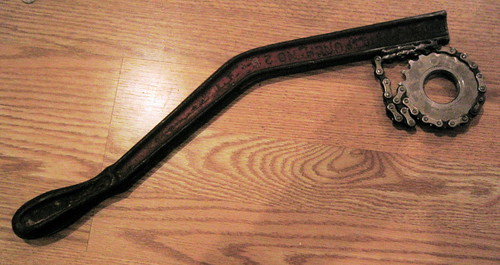
DIY CHAINWHIP! itll survive the imminent nuclear winter, no doubt! (i was really bored)
DIY CHAINWHIP! itll survive the imminent nuclear winter, no doubt! (i was really bored)
Last edited by onetwentyeight; 01-10-07 at 10:43 PM.
01-10-07 | 10:37 PM
#16
Bikes Not Scott
Joined: Jul 2006
Posts: 617
Likes: 0
From: Boston, Ma
that is sick, i'll give you $10
01-10-07 | 10:39 PM
#17
blah
Joined: Oct 2005
Posts: 5,573
Likes: 6
From: Oakland, CA
funny, thats about what my friend just offered me to make him one. i told him give me the materials and buy me a nice lunch and we'll call it even.
whee mig welders!
whee mig welders!
01-10-07 | 10:41 PM
#18
Banned.
Joined: Oct 2004
Posts: 4,416
Likes: 1
DIY chain whip: rotafix method
DIY lockring wrench: hammer and a screwdriver/cold chisel
DIY lockring wrench: hammer and a screwdriver/cold chisel
01-10-07 | 10:58 PM
#19
cxmagazine dot com

Joined: Jun 2003
Posts: 8,269
Likes: 1
From: WI
Bikes: Titus road, Fort CX
Originally Posted by SamHouston
Locked in a wheel shaped cage, that's harsh
rotafix:
https://204.73.203.34/fisso/eng/schpignone.htm
01-10-07 | 11:14 PM
#20

Dismount Run Remount etc.
Joined: Apr 2005
Posts: 2,235
Likes: 0
From: Some Latitude and Some Longitude
Bikes: A couple customs and some beaters.
I'm building three wheelsets in the next couple of weeks, so I'll make an appropriate thread with lots of pictures. I realize there are a couple books out there documenting in detail this process, but I think they're prohibitively expensive.
01-10-07 | 11:31 PM
#21

crotchety young dude
Joined: Jan 2005
Posts: 4,818
Likes: 0
From: SF, CA
Bikes: IRO Angus; Casati Gold Line; Redline 925; '72 Schwinn Olympic Paramount
I've used the Sheldon method of wheelbuilding for the (counts) 13 wheels I've built.
01-10-07 | 11:42 PM
#22
Dismount Run Remount etc.
Joined: Apr 2005
Posts: 2,235
Likes: 0
From: Some Latitude and Some Longitude
Bikes: A couple customs and some beaters.
Originally Posted by el twe
I've used the Sheldon method of wheelbuilding for the (counts) 13 wheels I've built.
01-10-07 | 11:55 PM
#23
Senior Member
Joined: Apr 2006
Posts: 326
Likes: 0
From: Boston, MA
Bikes: trek 6700 mtb, raleigh rush hour
Originally Posted by scotthorrigan
that is sick, i'll give you $10
01-11-07 | 12:45 AM
#24

Sheldon Brown's posse
Joined: Jul 2006
Posts: 1,046
Likes: 0
From: Oz-tray-lee-ah
Bikes: BMC SL01, XtC, Rhythm GX and a frankenstein avalanche 2.0
Originally Posted by fix
LoFarkas' disc hub cog thread was awesome. Throw that in there.

It helps to use a piece of PVC pipe (or anything round) the same diameter as the inside of the splines, so you can slot the rotor and cog on to mark the hole positions. Make sure to use a good drill bit (I broke a couple, they were dead cheap crappy ones) otherwise you'll be there forever. I found it best to drill one hole, bolt it to the hub, then drill the other 5. Dead easy to do (and it was cheaper than buying a new hub).
It is easier with a loose ball hub, because the axles are easier to get. Otherwise, get some machined for cartridge, but the cost of that defeats the purpose.
01-11-07 | 12:57 AM
#25
Thread Starter
Elitist
Joined: Jul 2005
Posts: 15,966
Likes: 94
From: Atlanta, GA
Keep 'em coming!