


What have you been wrenching on lately?
 10-19-24, 11:51 AM
#8676

Edumacator
Join Date: Jan 2018
Location: Goose Creek, SC
Posts: 7,683
Bikes: '87 Crestdale, '87 Basso Gap, '92 Rossin Performance EL-OS, 1990 VanTuyl, 1980s Losa, 1985 Trek 670, 1982 AD SLE, 1987 PX10, etc...
Liked 3,678 Times
in
2,303 Posts
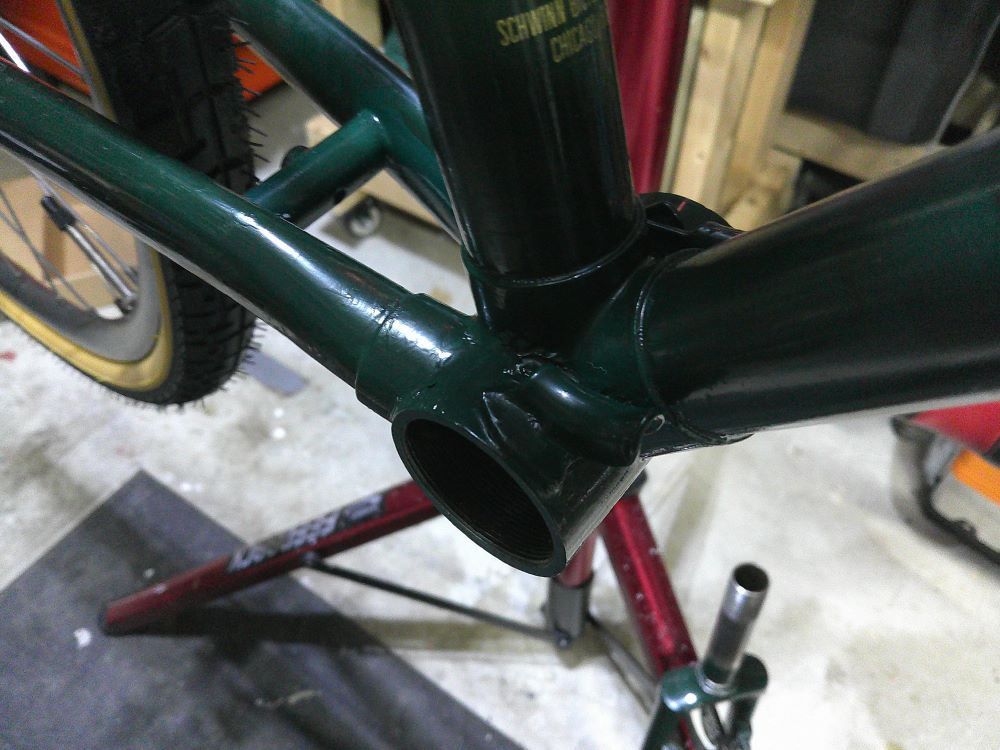
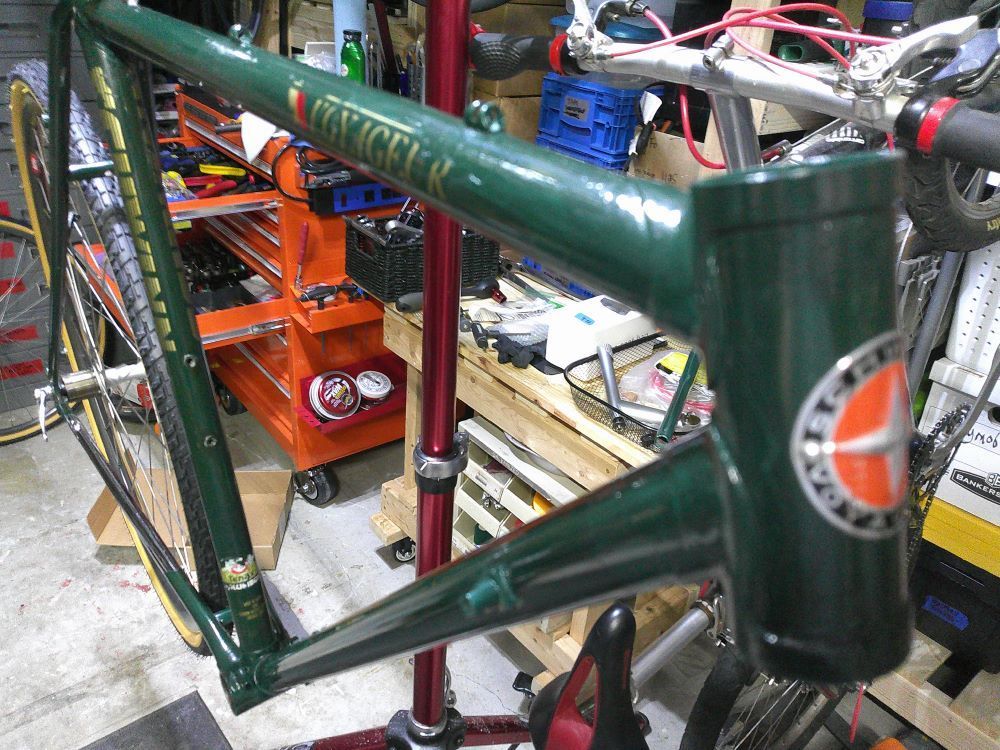
Trek Elance. Hopefully finding a new home. And my decent match of British Racing Green for the Voyager project for my friend.

__________________
1987 Crest Cannondale, 1987 Basso Gap, 1992 Rossin Performance EL, 1990ish Van Tuyl, 1985 Trek 670, 2003 Pinarello Surprise, 1990ish MBK Atlantique, 1987 Peugeot Competition, 1987 Nishiki Tri-A, 1981 Faggin, 1996 Cannondale M500, 1984 Mercian, 1982 AD SuperLeicht, 1985 Massi (model unknown), 1988 Daccordi Griffe , 1989 Fauxsin MTB, 1981 Ciocc Mockba, 1992 Bianchi Giro, 1977 Colnago Super, 1971 Raleigh International, 1998 Corratec Ap & Dun, 1991 Peugeot Slimestone
1987 Crest Cannondale, 1987 Basso Gap, 1992 Rossin Performance EL, 1990ish Van Tuyl, 1985 Trek 670, 2003 Pinarello Surprise, 1990ish MBK Atlantique, 1987 Peugeot Competition, 1987 Nishiki Tri-A, 1981 Faggin, 1996 Cannondale M500, 1984 Mercian, 1982 AD SuperLeicht, 1985 Massi (model unknown), 1988 Daccordi Griffe , 1989 Fauxsin MTB, 1981 Ciocc Mockba, 1992 Bianchi Giro, 1977 Colnago Super, 1971 Raleigh International, 1998 Corratec Ap & Dun, 1991 Peugeot Slimestone

Likes For jdawginsc:
10-19-24, 01:16 PM
#8677
Uncle John�s Bianchi
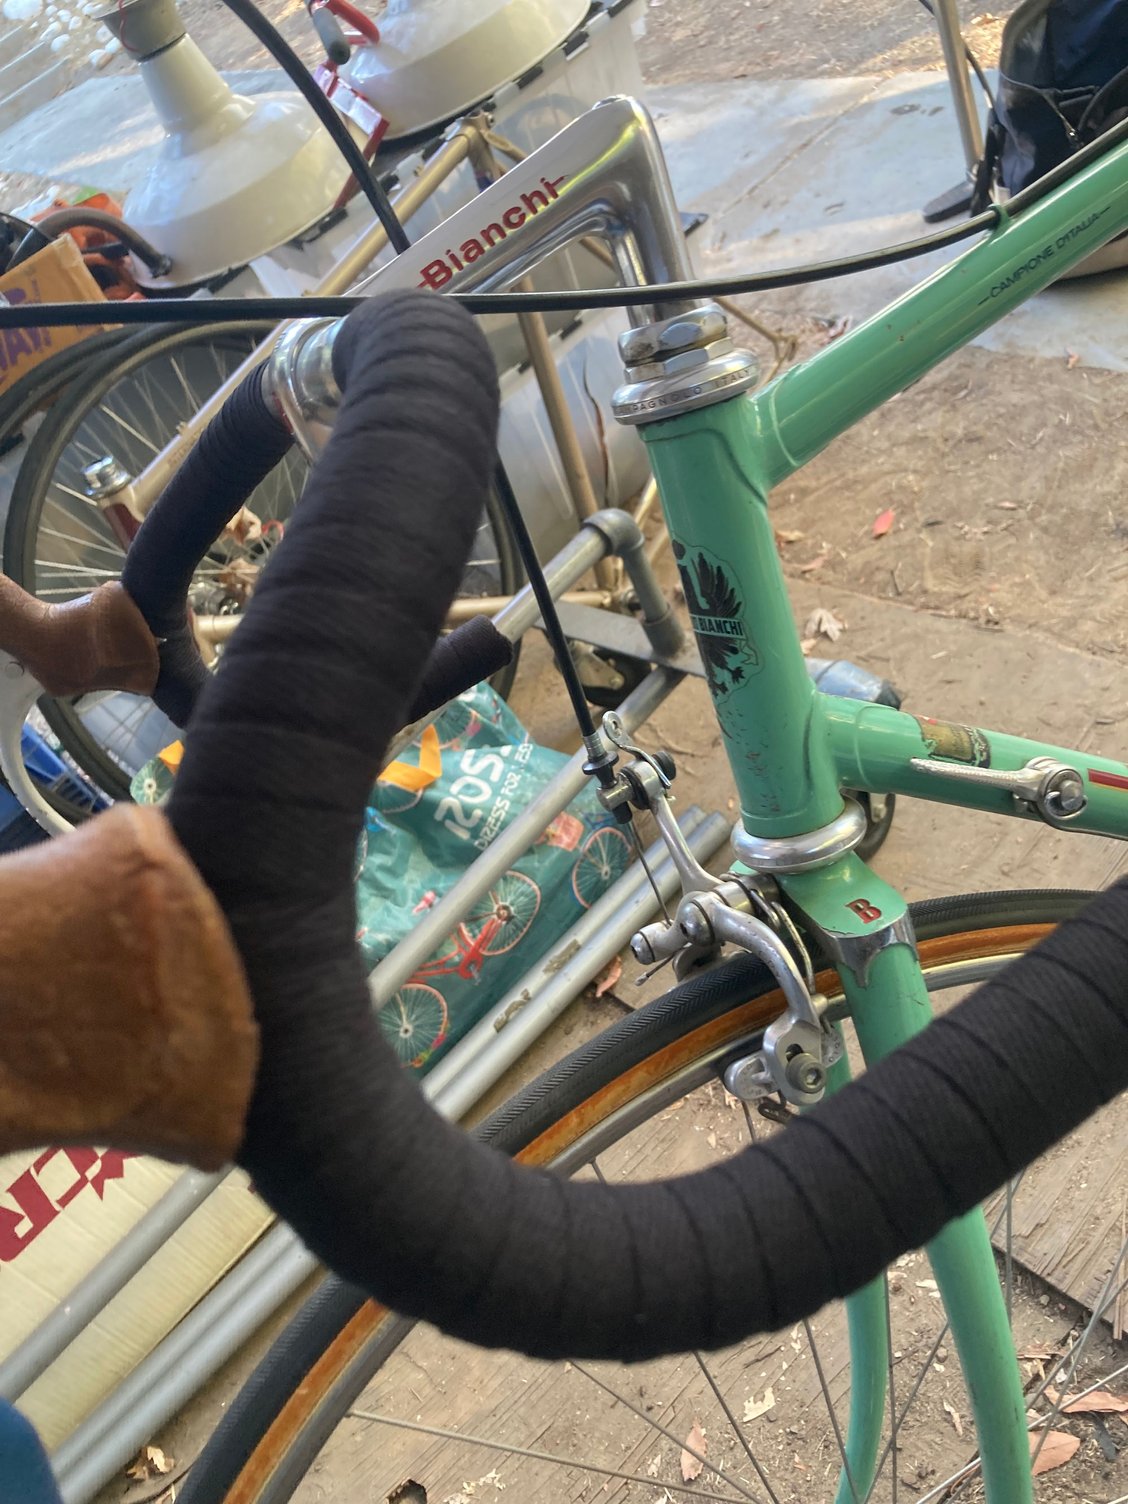
I miss my uncle John very much. So when I had to stay the extra day at my Pop�s house I suggested that we finish up Uncle John�s Bianchi. It�s an early 80s Bianchi Campione D�italia with mostly Campy, modolo speedy brakes and an Ofmega crackset. Unfortunately, it�s a 58cm, which is too big for both my pop and I. Otherwise I�d be riding the wheels off it. There is a long story associated with the bike but for this post I�ll keep it short as I can.
My uncle really liked the Cinelli hidden bolt stem and decided to use a leather wrap to give this common production bicycle, a unique touch. Unfortunately, after a couple rides, he didn�t like the leather wrap, but never got around to taking it off. Since it seems we�ve both missed him a lot lately. My pop and I figured we�d finish up his bicycle. Every little piece we have to remember him by is worth cherishing. I can�t wait to walk in to visit my pop and see it hung up for everyone to enjoy.
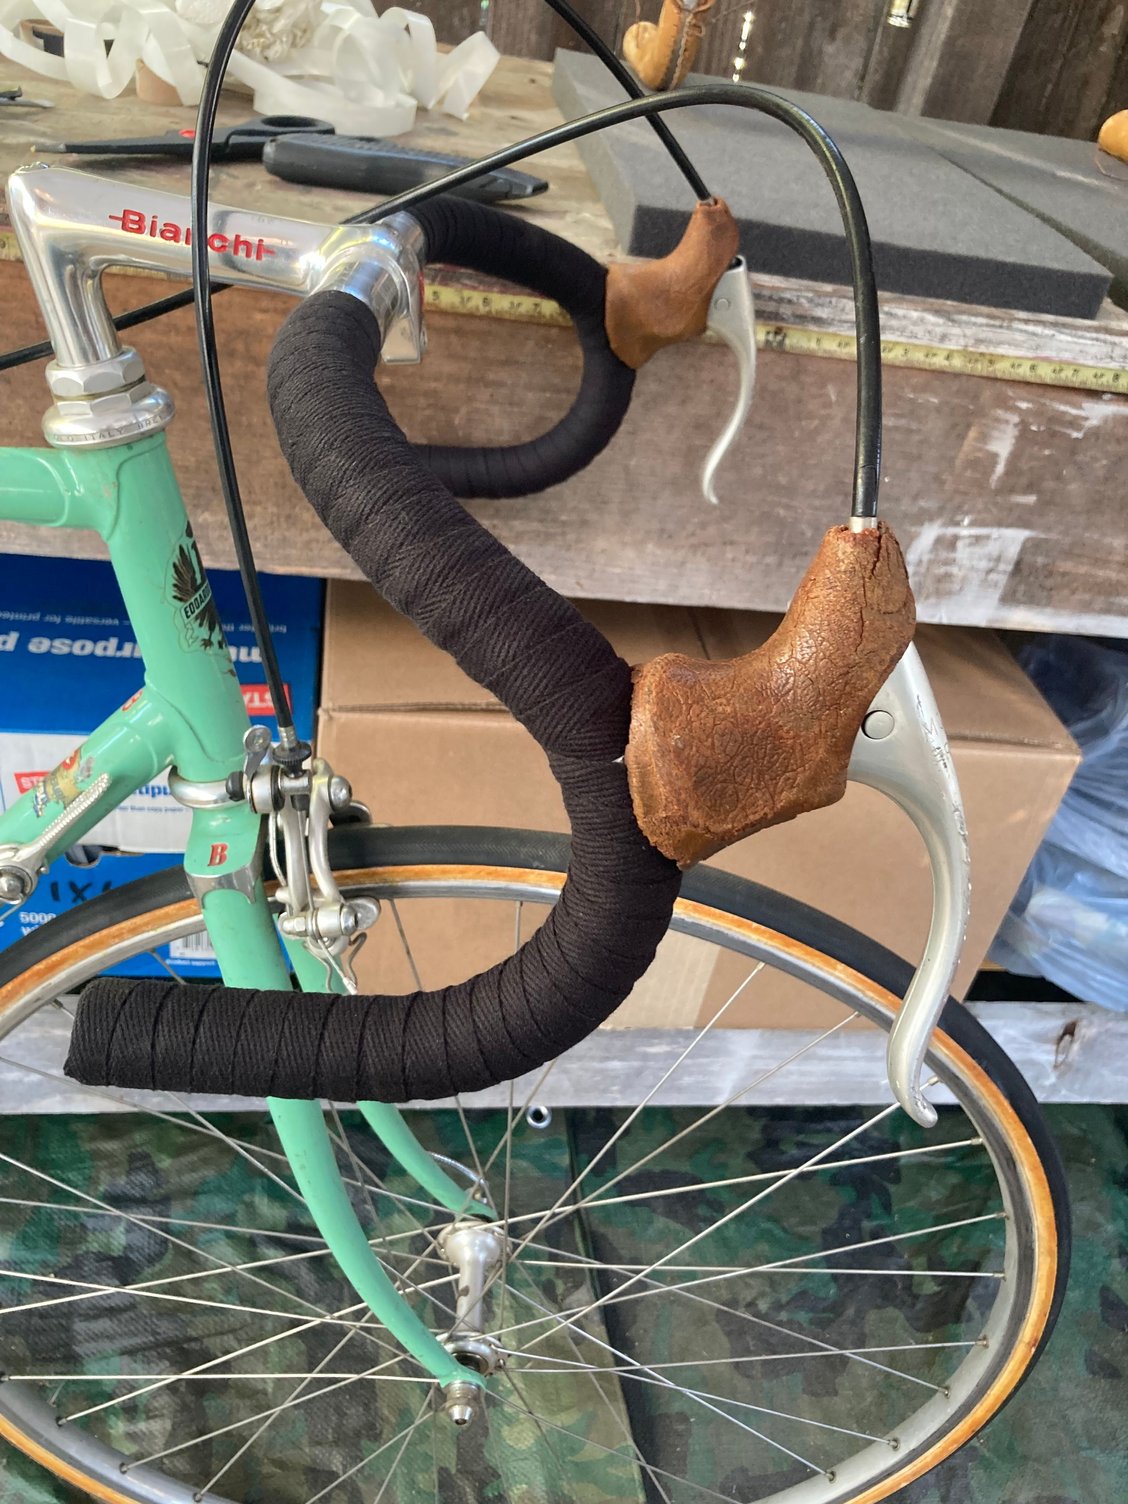
For my first cloth tape job, it was OK. There is a small piece of the brake lever clamp that is visible. I will redo it when it�s raining and I�m stuck inside. For now it�s fine. I have certainly seen worse. I wish that I hadn�t started on the drive side. Very silly of me! After having one side to get in the groove I got the other side just about right.
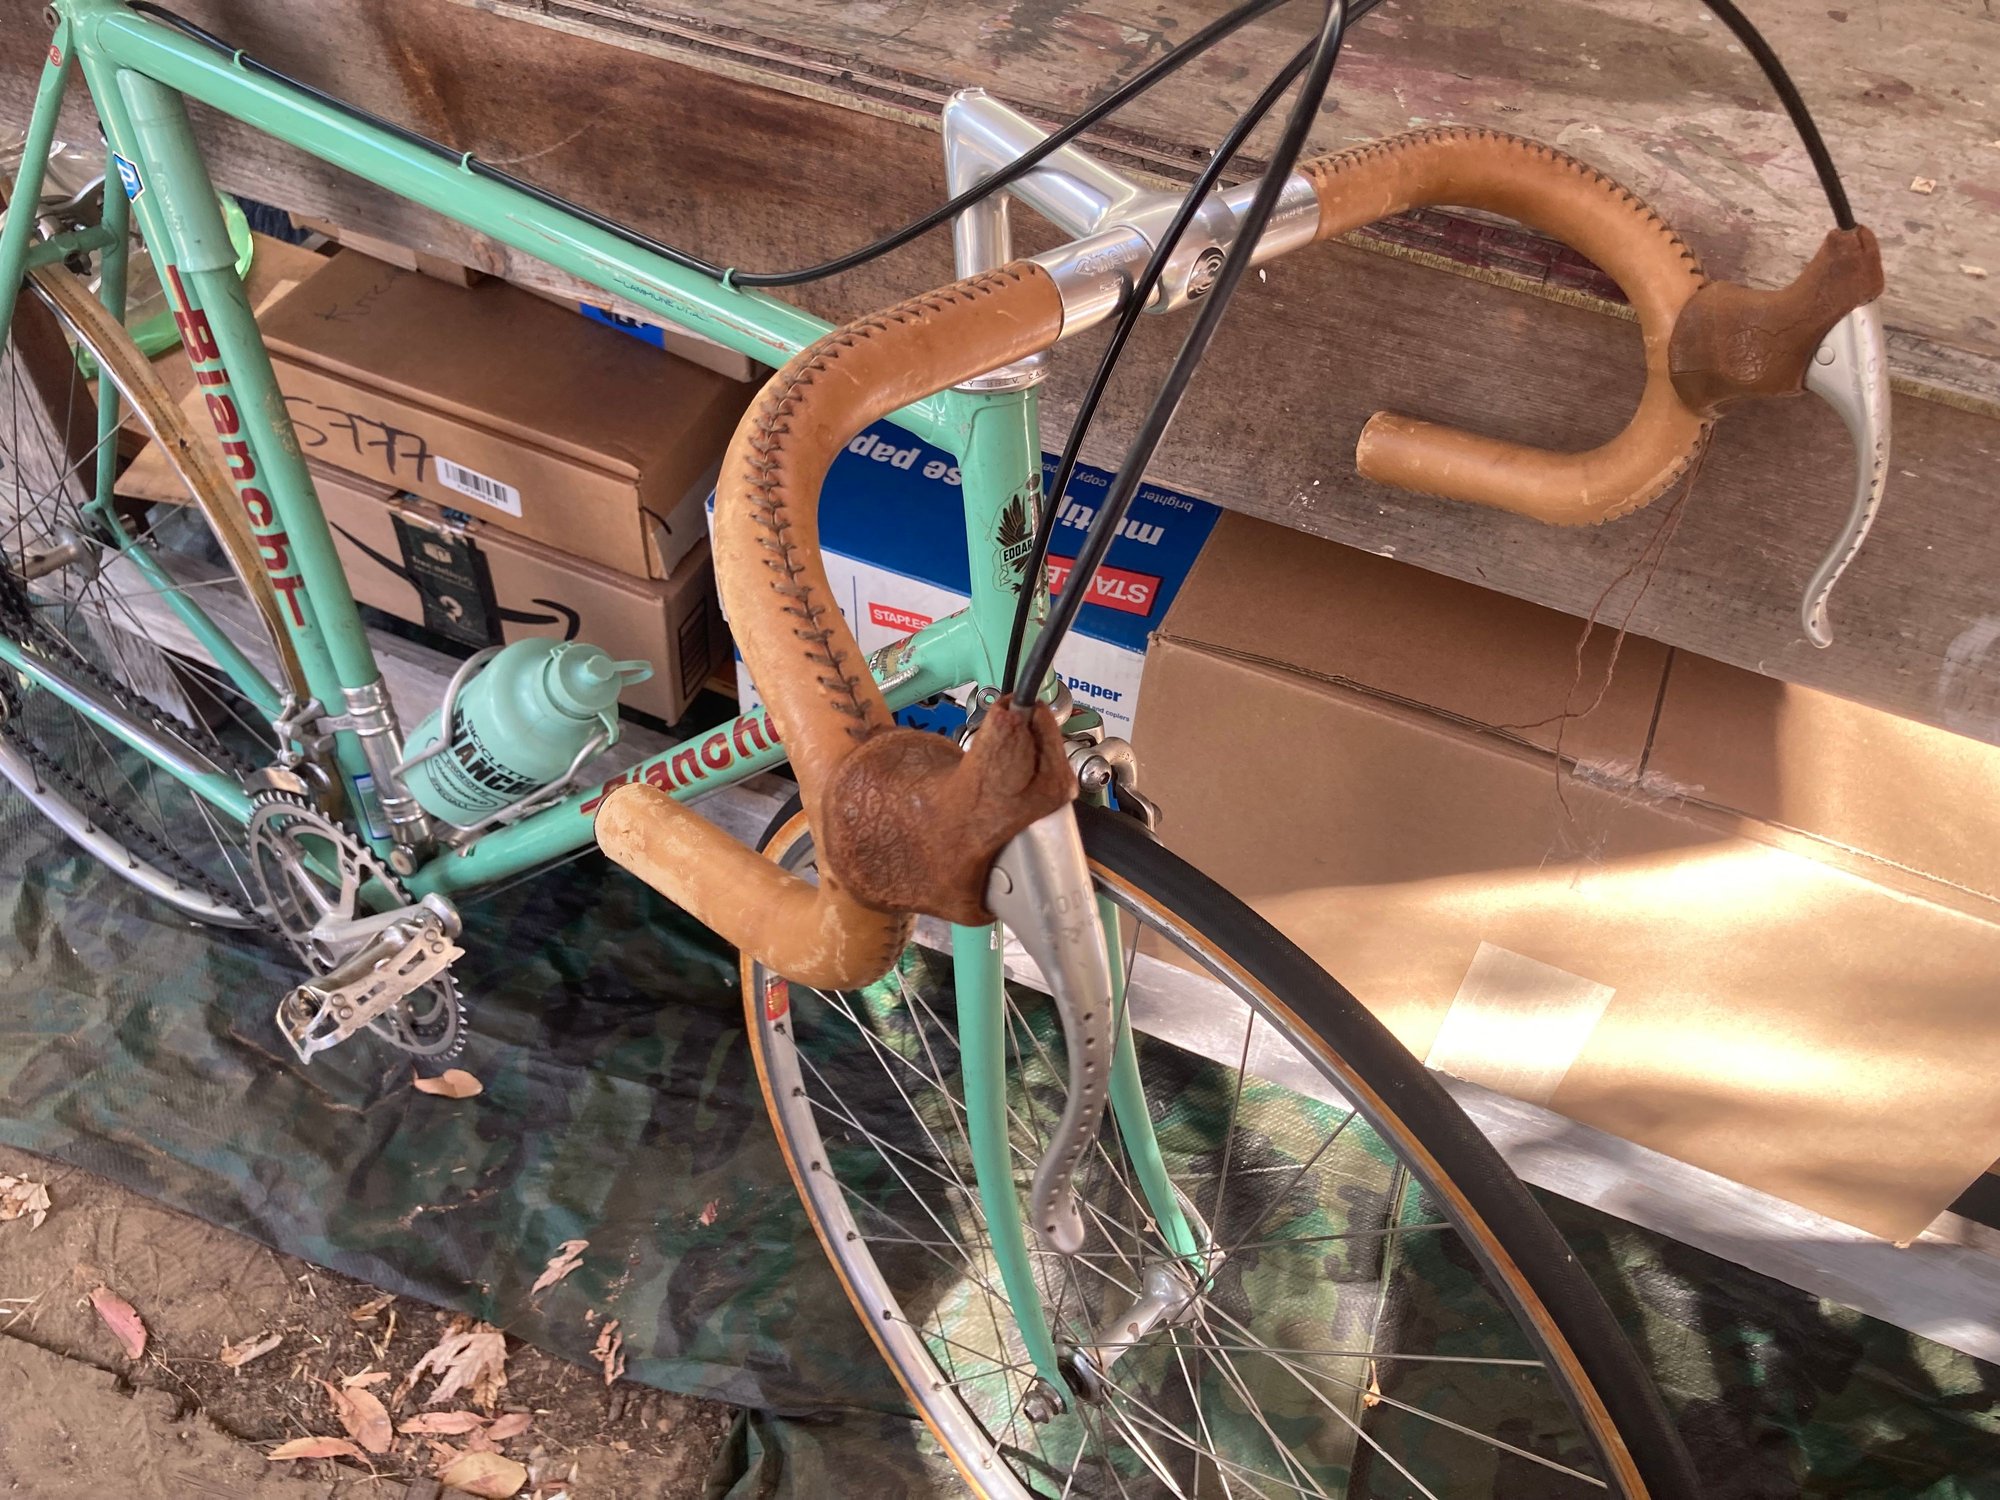
My uncle really liked the Cinelli hidden bolt stem and decided to use a leather wrap to give this common production bicycle, a unique touch. Unfortunately, after a couple rides, he didn�t like the leather wrap, but never got around to taking it off. Since it seems we�ve both missed him a lot lately. My pop and I figured we�d finish up his bicycle. Every little piece we have to remember him by is worth cherishing. I can�t wait to walk in to visit my pop and see it hung up for everyone to enjoy.
For my first cloth tape job, it was OK. There is a small piece of the brake lever clamp that is visible. I will redo it when it�s raining and I�m stuck inside. For now it�s fine. I have certainly seen worse. I wish that I hadn�t started on the drive side. Very silly of me! After having one side to get in the groove I got the other side just about right.
Likes For ThomasOmalley:
10-19-24, 03:21 PM
#8678
Senior Member

just a quick bit of work on the venerable Bullseye derailleur pulleys.
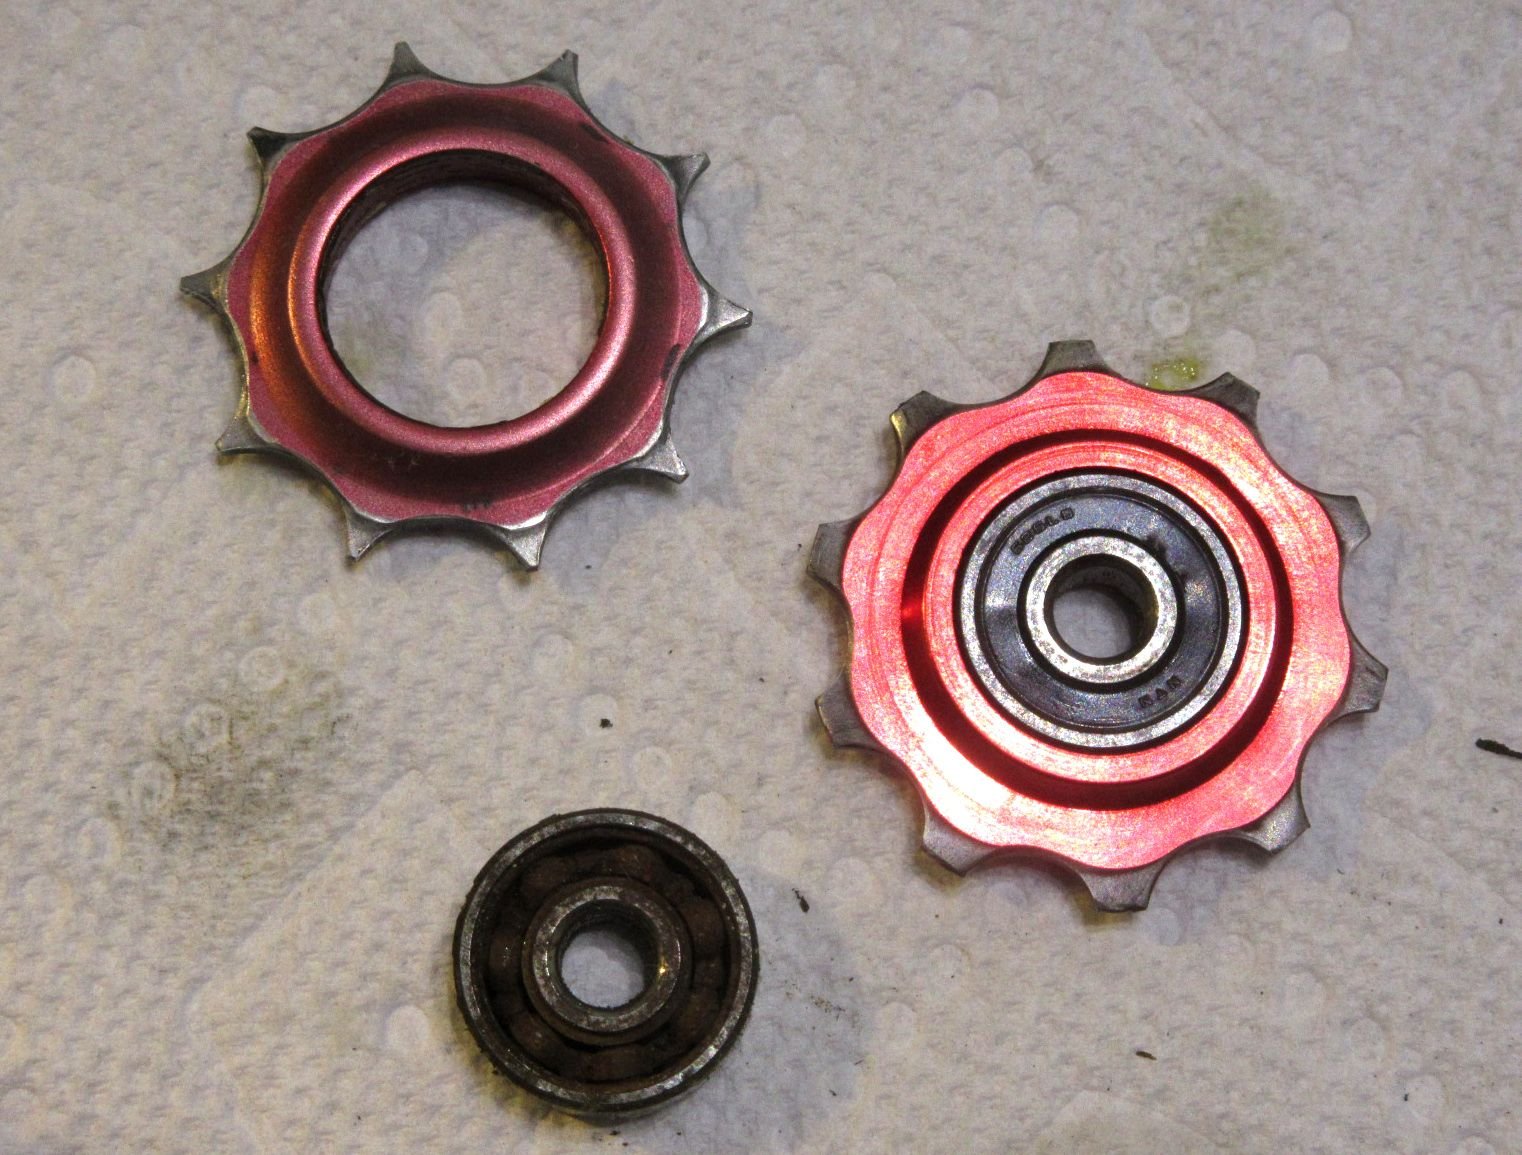
A while ago, I had a Bullseye pulley where the lube was absolutely gone. When the seals were removed, it was just a rusty nasty mess. It hadn't seen a ton of miles, but they were some wet and nasty miles. On the right side of the image below shows the bad bearing pushed out of the lightly worn pulley.
On left is the well worn pulley that will donate its bearing...

The good bearing is marked as 626LB, and made by NTN (a very well respected bearing manufacturer).
The 626LB marking:
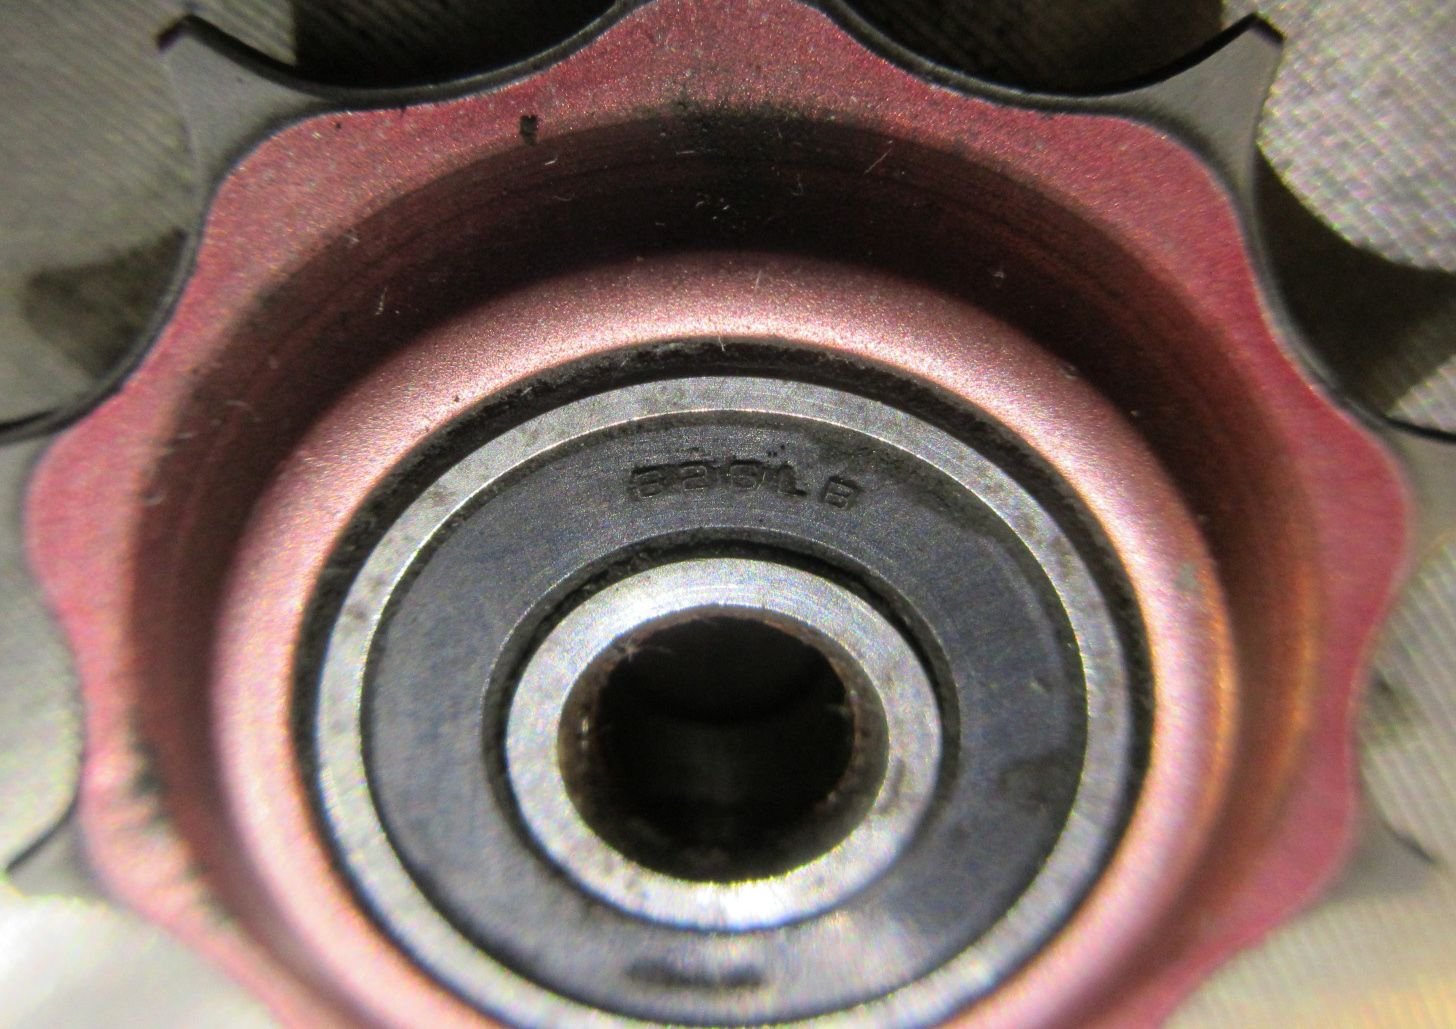
the NTN marking...
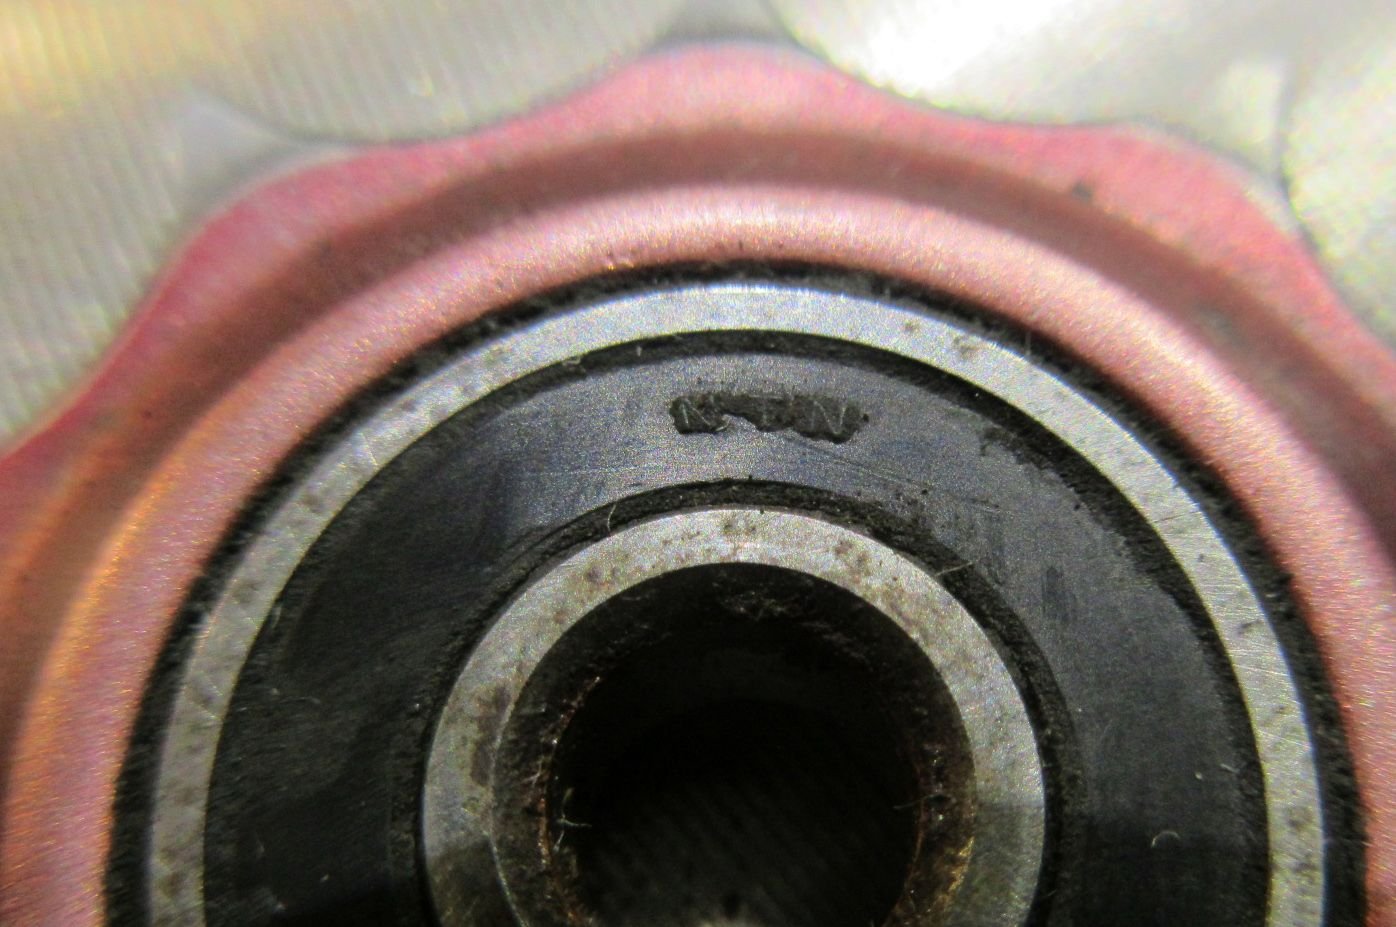
The transplantation was a success...
I was just cleaning the chain on another bike and found that the Bullseye pulleys were not turning freely. I removed the seals on one, and the grease was missing and/or dried up. The seals were marked with 626LB and NTN, so maybe those aren't perfect. The other one was marked 626D and NMB Singapore. I had some Tacx T4000 pulleys in the spare parts box to replace them with, but did order some 626-2RS bearing to replace the bad bearings. The -2RS suffix means "two rubber seals", which is what is obviously needed for this application. The new bearings were ordered from Bearings Direct for about $4 each, so hopefully they aren't too bad?? McMaster Carr had some too, but wanted about $19 each.
I also ordered some Velo Orange Gran Cru 10 tooth pulleys, just to try them out and to have some decent spares handy. I'm using these on SunTour Cyclone GT derailleurs, which are a bit unique in using a 6mm diameter bolt for the pulleys.
Steve in Peoria
A while ago, I had a Bullseye pulley where the lube was absolutely gone. When the seals were removed, it was just a rusty nasty mess. It hadn't seen a ton of miles, but they were some wet and nasty miles. On the right side of the image below shows the bad bearing pushed out of the lightly worn pulley.
On left is the well worn pulley that will donate its bearing...
The good bearing is marked as 626LB, and made by NTN (a very well respected bearing manufacturer).
The 626LB marking:
the NTN marking...
The transplantation was a success...
I was just cleaning the chain on another bike and found that the Bullseye pulleys were not turning freely. I removed the seals on one, and the grease was missing and/or dried up. The seals were marked with 626LB and NTN, so maybe those aren't perfect. The other one was marked 626D and NMB Singapore. I had some Tacx T4000 pulleys in the spare parts box to replace them with, but did order some 626-2RS bearing to replace the bad bearings. The -2RS suffix means "two rubber seals", which is what is obviously needed for this application. The new bearings were ordered from Bearings Direct for about $4 each, so hopefully they aren't too bad?? McMaster Carr had some too, but wanted about $19 each.
I also ordered some Velo Orange Gran Cru 10 tooth pulleys, just to try them out and to have some decent spares handy. I'm using these on SunTour Cyclone GT derailleurs, which are a bit unique in using a 6mm diameter bolt for the pulleys.
Steve in Peoria
 10-19-24, 04:15 PM
#8679
Senior Member
Join Date: May 2019
Location: Bloomington, IN
Posts: 3,222
Bikes: Paramount, Faggin, Ochsner, Ciocc, Basso
Liked 2,221 Times
in
1,293 Posts
Today I got to do some needed touch up on the Basso after a weld to the right side drop out. It has been on the shelf for close to seven months while I take care of other duties. Both chain stays were pretty damaged as far as paint goes so the both got a touch up along with the welded areas. Smiles, MH
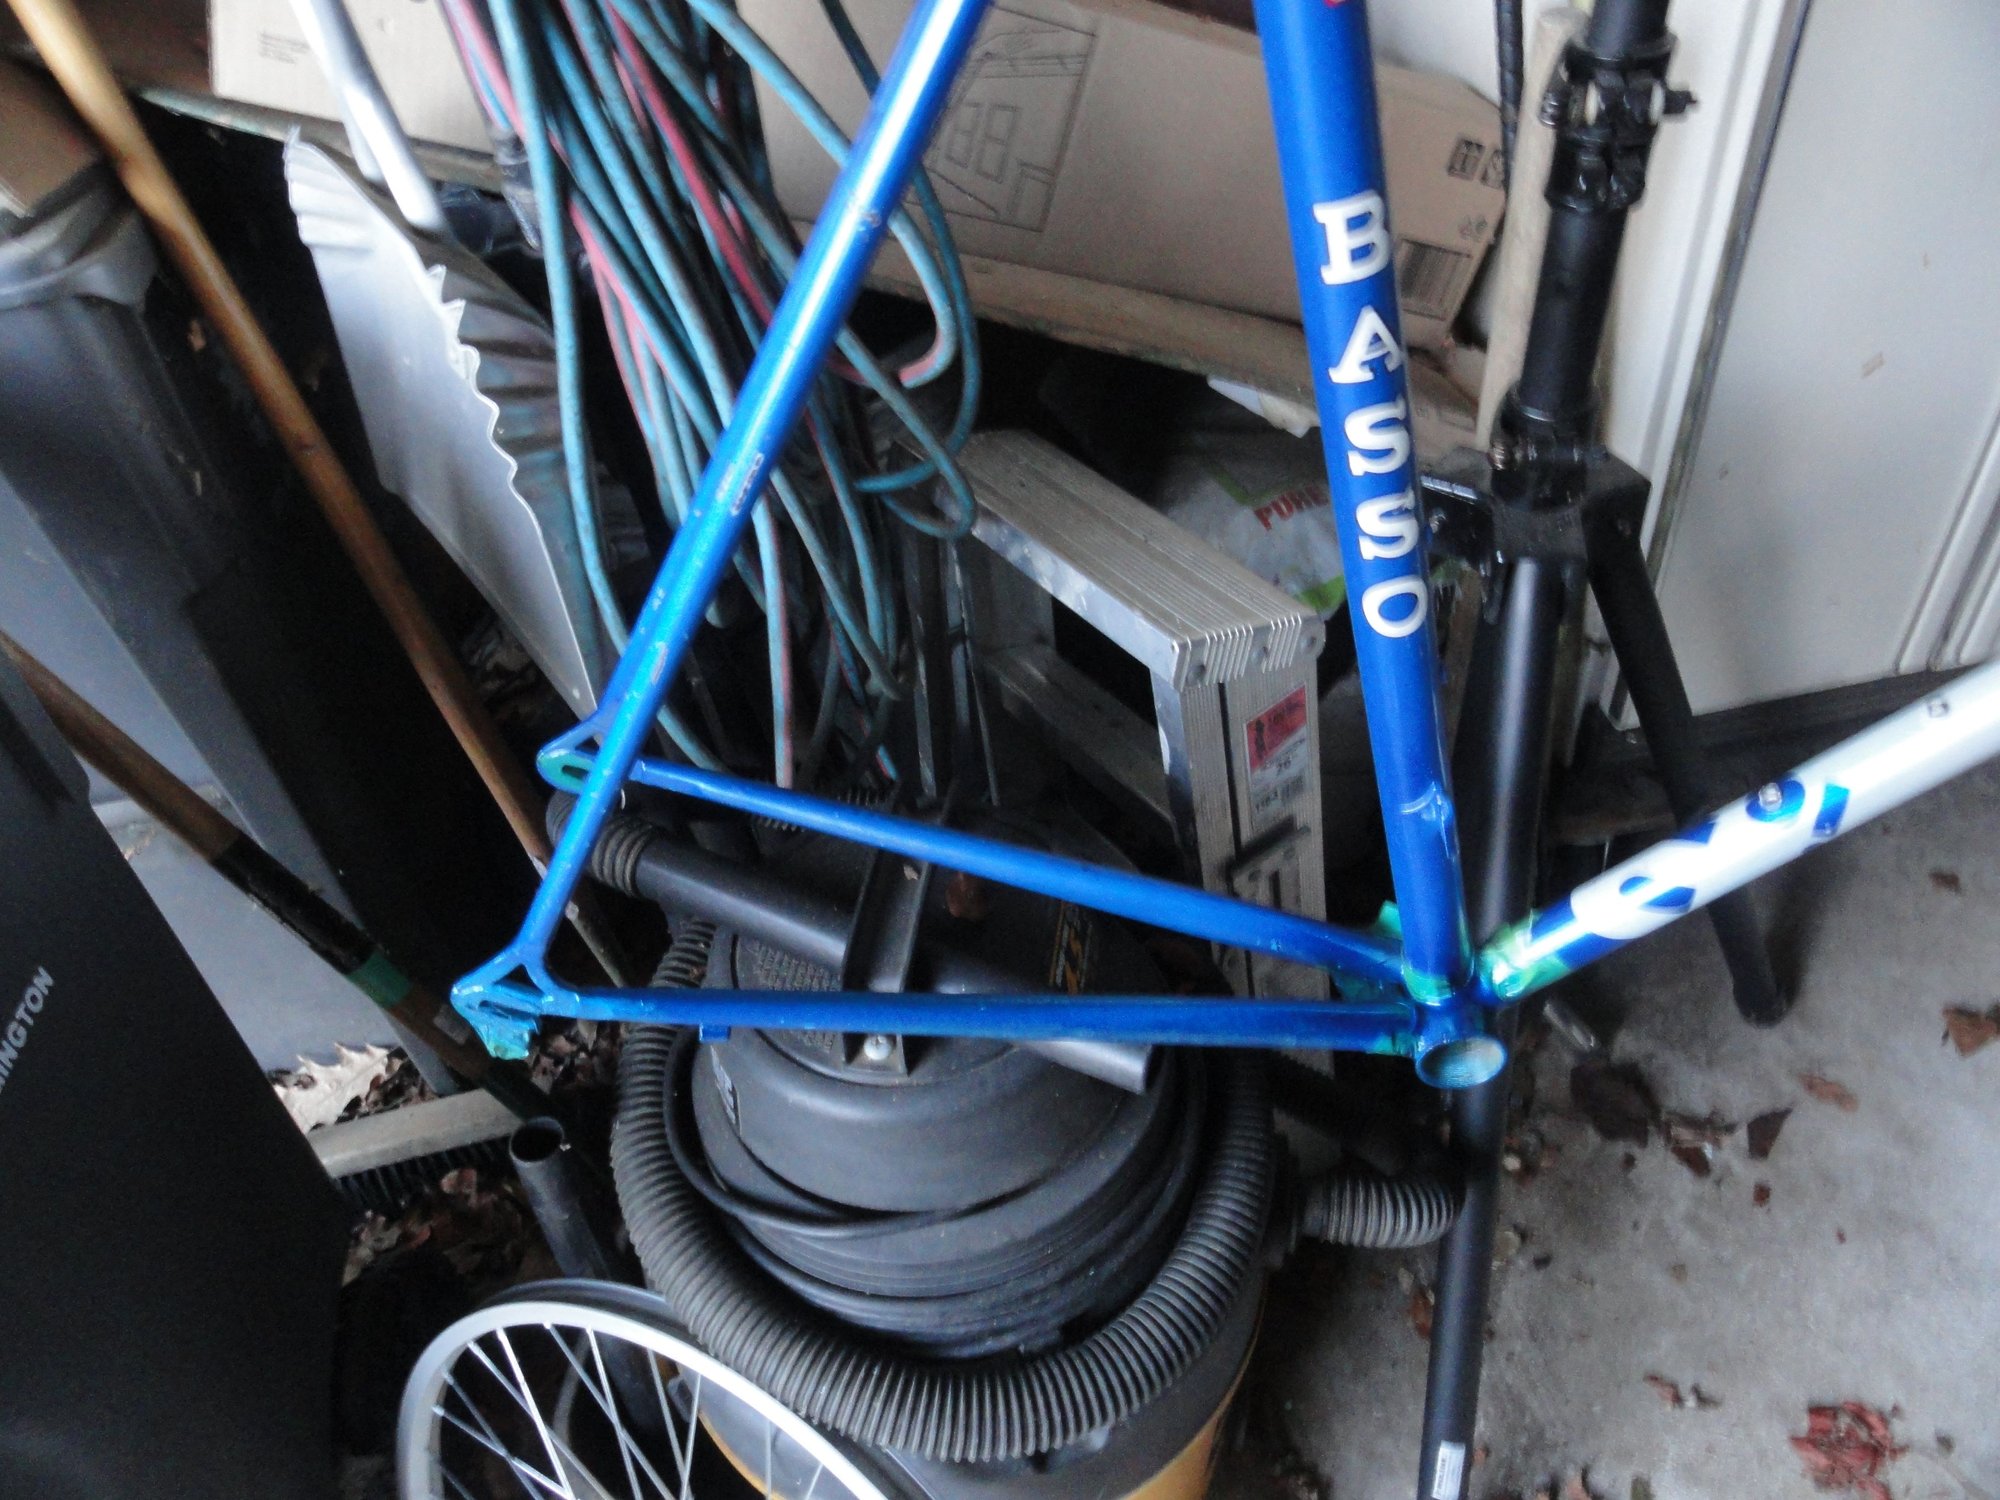
I probably got the tint a little too dark, but it is going to keep rust from forming, and will be blue as I speed past any observer. You know speeding horse concept.

I think the drop out will look just fine after the welding and repainting.
I probably got the tint a little too dark, but it is going to keep rust from forming, and will be blue as I speed past any observer. You know speeding horse concept.
I think the drop out will look just fine after the welding and repainting.
Likes For Mad Honk:
10-19-24, 06:34 PM
#8680
Deraill this!
Join Date: Jun 2019
Location: CMH is close
Posts: 847
Bikes: 18 Cdale Quick 1, 16 Cdale Synapse 105, 88 Cdale M500, and a few others
Liked 700 Times
in
364 Posts
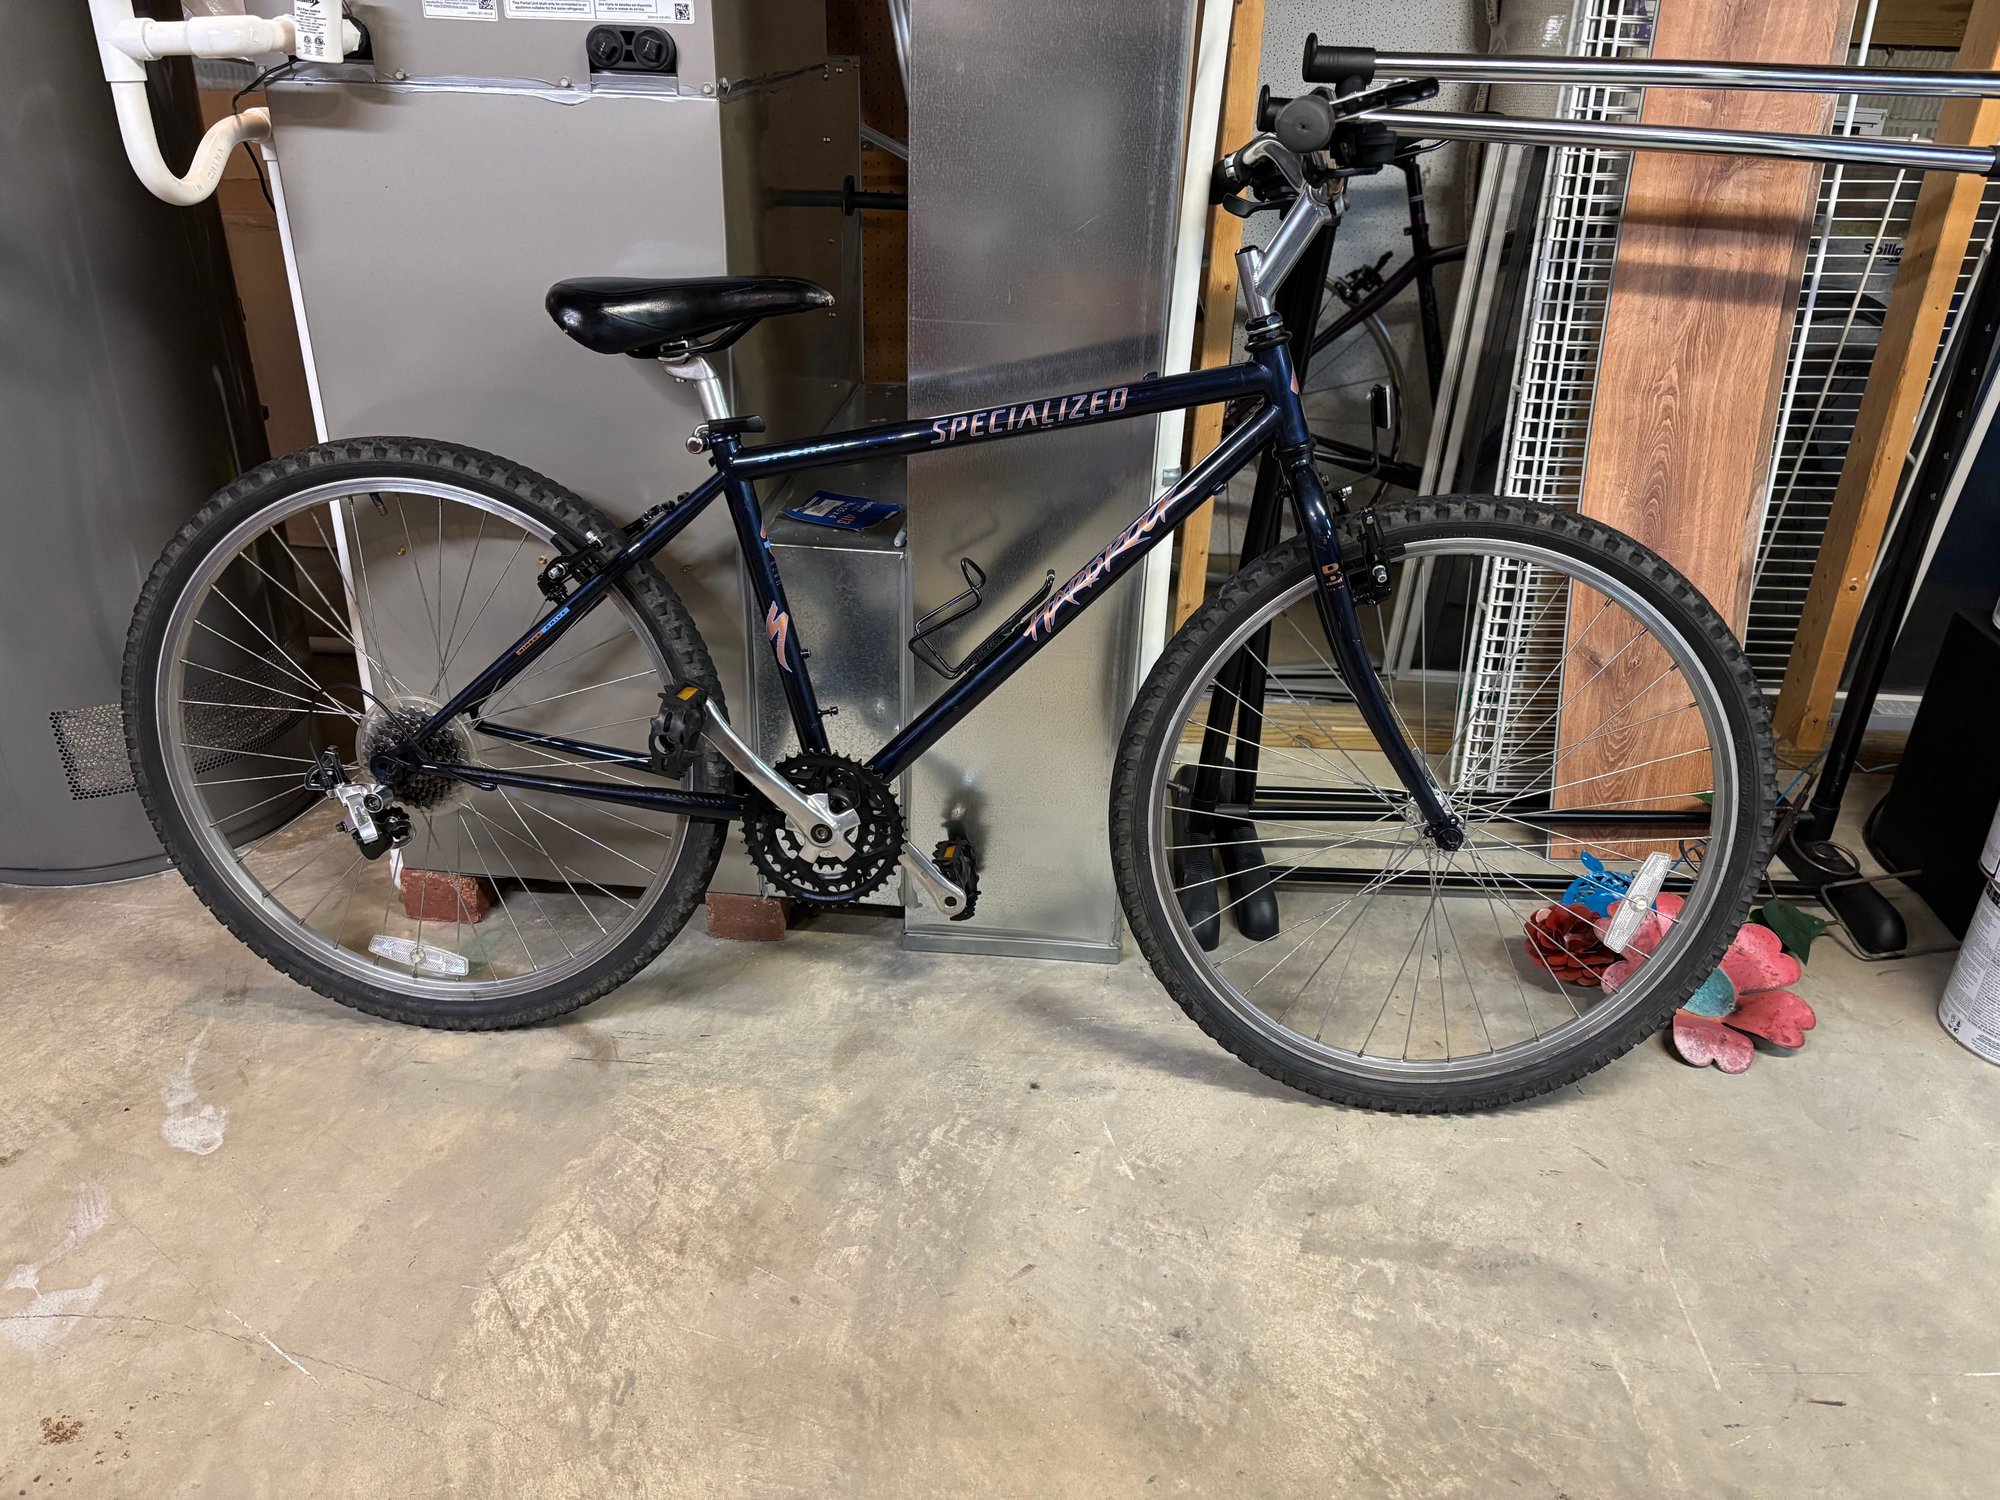
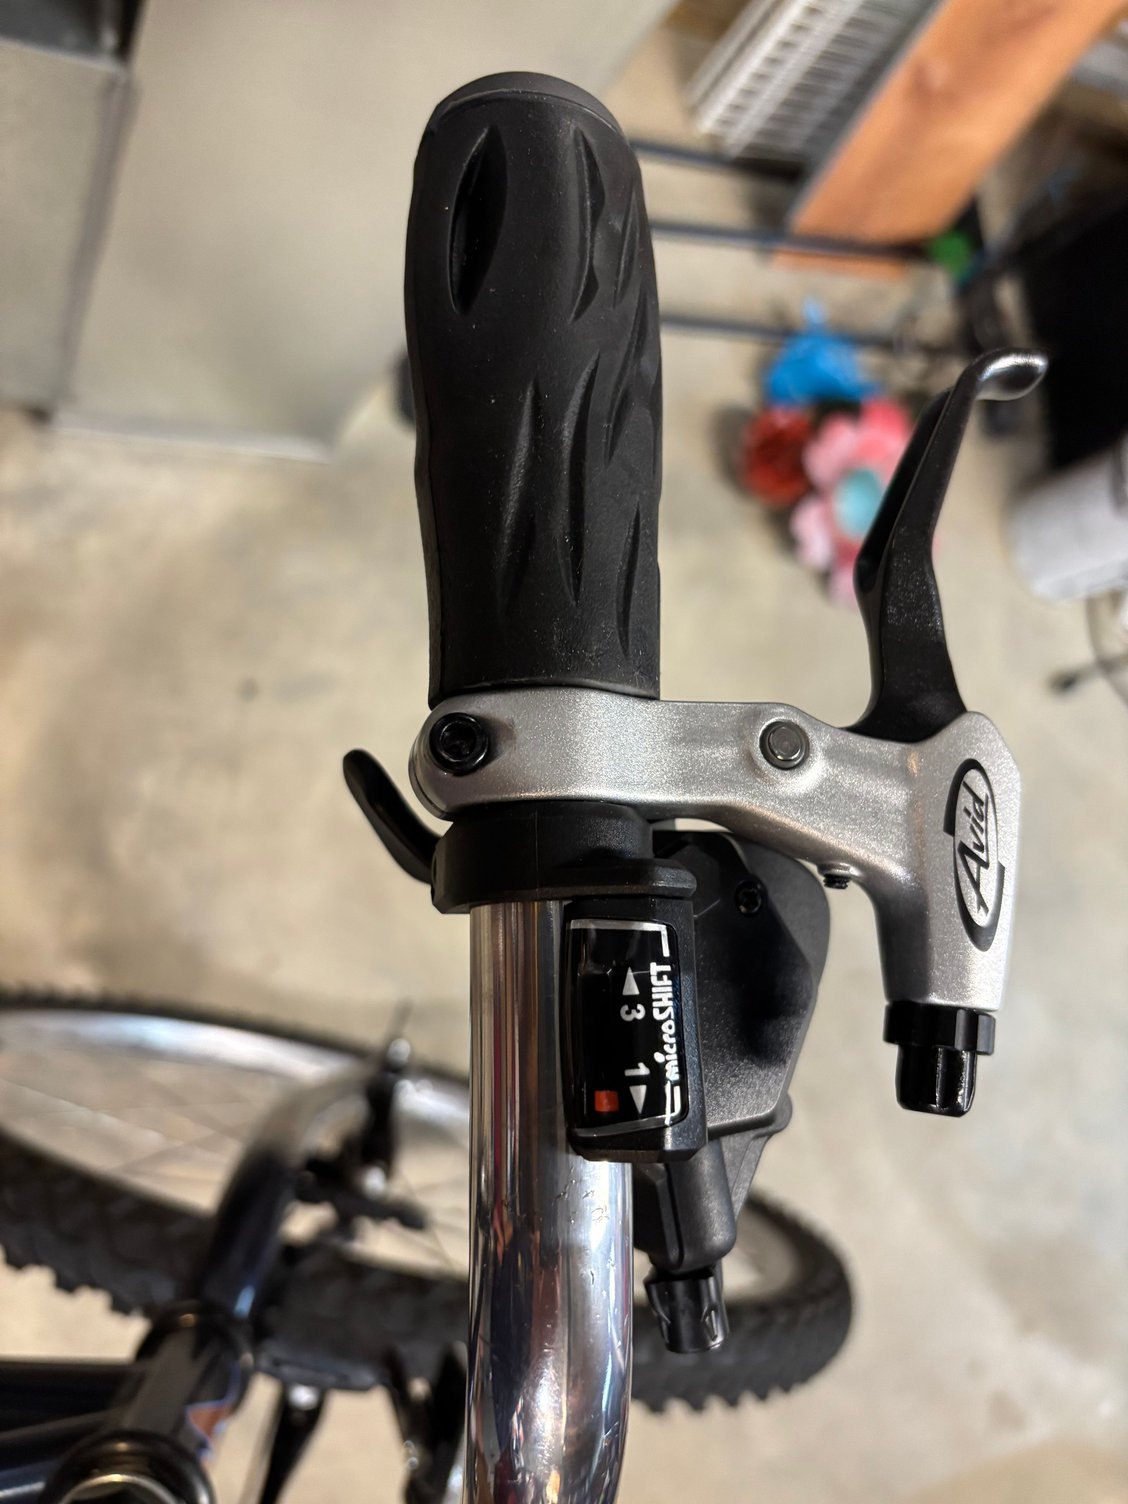
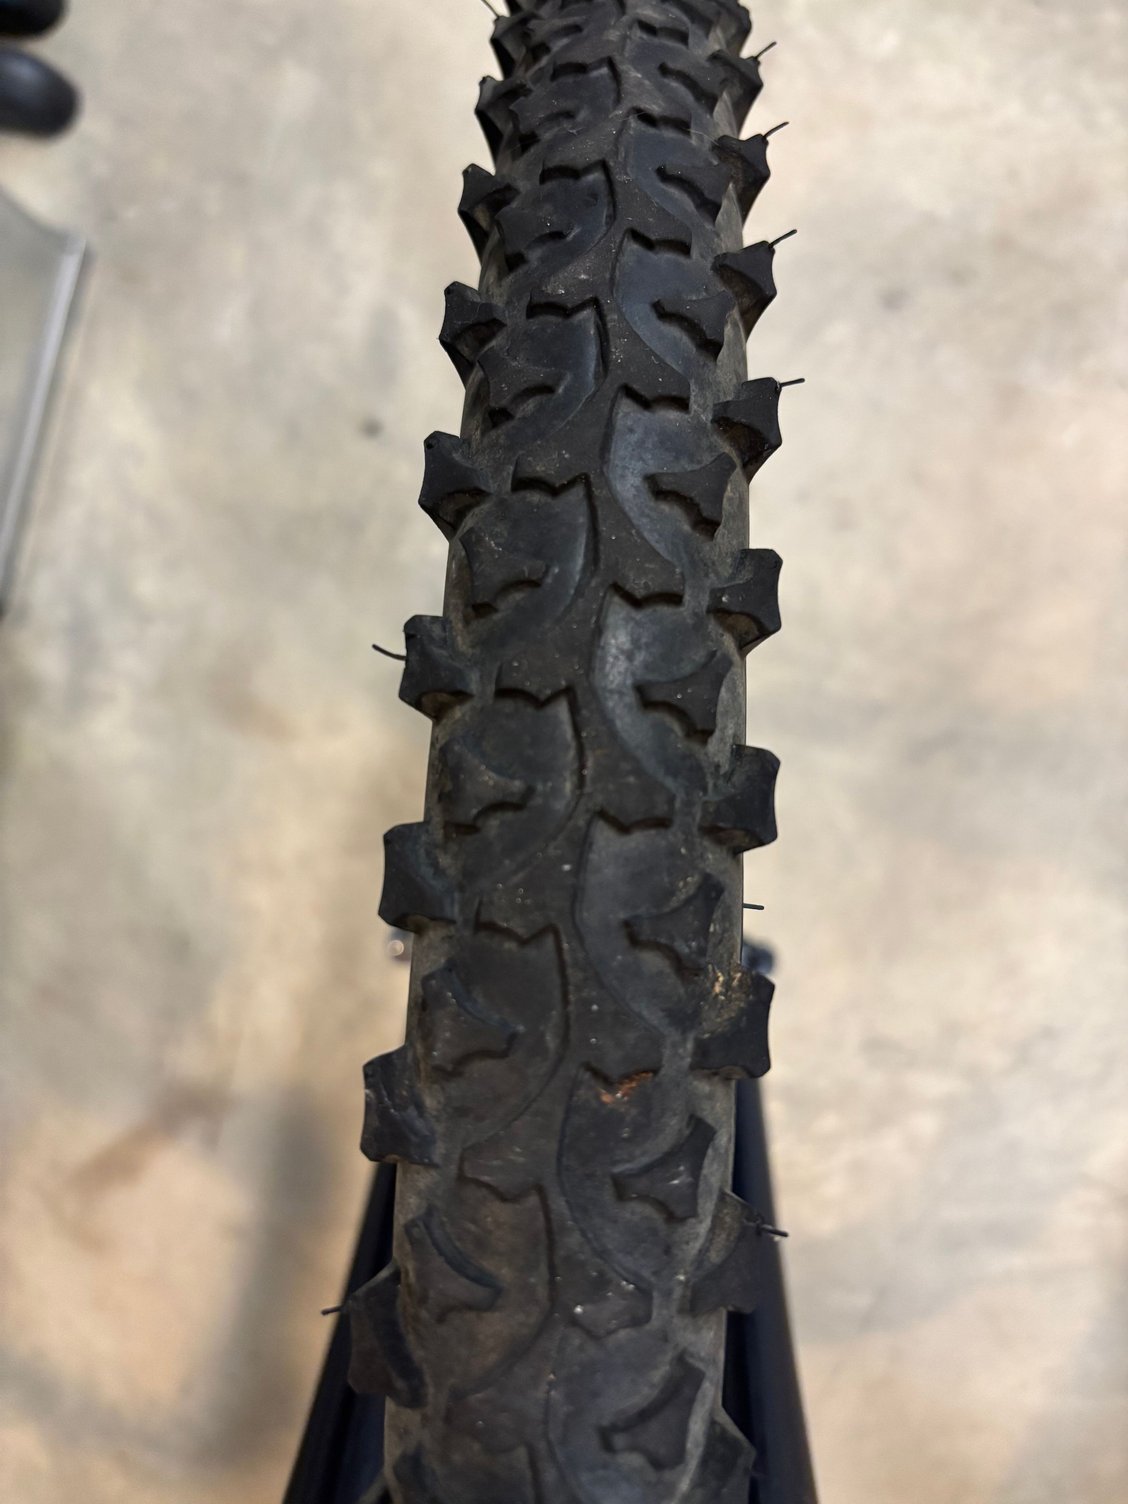
Got to the Hardrock Sport today. Polished it, added vbrakes and Avid levers, microshift 3x7 shifters, a nice older Acera derailleur, swapped a more size appropriate saddle, more upright bars, and grips. Tires are soft and have life left in them so they�ll stay for now. Looks pretty nice:

Last edited by Trav1s; 10-19-24 at 06:50 PM.
10-20-24, 09:06 PM
#8681
Newbie
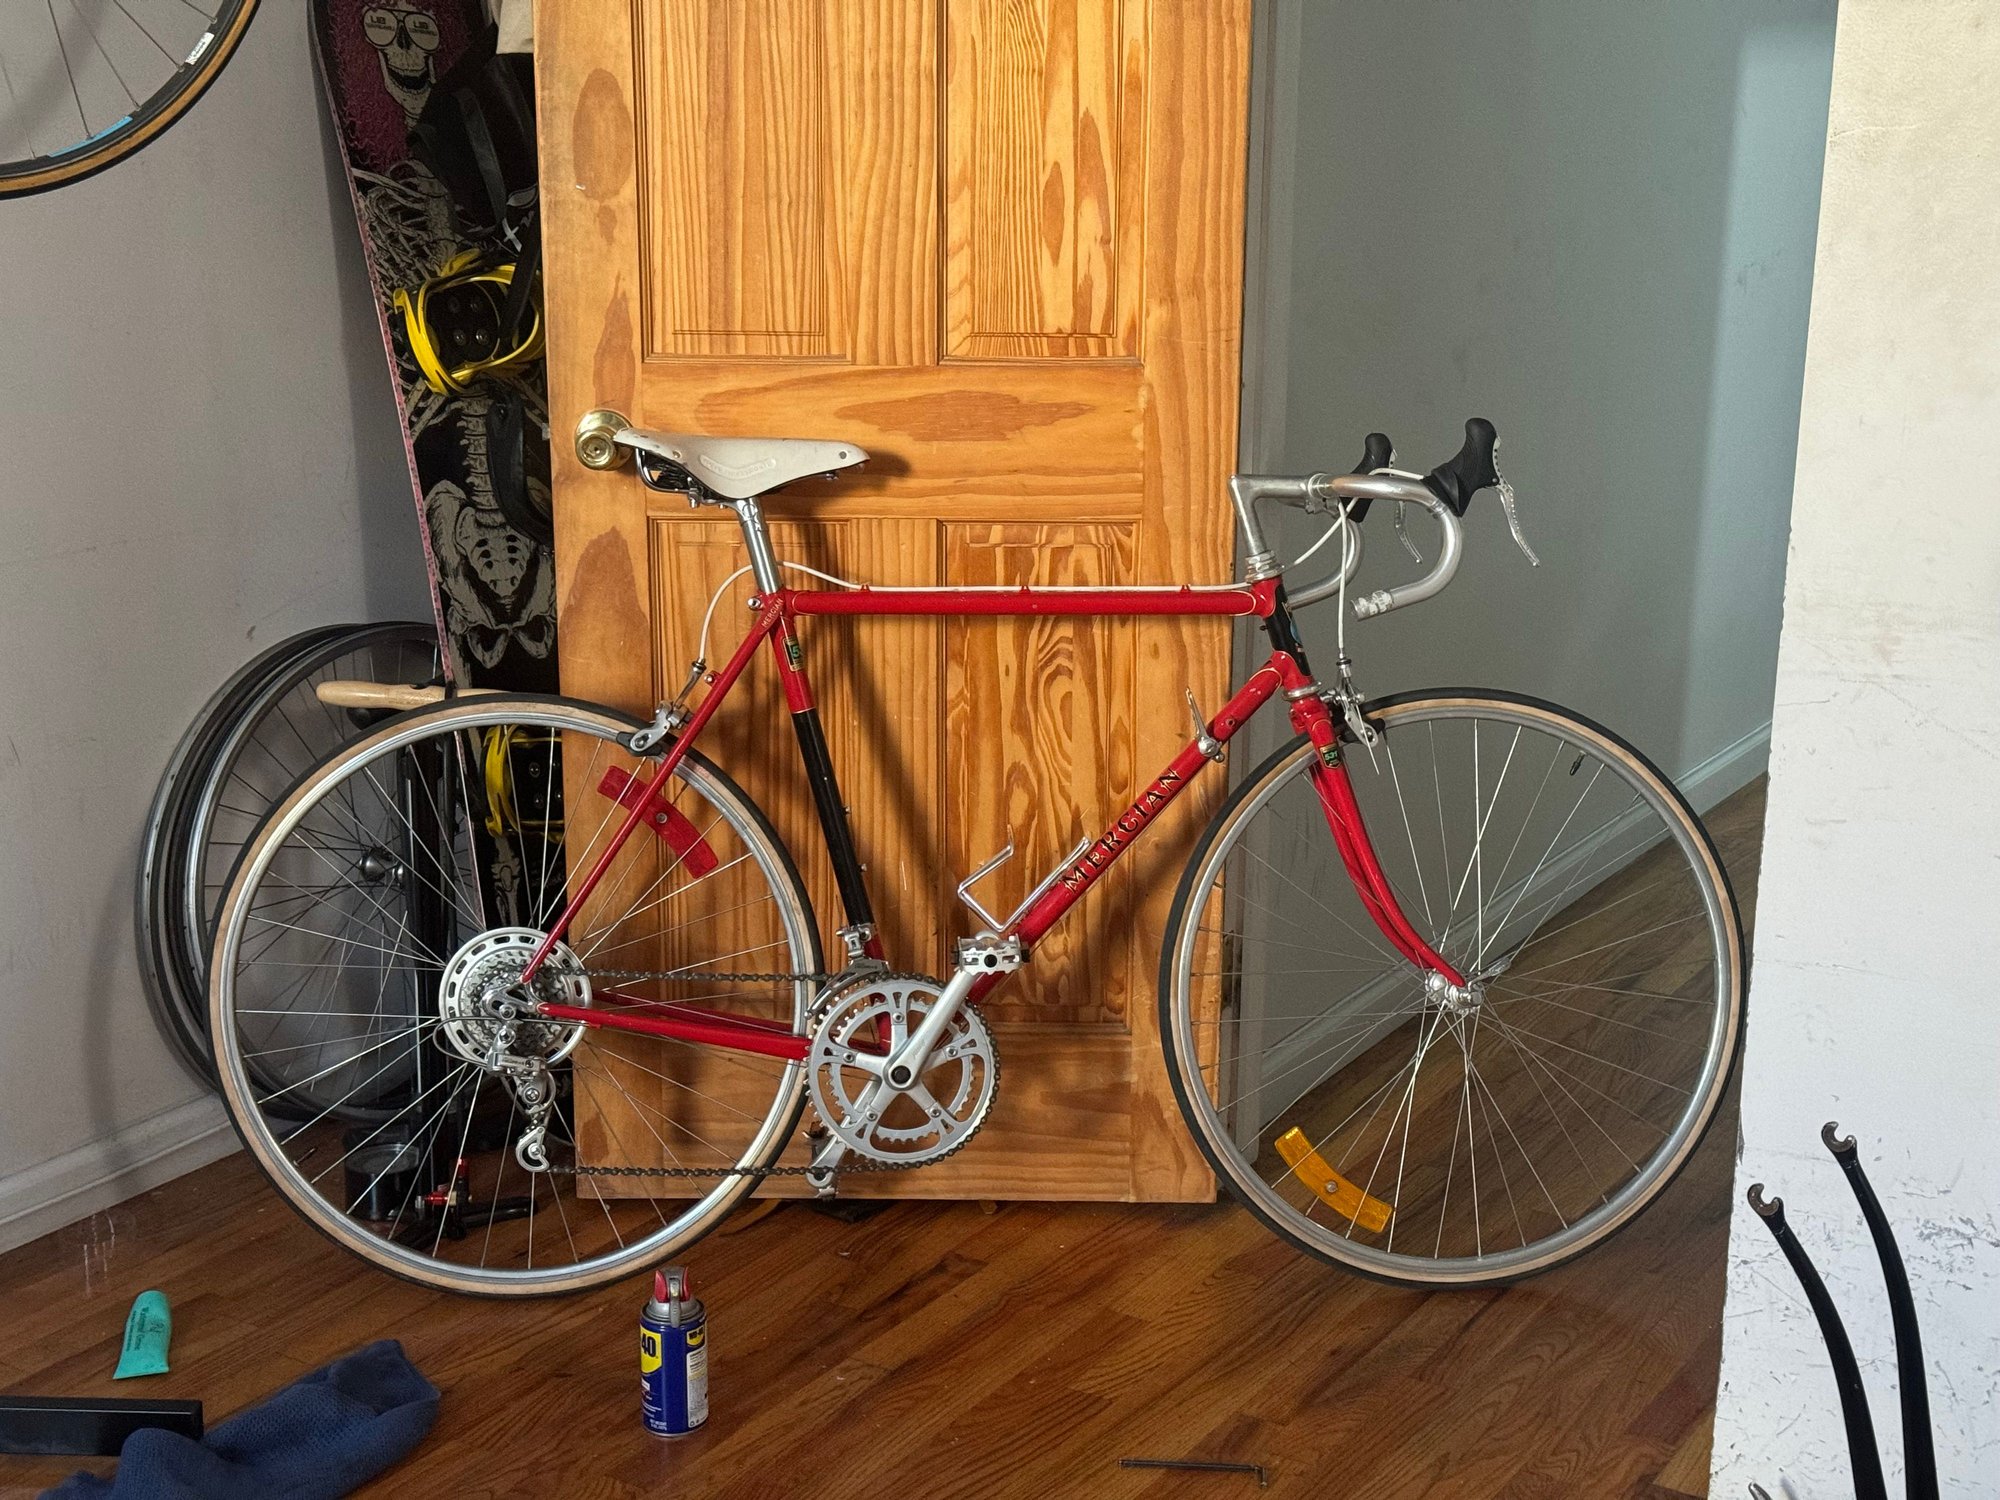
Mercian frameset, took 2+ hour train journey with my 9 month old puppo to pick it up. Slapped on some wheels/drivetrain from my trek 710, and some cockpit/brakes I had on hand to give it a first test ride. Smooth, fits my size (finallly!!!).

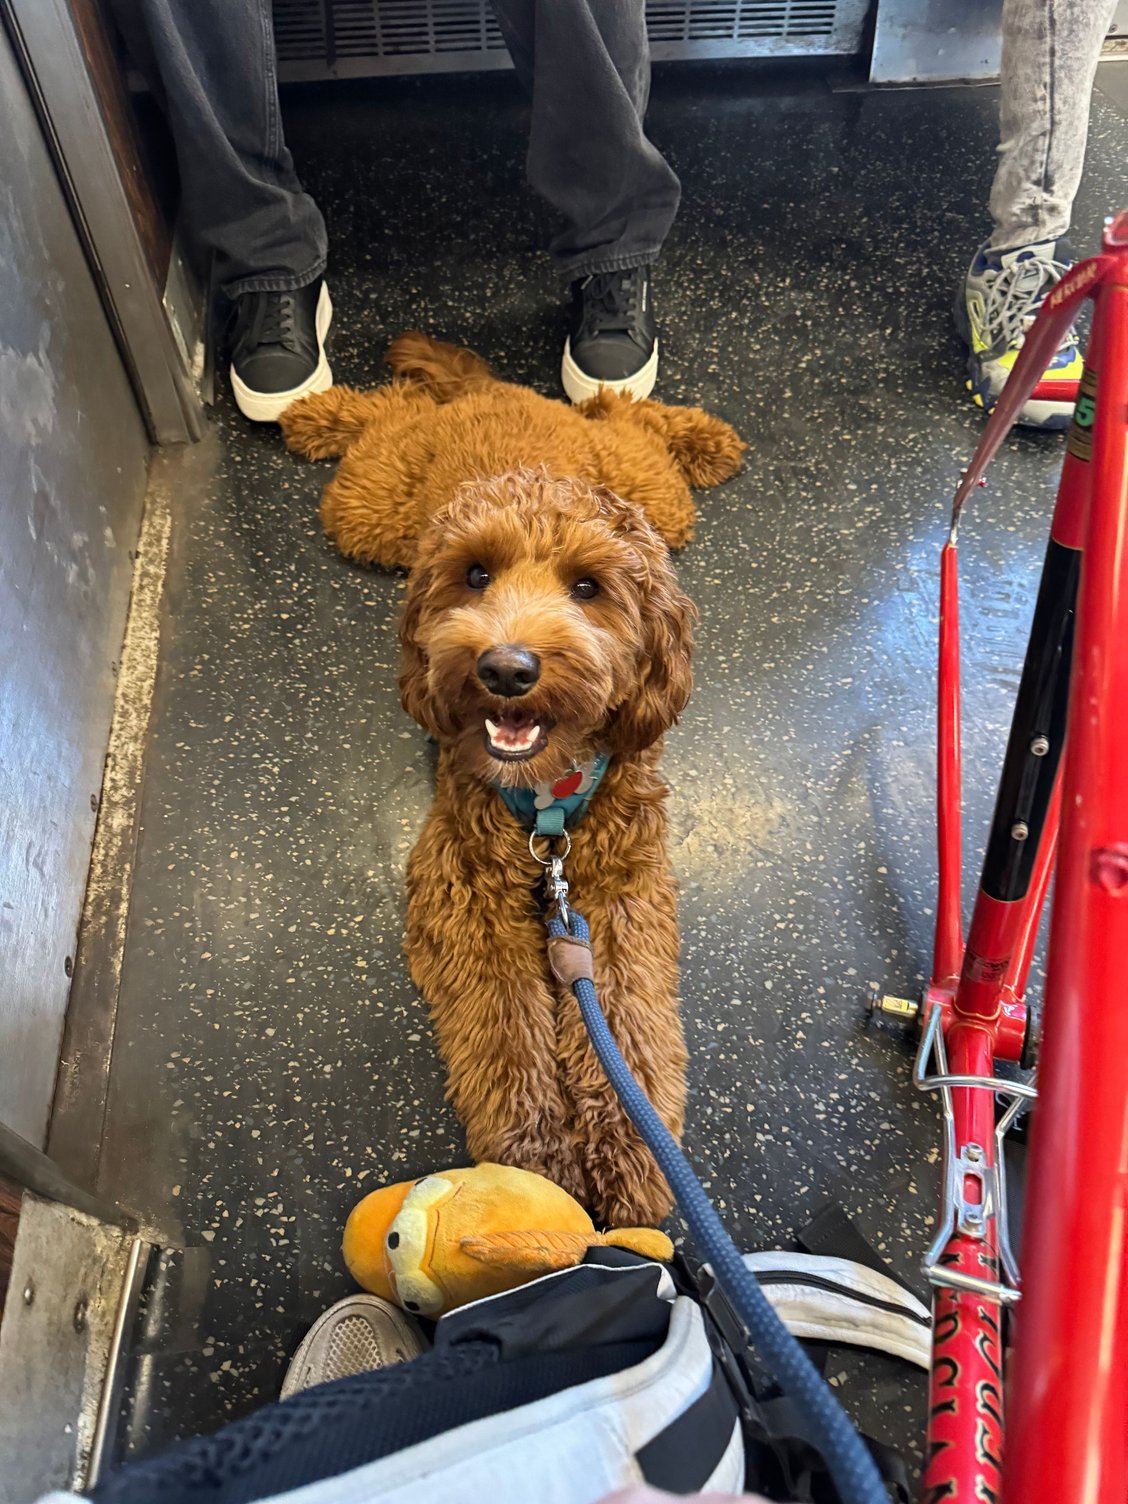
JoJo loves taking the train (cos he gets lots of treats)!
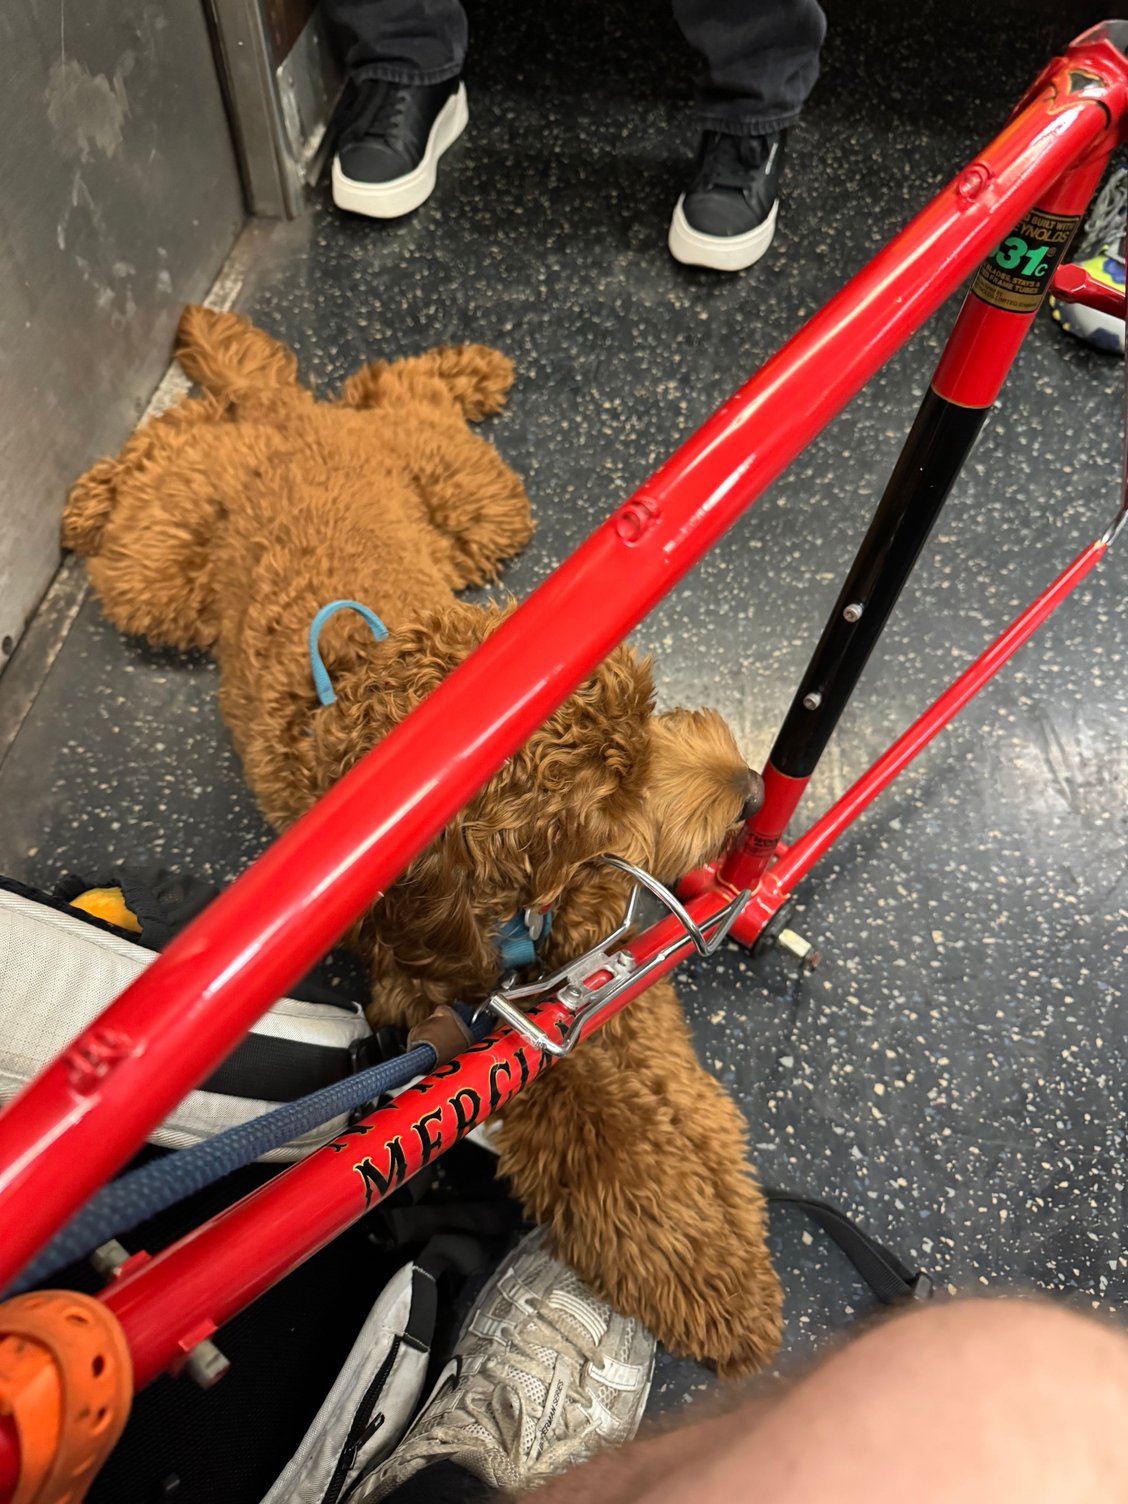
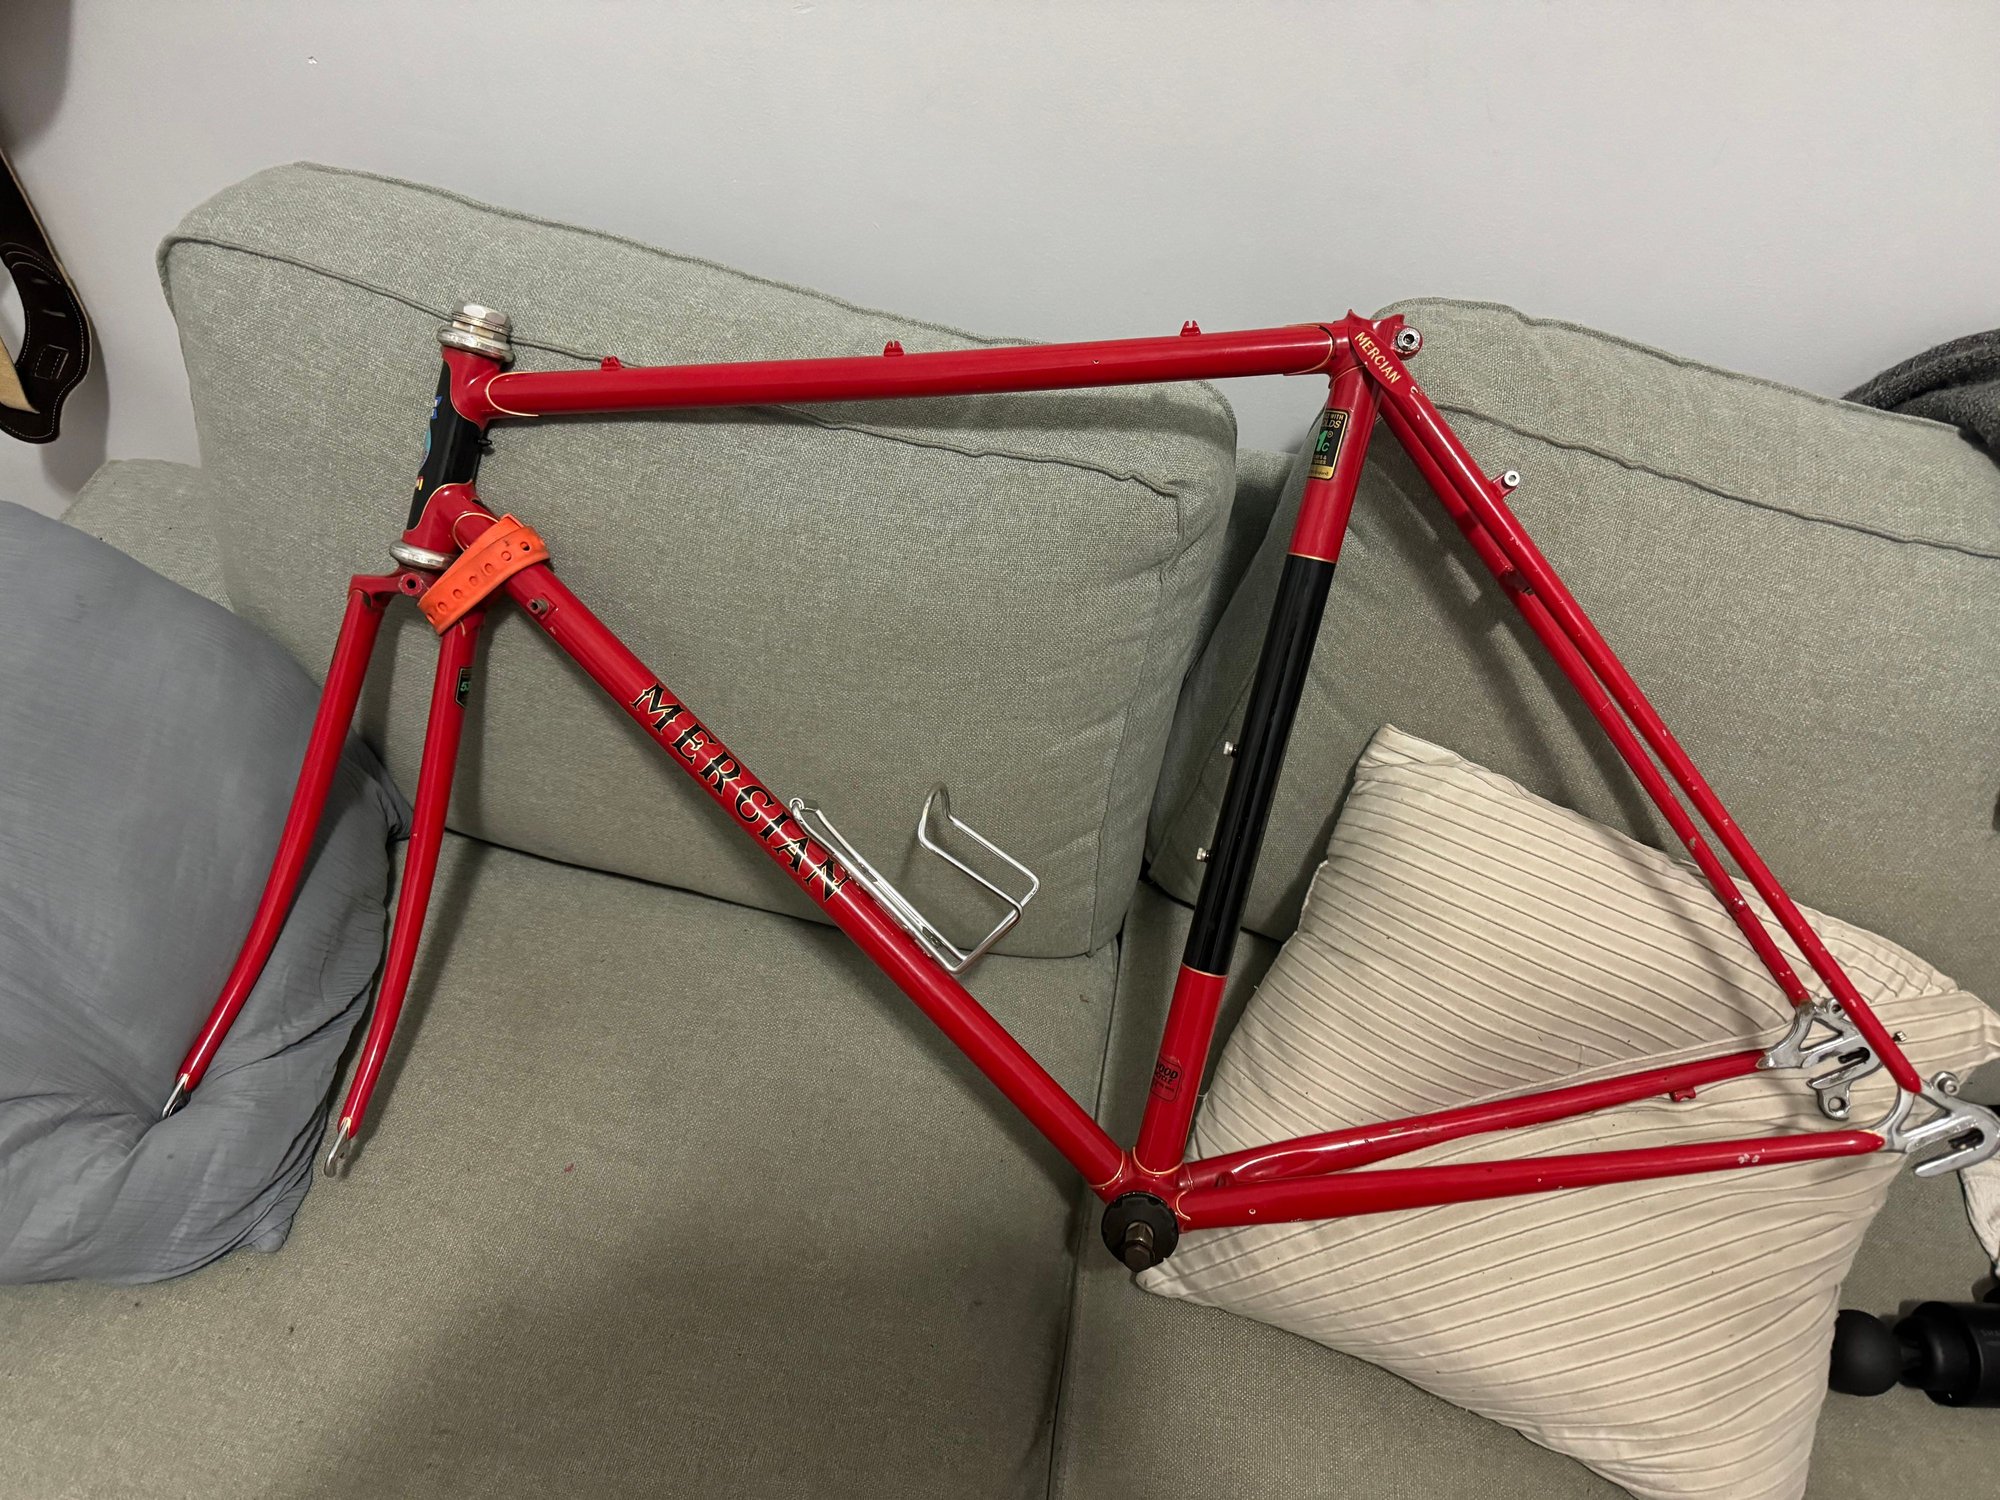
Safely home
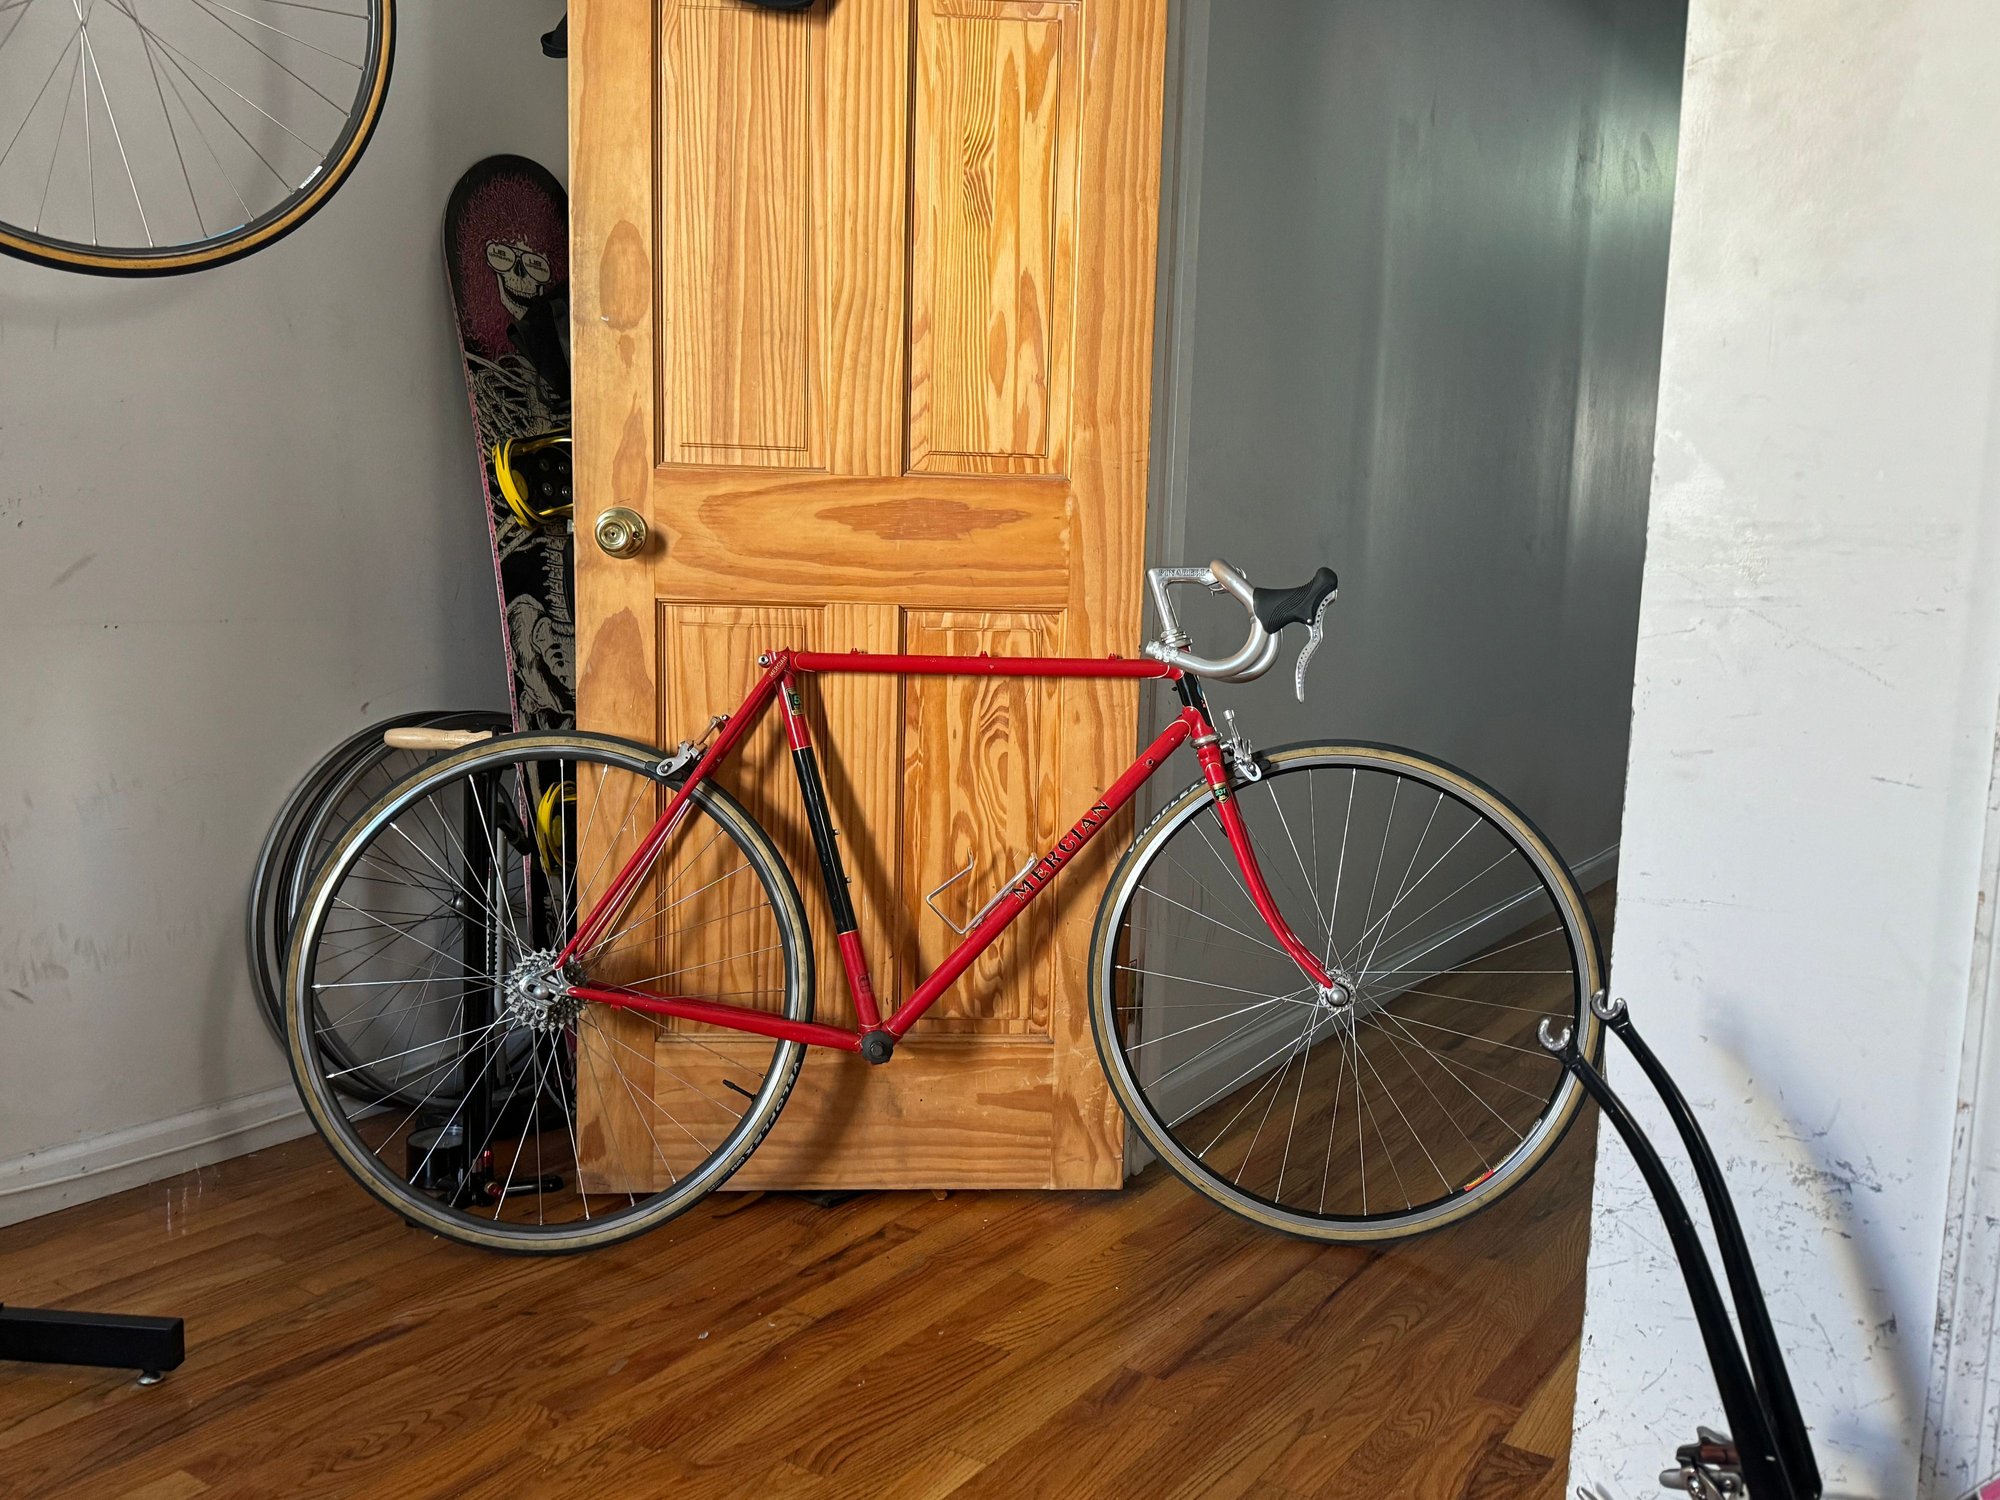
Standover is bout perfect
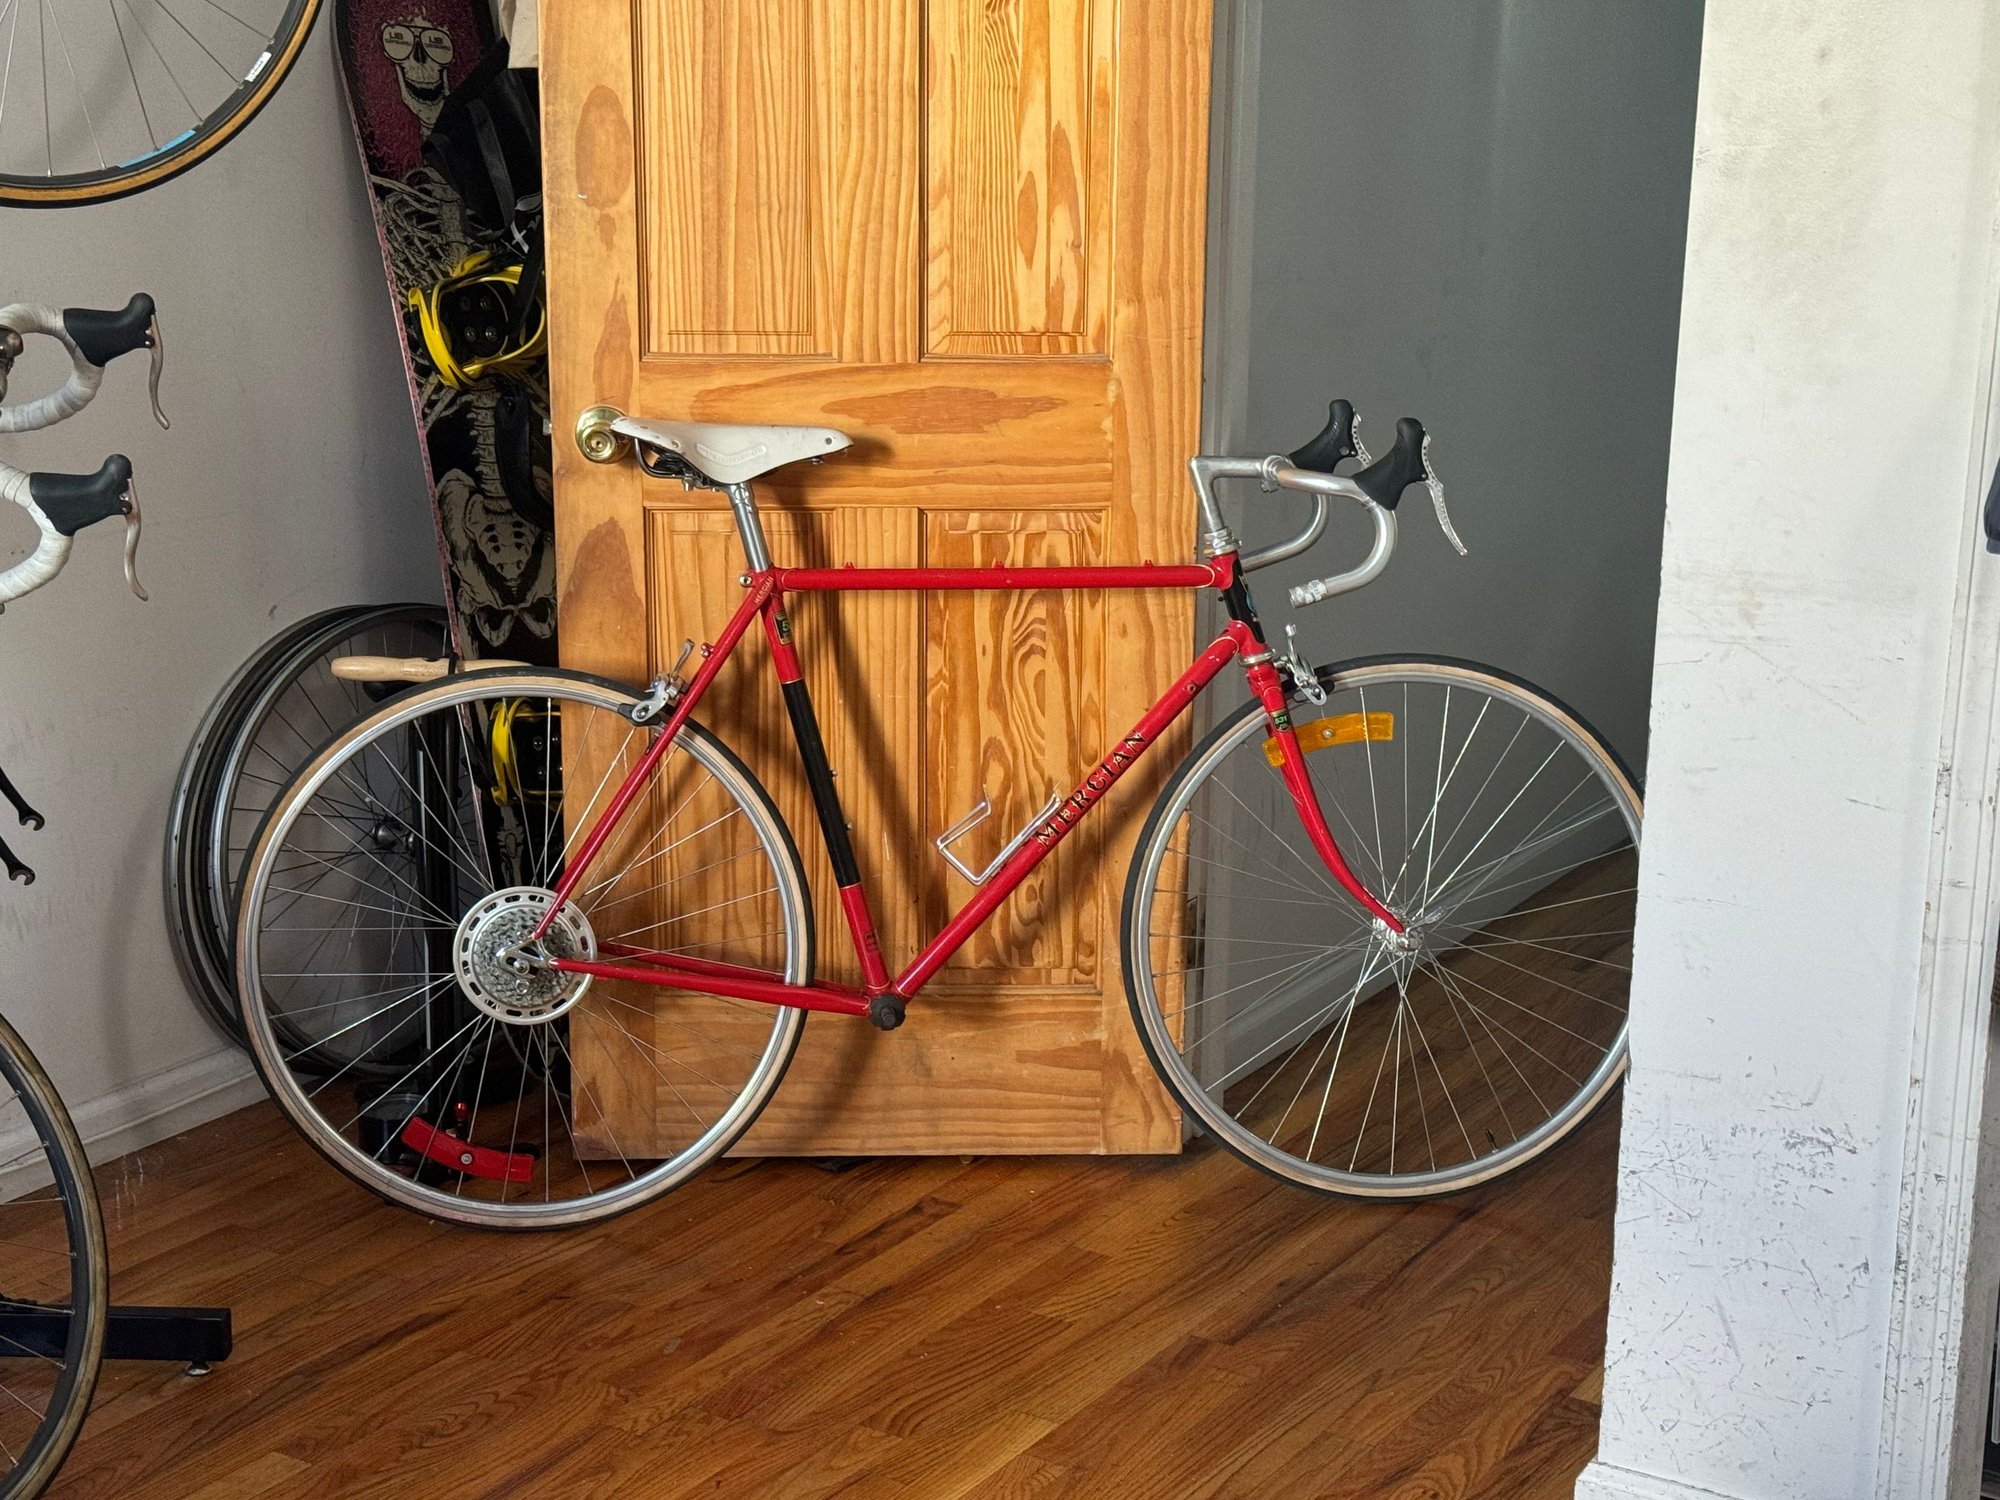
Silver rims looked better to me. Added cockpit. Prob will go with brown leather brooks b17, but my white team pro kinda looks cool. TRP RRK levers are comfy but look hideous, not sure how I feel. Using for now
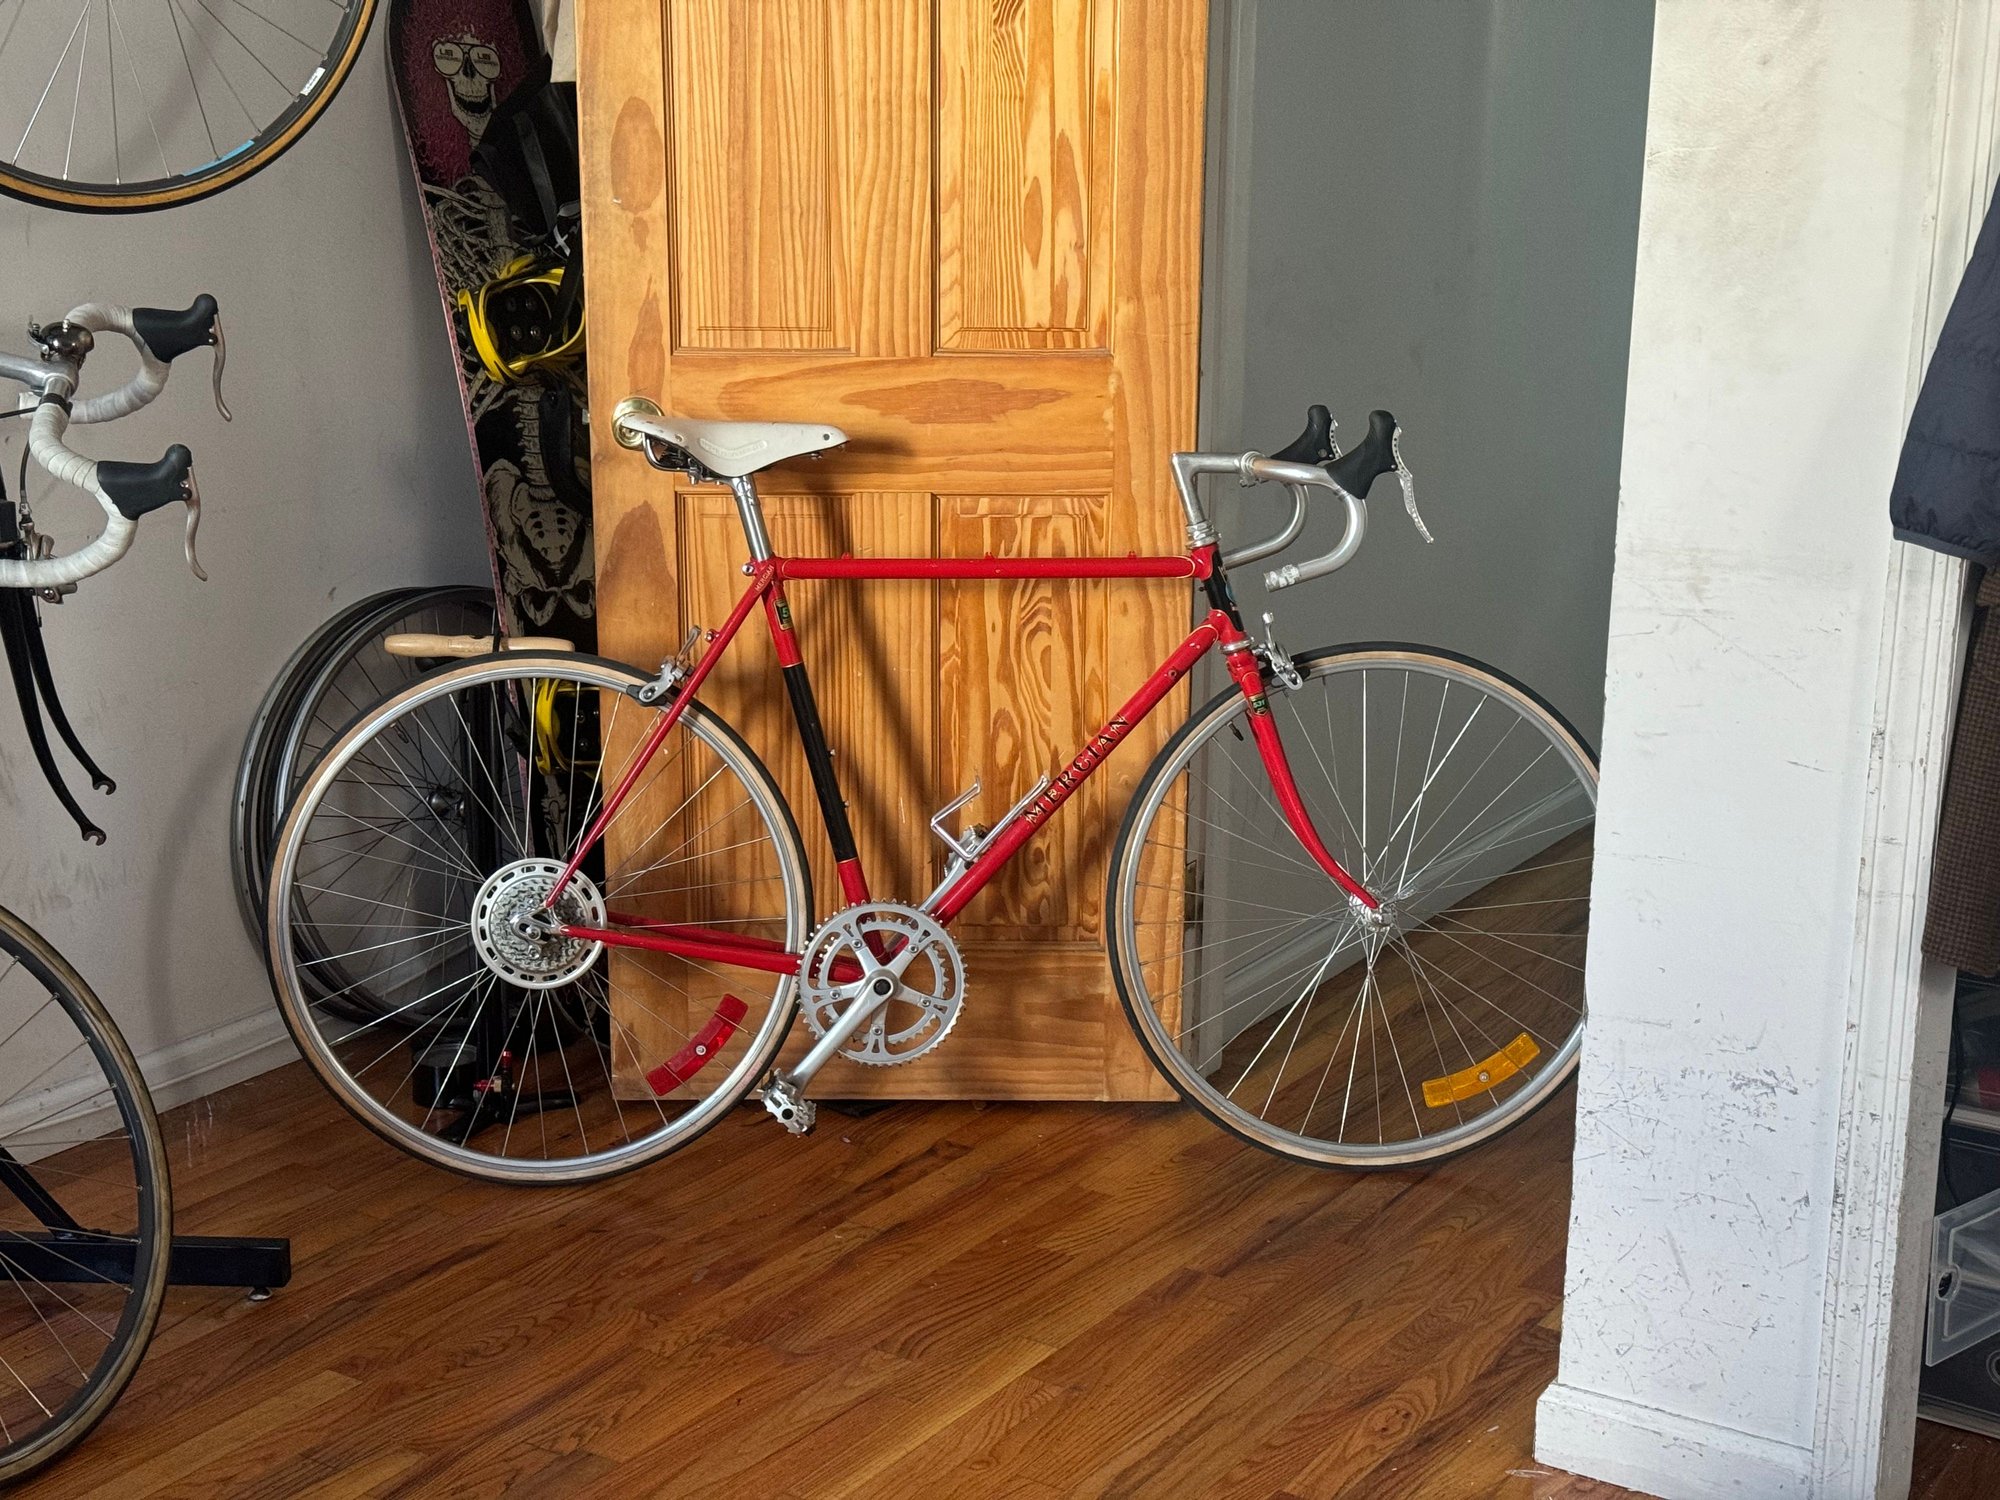
Crankset transfer from trek 710
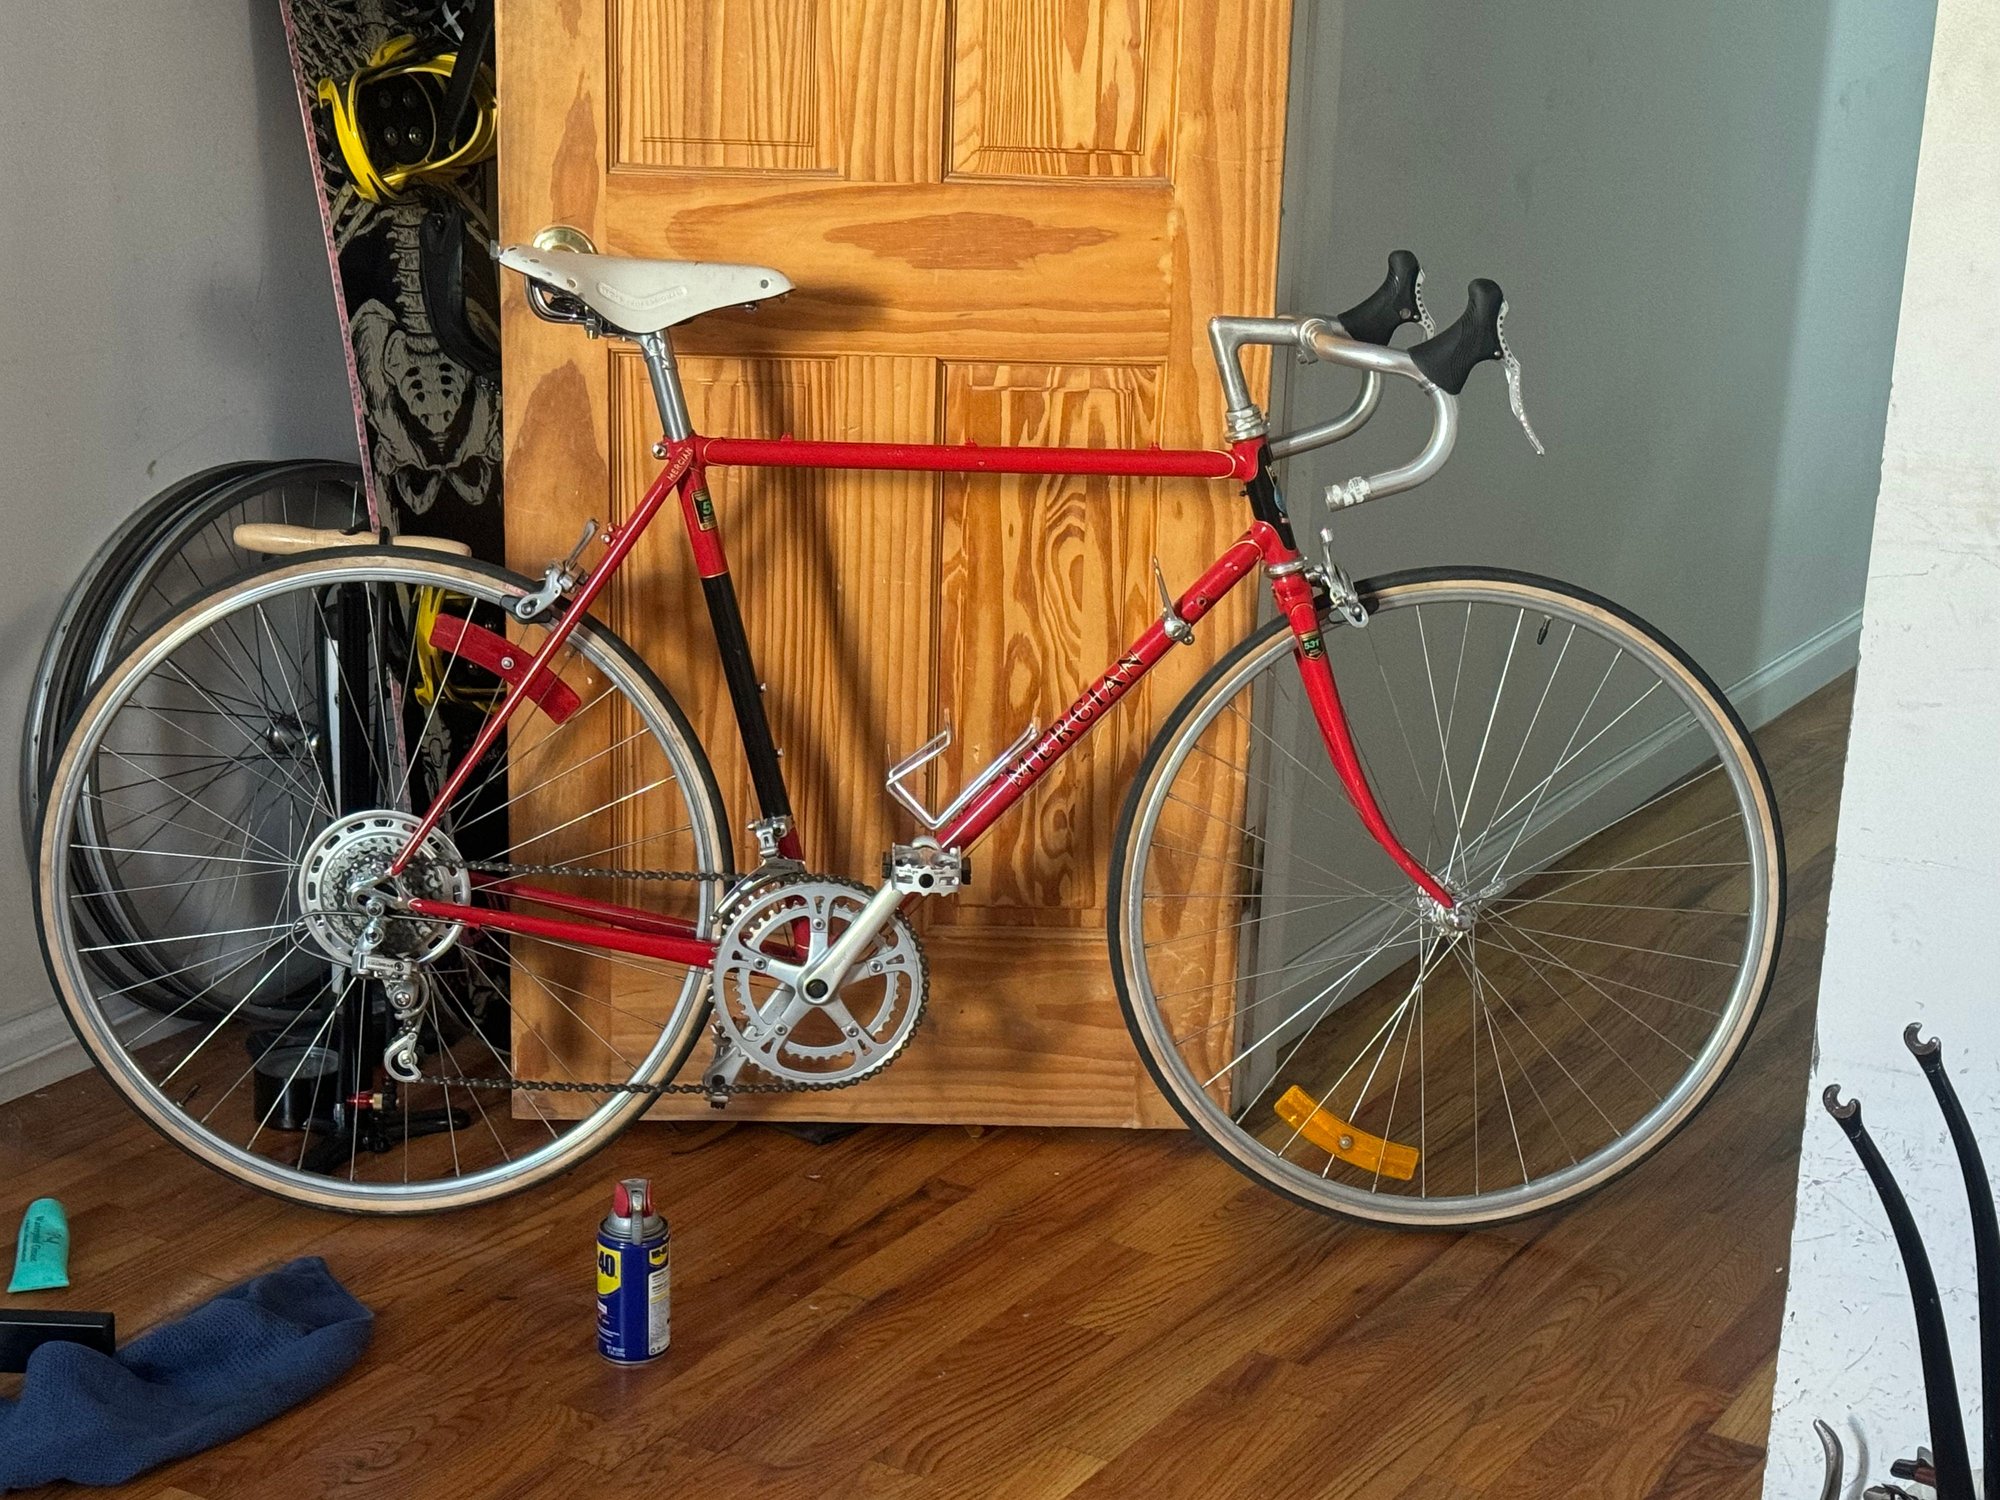
Rest of drivetrain from 710
Brakes (was still missing one cable for rear, had to go to lbs to get).
JoJo loves taking the train (cos he gets lots of treats)!
Safely home
Standover is bout perfect
Silver rims looked better to me. Added cockpit. Prob will go with brown leather brooks b17, but my white team pro kinda looks cool. TRP RRK levers are comfy but look hideous, not sure how I feel. Using for now
Crankset transfer from trek 710
Rest of drivetrain from 710
Brakes (was still missing one cable for rear, had to go to lbs to get).
Last edited by jondom22; 10-20-24 at 09:15 PM. Reason: Added pictures
Likes For jondom22:
10-20-24, 10:27 PM
#8682
Cantilever believer

Busy weekend.
Got off the plane late Friday night, and after a few hours sleep was driving through the (unusual) rain before sunrise on Saturday out to Recycle Your Bicycle for a long day of volunteer work. Only got one bike complete (a Fuji Nevada), but helped several others with their bikes, drilled a bunch of rims for Schrader valves, and used some strategically-placed JB Weld to fix a Park truing stand. Then down to the co-op to drop off some items (take-offs at RYB are treasures at the co-op), and then tried to resurrect a Feedback workstand where someone at the co-op (likely an overeager customer) had managed to completely shear off the adjusting knob. It might survive, but I think its days as a shared workstand may be behind it.
Started today leading my group ride, then spent much of the day trying to degunk two pairs of shifters amid other bike work. One set of Deore XT 3x9s were a nightmare to dismantle, but cleaned up well, while the other set had grease that had decayed to the consistency of RTV sealant and took many passes and a lot of hand work to even get the pawls to move a millimeter. While these were stewing, I also cleaned a caked-crud Dura-Ace freewheel and dropped a seized Mountech derailleur in the cleaner as well. And while all that was cooking, I started swapping out tires on a few of my bikes for some cool colored ones I happened into recently.
Tomorrow is looking like a 12-hour workday, but I'll see if I can finish those shifters and maybe a couple other items in between all the paying work...
__________________
Richard C. Moeur, PE - Phoenix AZ, USA
https://www.richardcmoeur.com/bikestuf.html
Richard C. Moeur, PE - Phoenix AZ, USA
https://www.richardcmoeur.com/bikestuf.html
Likes For RCMoeur:
10-21-24, 09:00 AM
#8683

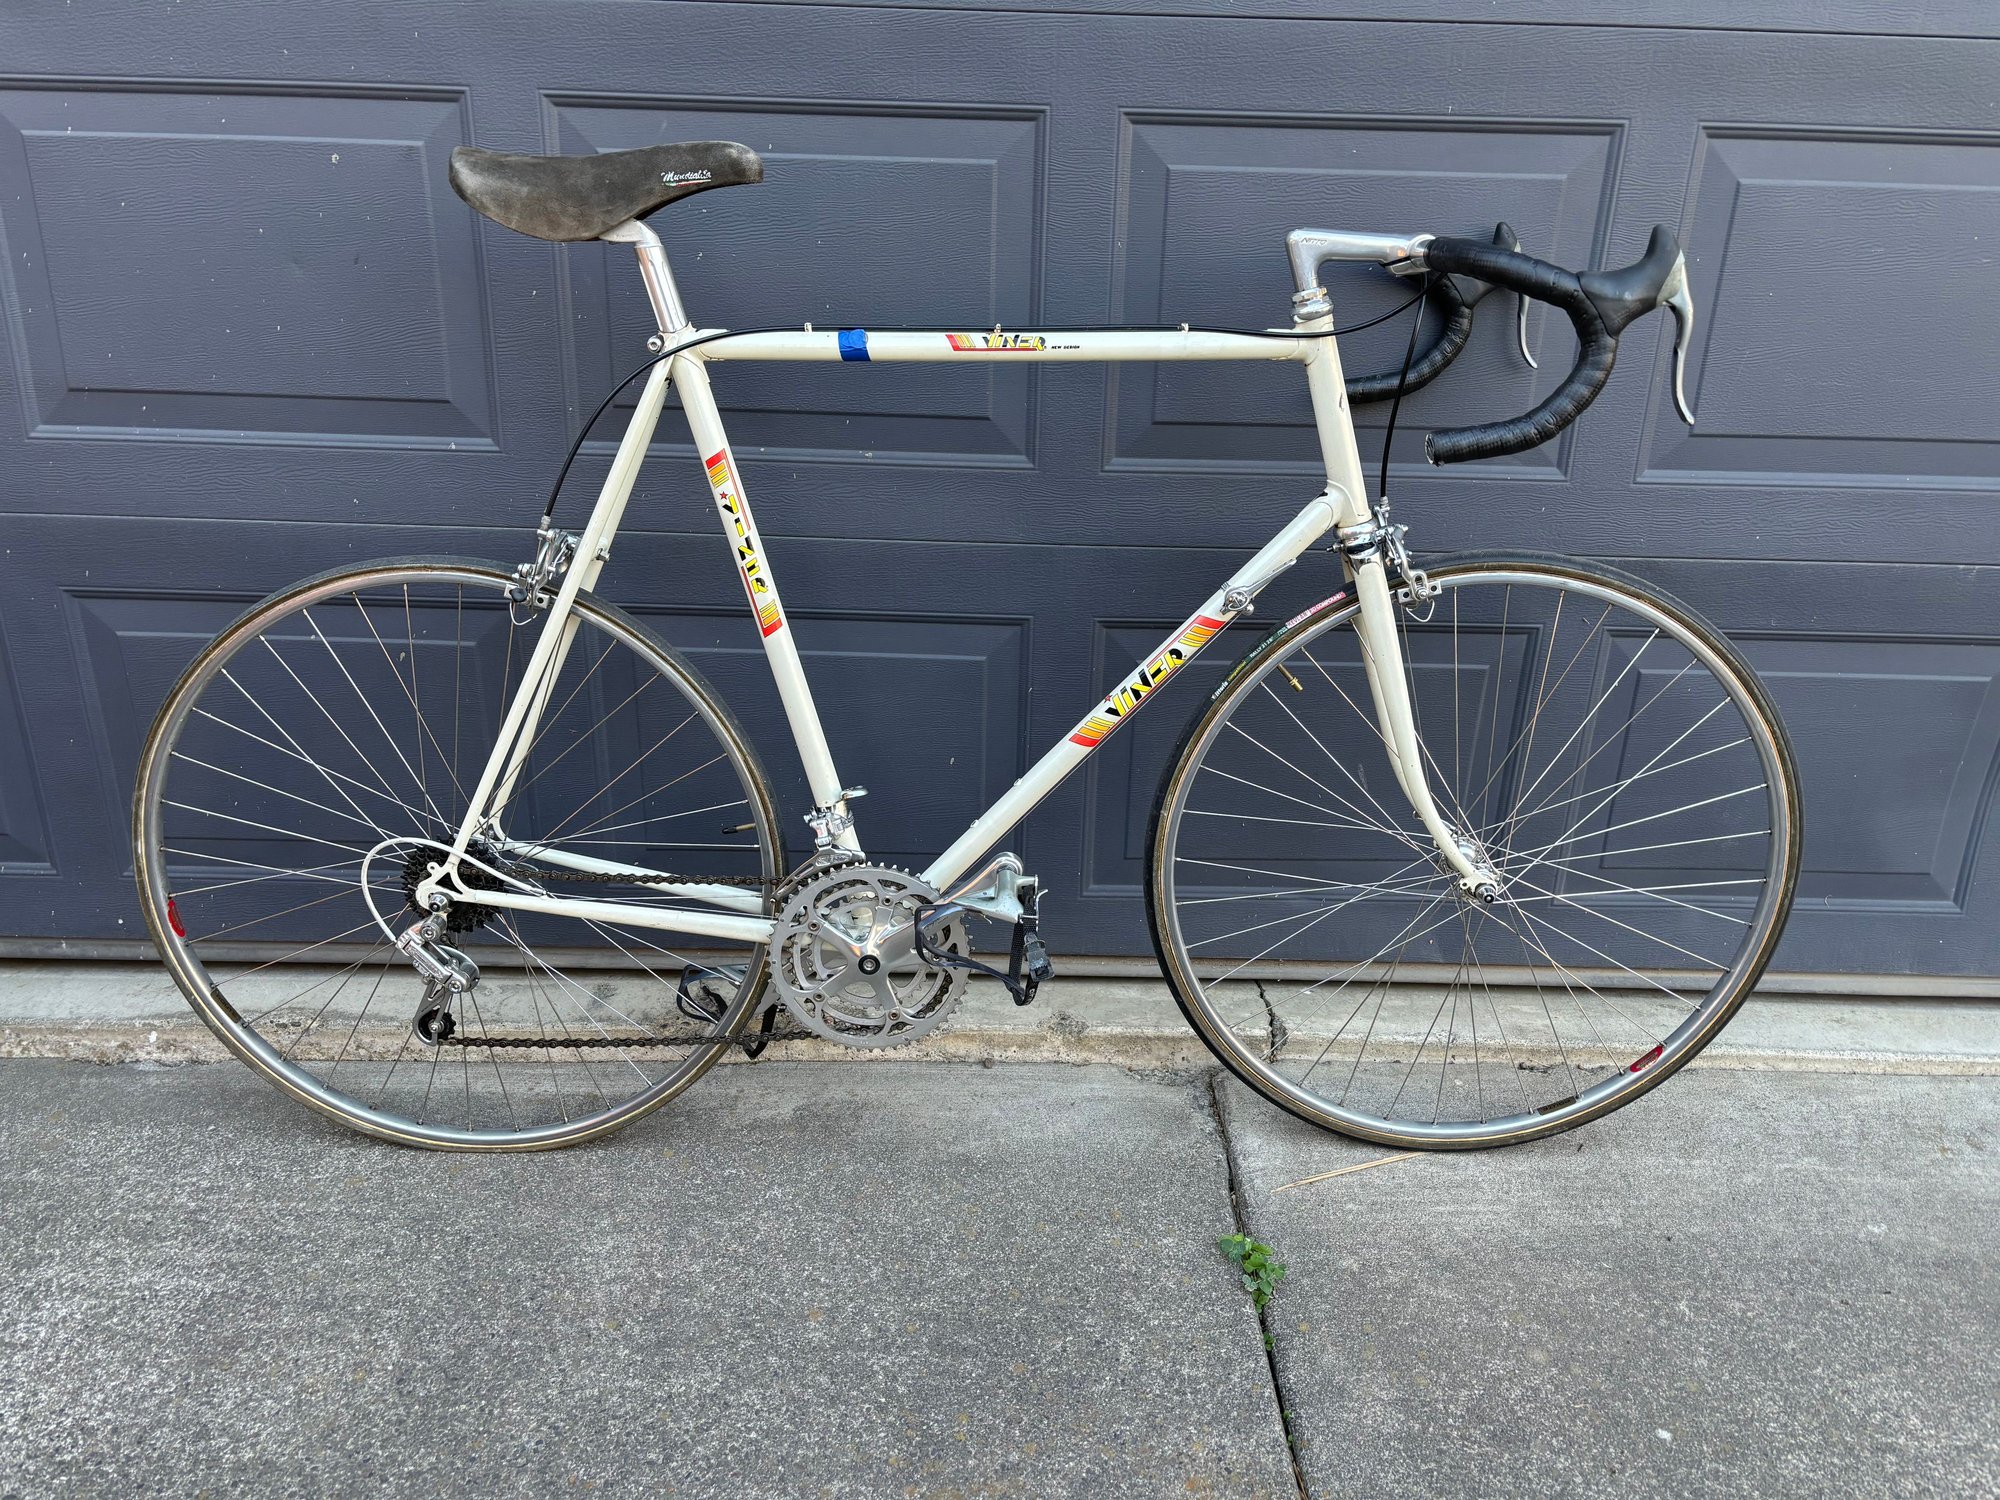
Here is the Viner, golly gunkers this is an interesting build. This touring frame was purchased for a low some of $20 at the Seattle. Bike Swap. The first thing I found out is that even though this was advertised as a bike that can handle 27� or 700cm brake reach would be a problem for the mid reach caliper.
I shelved the project for a couple of years, finally I decided that another project tanked due to possible front end damage, and the Shimano 600 was right for the viner. I went to install the cup and cone bb. Both sides of the bb shell were cross threaded, or mis-angled to the shell. A closer examination showed that the bb shell was smashed causing the misfit.
This was very bumming, lol. I went to the local coop to chase the threads but that was to no avail. This is a nice looking frame to go to waist. In the stash I had lower end campy cartridge and triple crank. I decided to �jam� that on since no cup and cone would ever work again without rethread. That worked, not my style but here ham fisted was my best alternative.
On the day at the coop I was able to pick the Nitto/SR/Tricolor cockpit, that worked out good. The brake calipers, well the front works with 600 mid-reach pads at end slot.
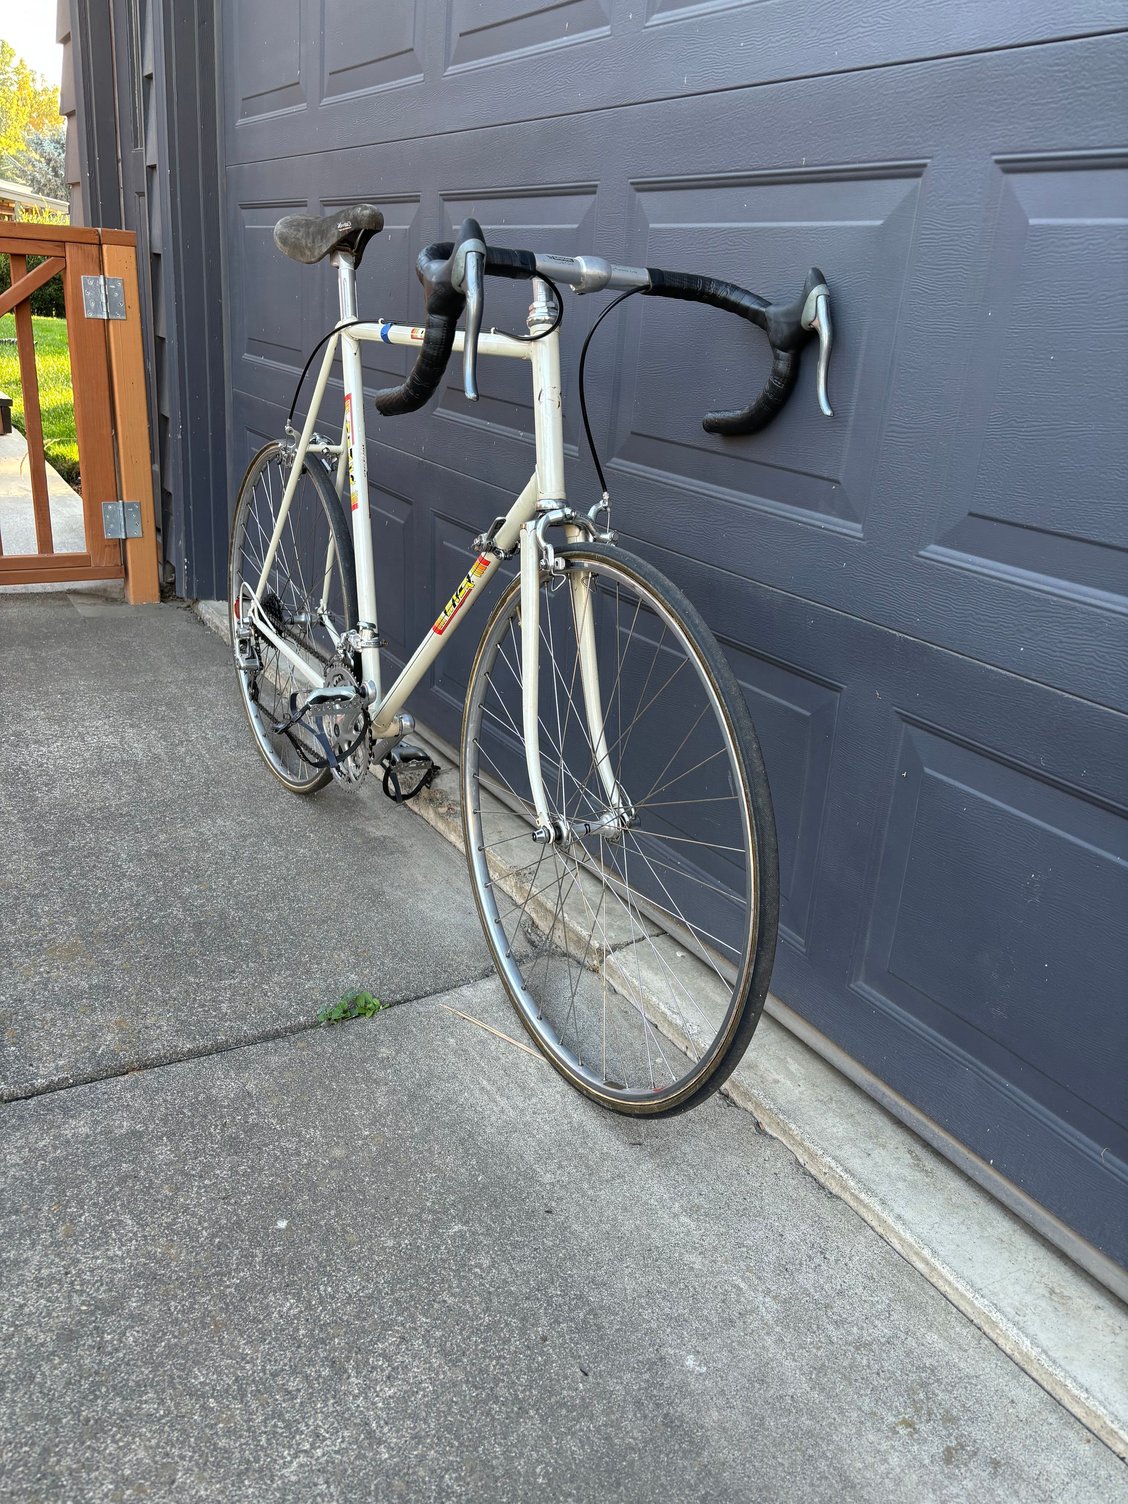
The back was not so lucky.
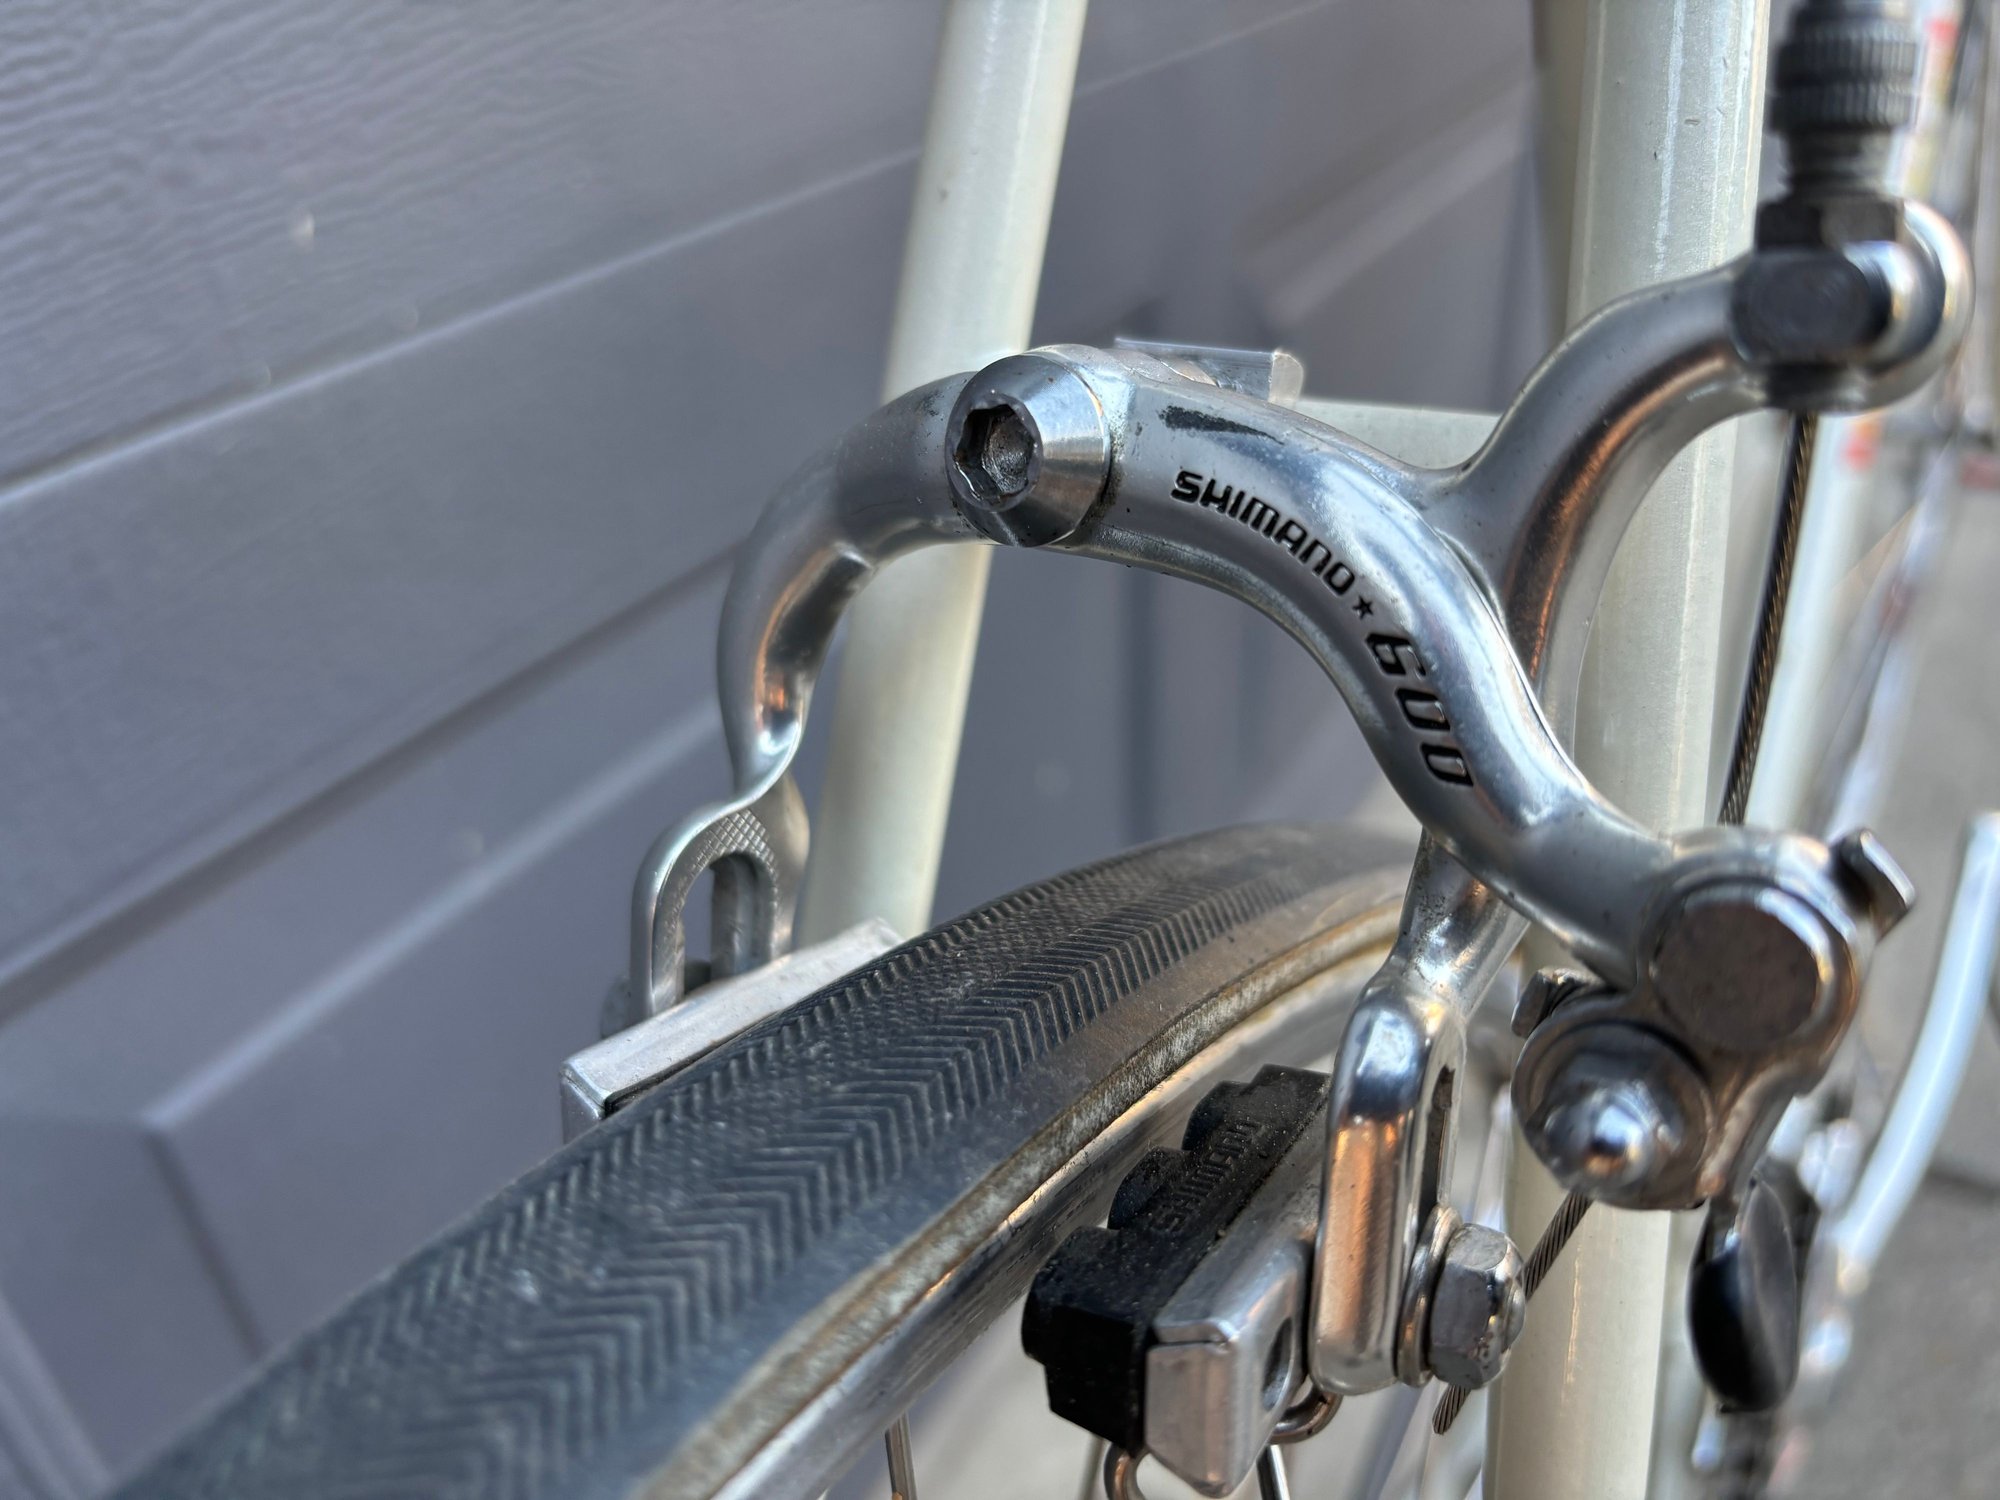
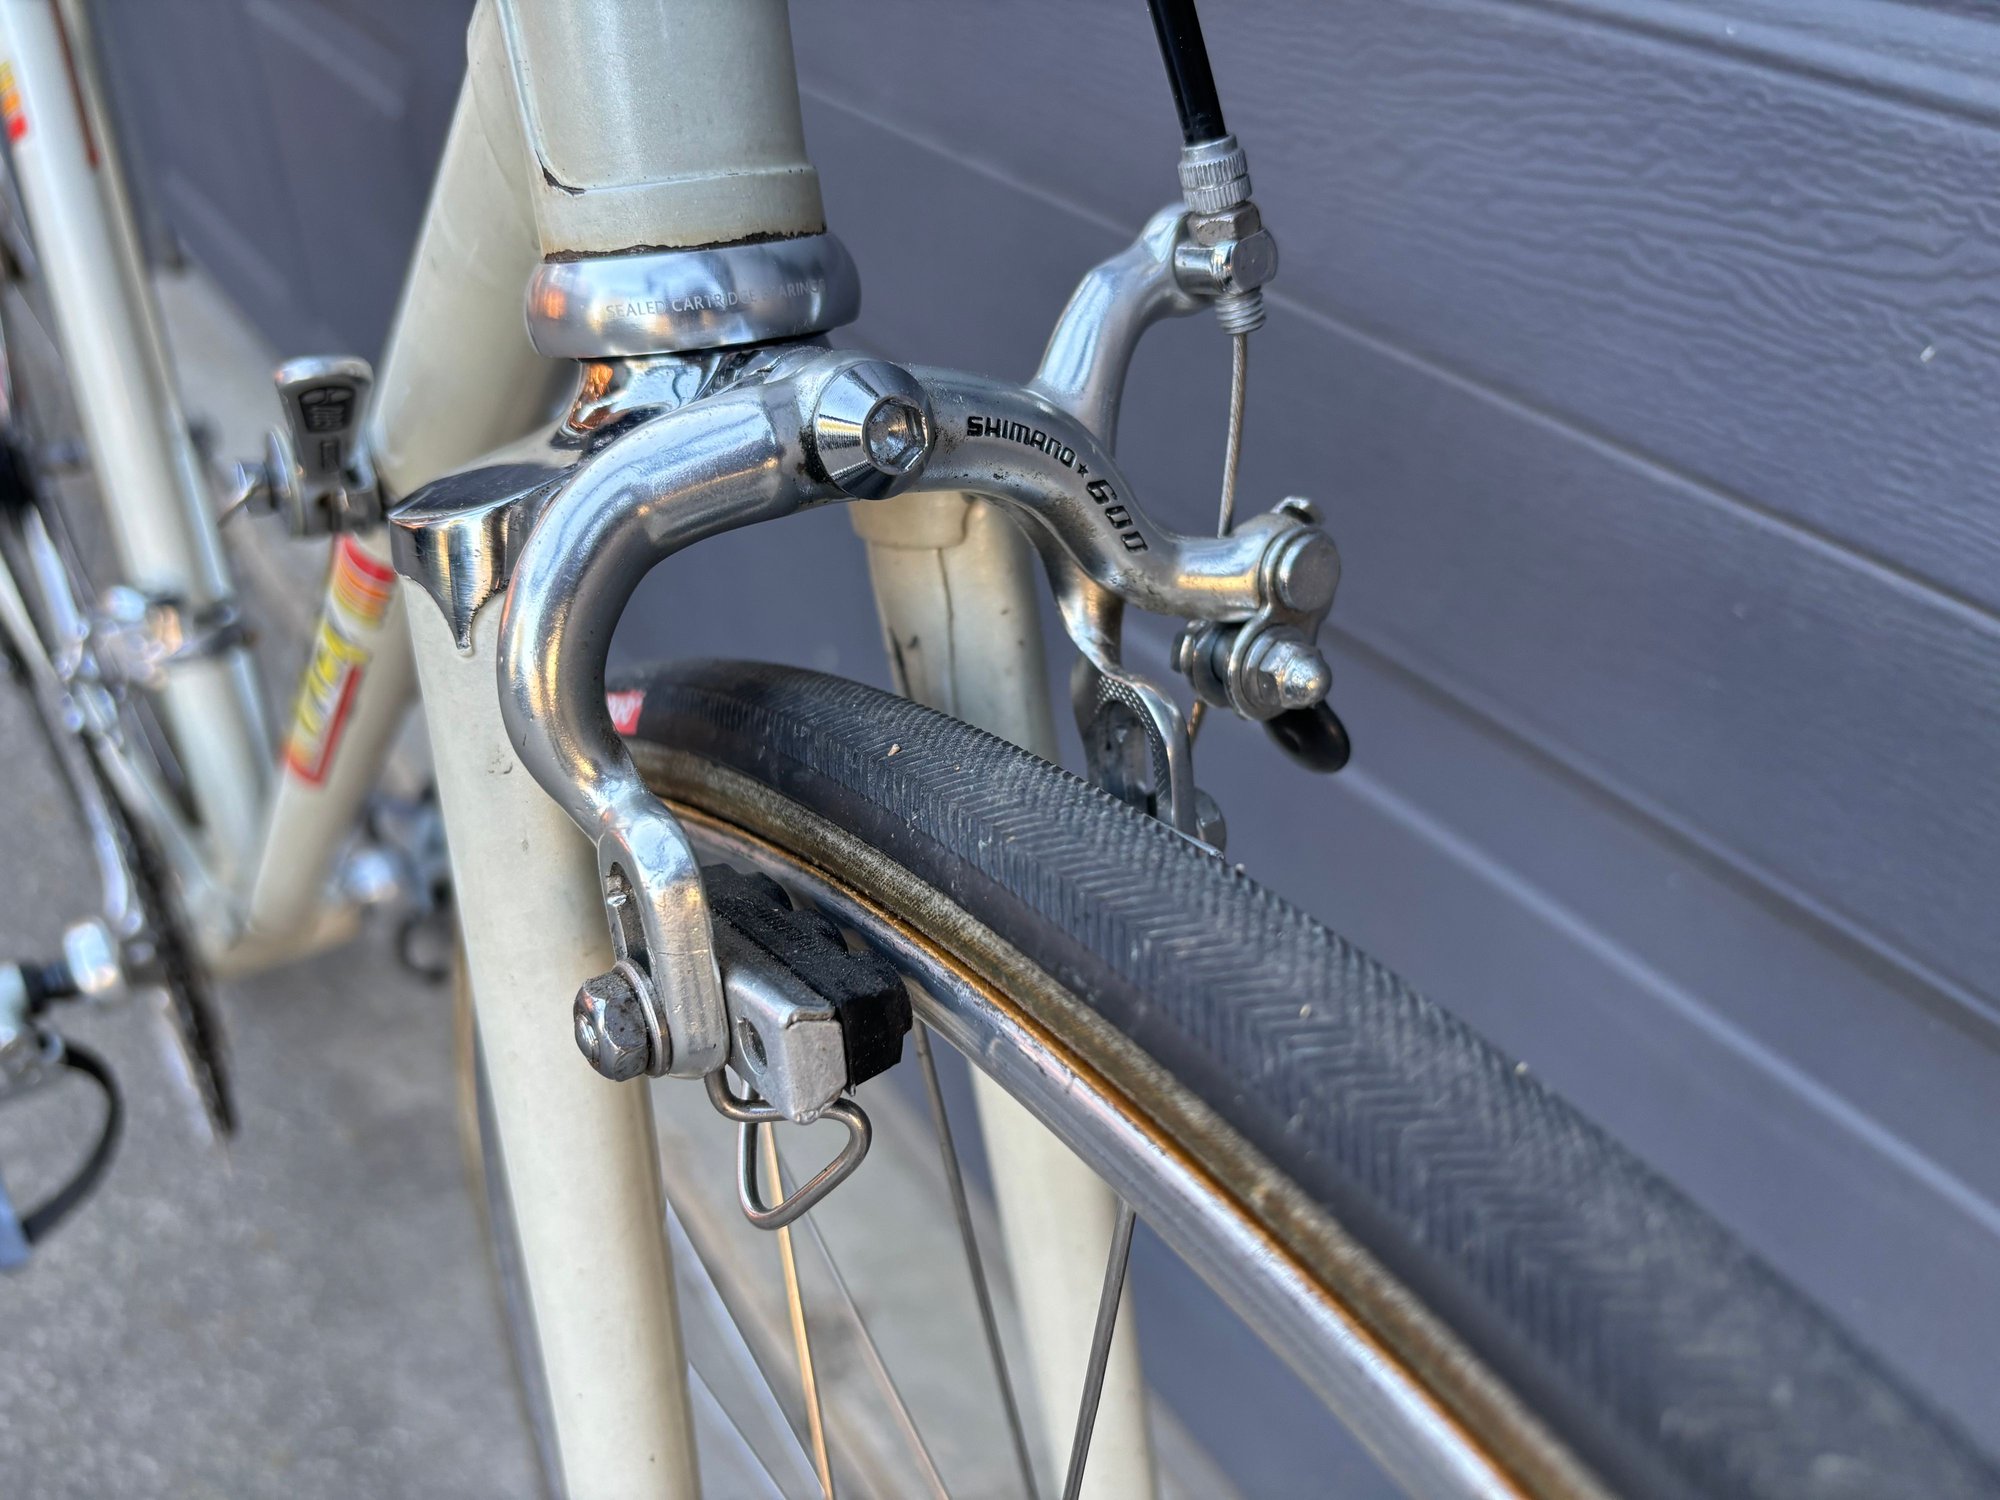
The pads at end slot wasn�t going to reach, but it�s very close. I�ve already ham fisted the bb, lol, so the mindset set is can�t find it-grind it, literally. I decided to make it work. Here I was needing 1mm+, again I went to the stash or the jar of randomness for the potential solution.
I couldn�t find the actual spacer I wanted to grind but I did locate one to shape. It�s a front caliper concave spacer. I filed this to angle, and placed a bend to the backside of the pivot bolt.
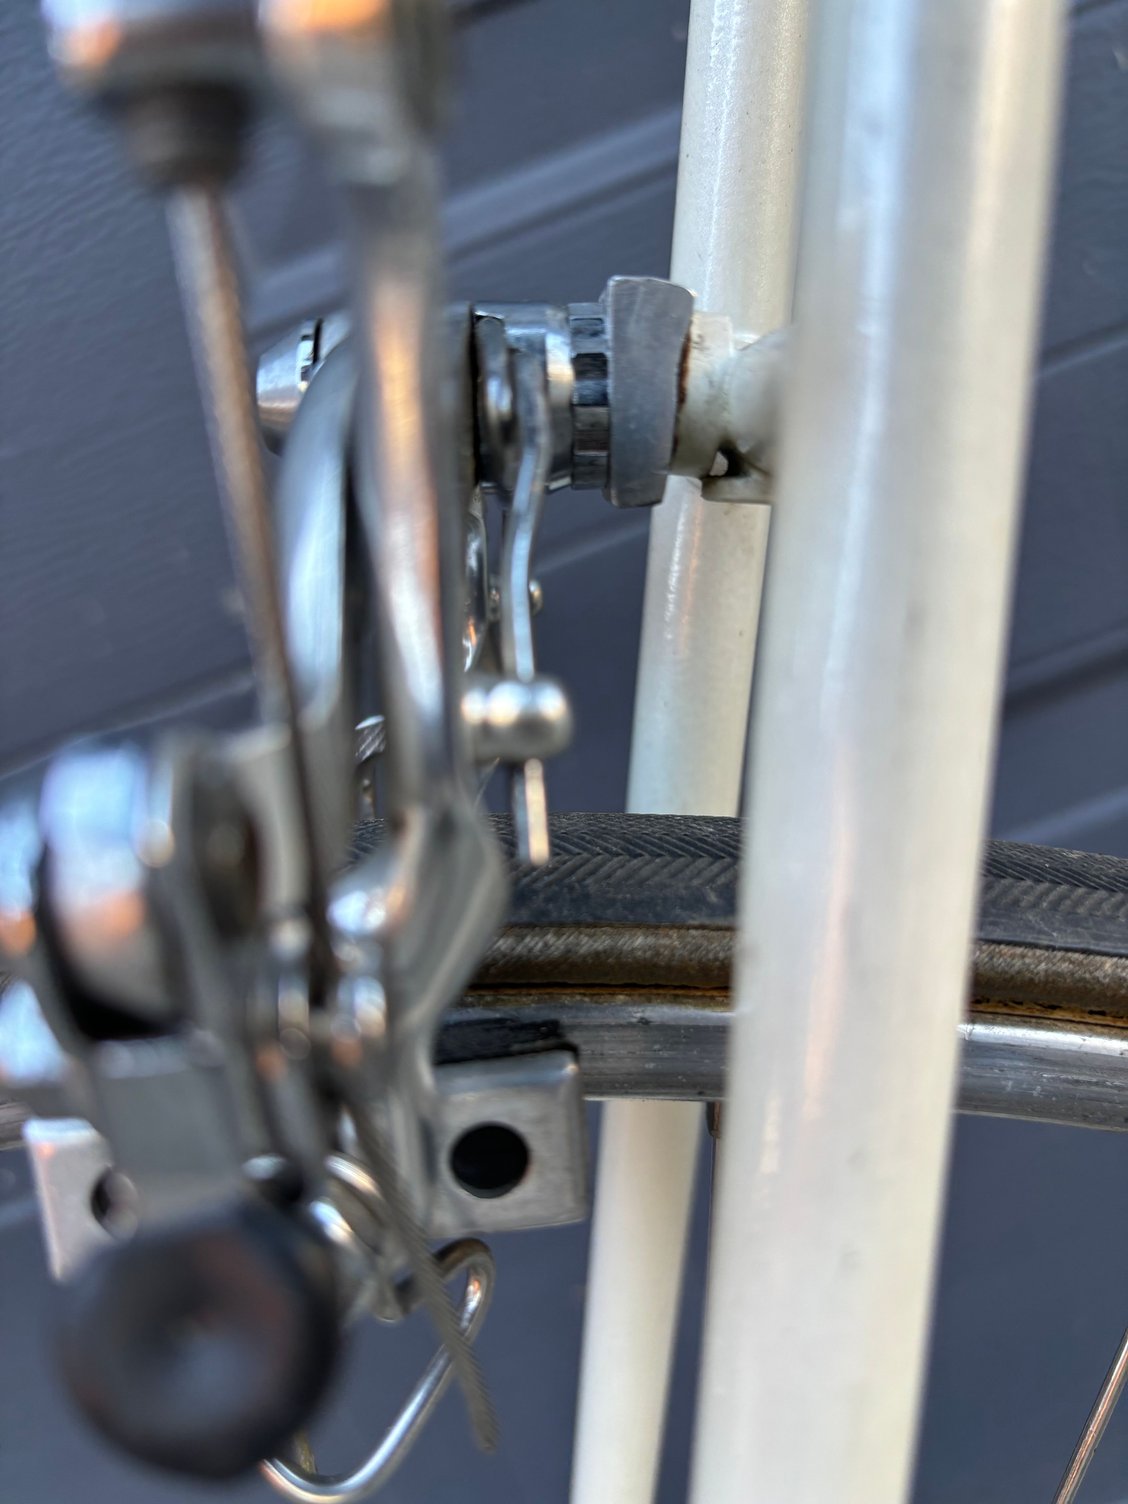
That did the trick.
The wheels are tubular, Kevlar lined. Well, my test ride didn�t work. The rear picked up a bradnail and punctured about a few minutes out and on the walk of shame home I picked up a shiit load of, goat head thorns. Yup both tires completely hosed. Hence the flat tire pictures.
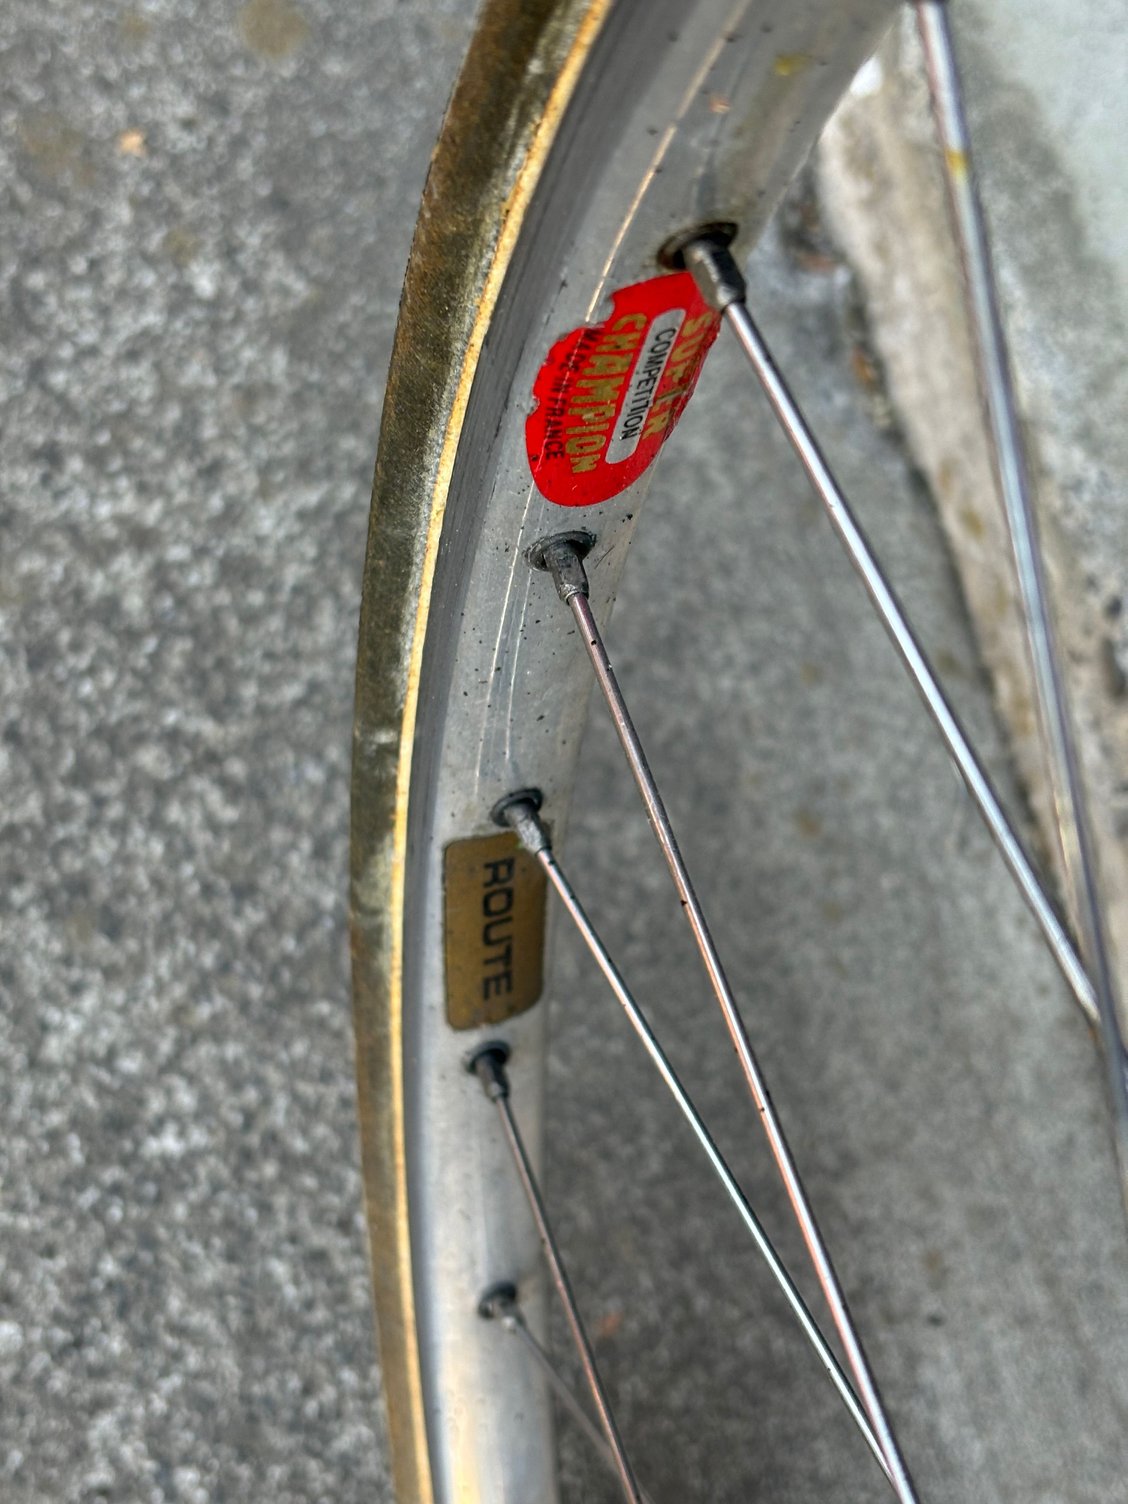
So it�s now back in limbo until I fit some new wheels.
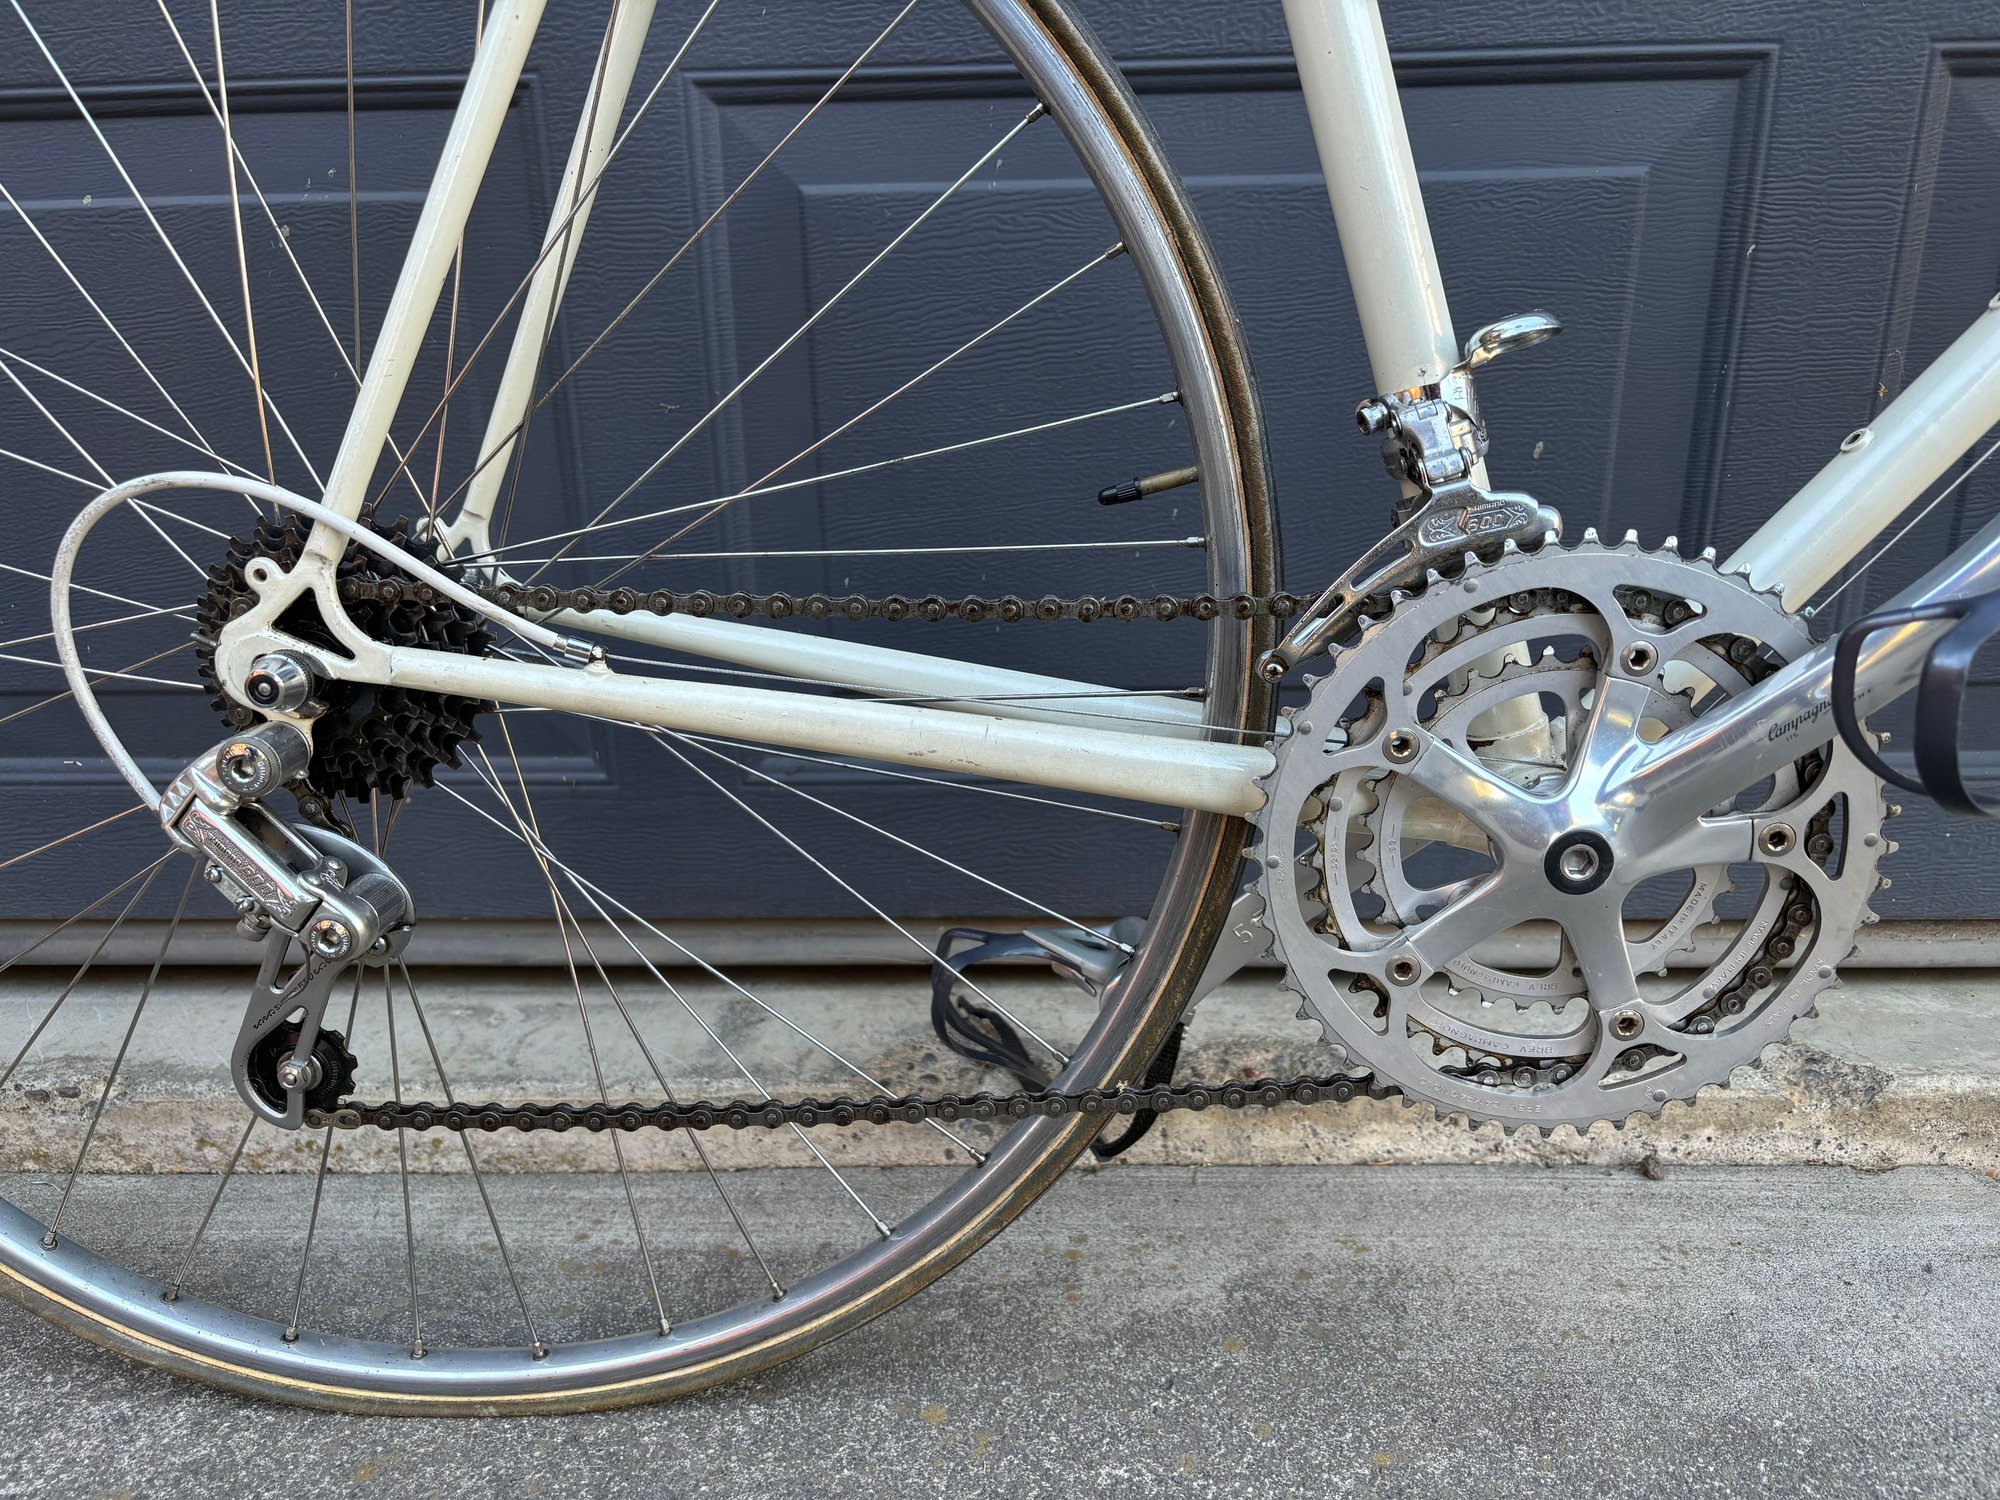
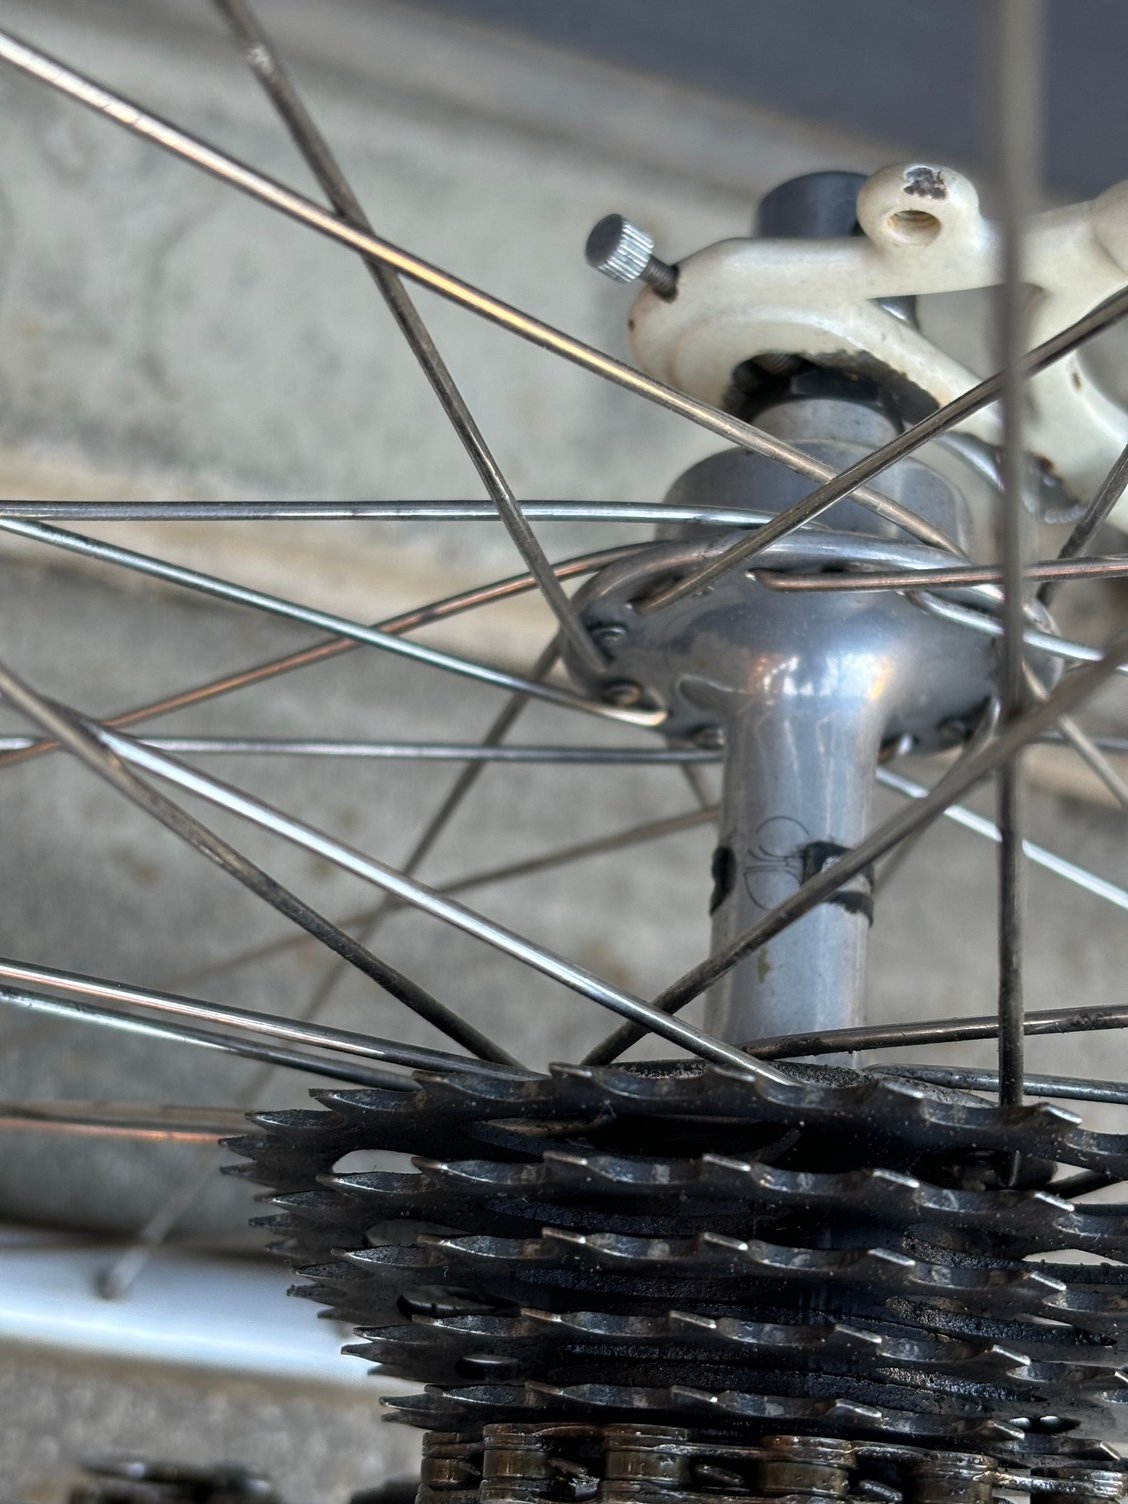
4 cross spokes on the 6 speed cassette Shimano hubs.
Likes For Mr. 66:
10-21-24, 11:03 AM
#8685
aka Tom Reingold
Thread Starter

Join Date: Jan 2009
Location: New York, NY, and High Falls, NY, USA
Posts: 41,192
Bikes: 1962 Rudge Sports, 1971 Raleigh Super Course, 1971 Raleigh Pro Track, 1974 Raleigh International, 1975 Viscount Fixie, 1982 McLean, 1996 Lemond (Ti), 2002 Burley Zydeco tandem
Liked 3,136 Times
in
1,771 Posts
On my morning commute, I got a flat tire. I didn't get my hands dirty! Amazing! This is my reward for cleaning my bike recently.
__________________
Tom Reingold, tom@noglider.com
New York City and High Falls, NY
Blogs: The Experienced Cyclist; noglider's ride blog
�When man invented the bicycle he reached the peak of his attainments.� � Elizabeth West, US author
Please email me rather than PM'ing me. Thanks.
Tom Reingold, tom@noglider.com
New York City and High Falls, NY
Blogs: The Experienced Cyclist; noglider's ride blog
�When man invented the bicycle he reached the peak of his attainments.� � Elizabeth West, US author
Please email me rather than PM'ing me. Thanks.
Likes For noglider:
10-21-24, 03:45 PM
#8686
Member
I decided to build a bike while on a month-long swing through the southwest US with our travel trailer. I always travel with my bike stand and a tub of tools, parts, and maintenance supplies anyway, but I upped the ante this time by also bringing along everything I�d need to assemble a bike.
The bike started with a 2006 Trek 6500SLR hard tail mountain bike frame I recently acquired. Before departure, I repainted it and remade the decals, using it as the basis for my recent thread about how I make my own decals.
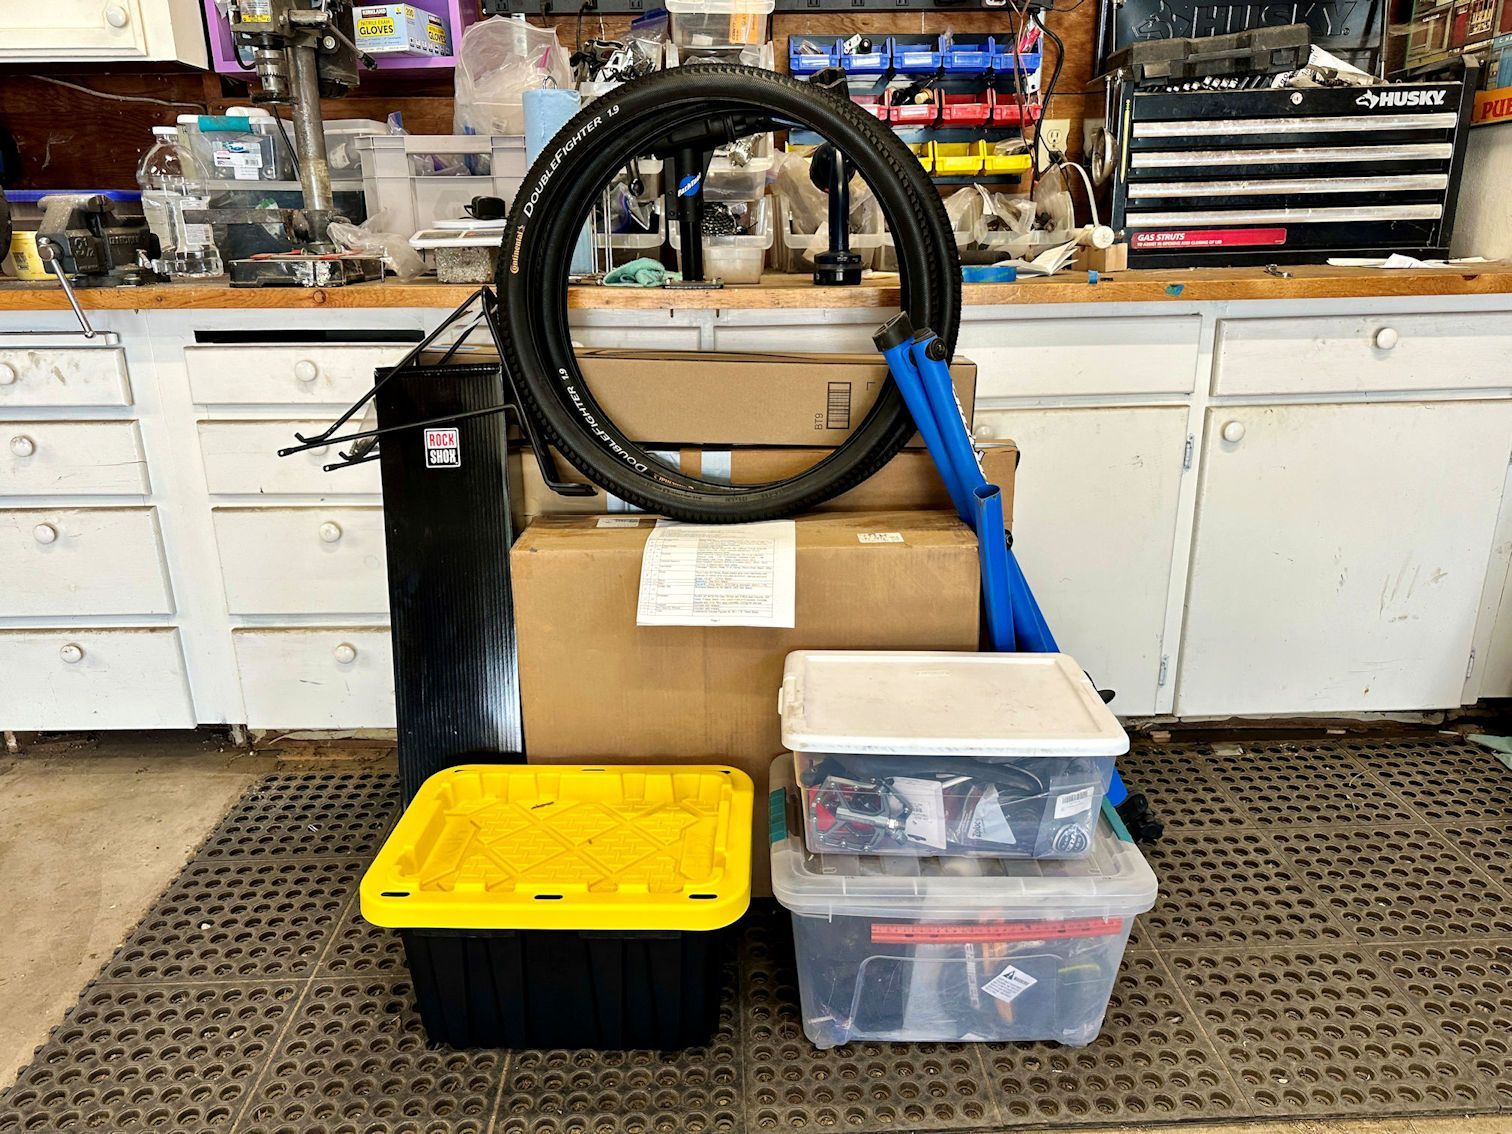
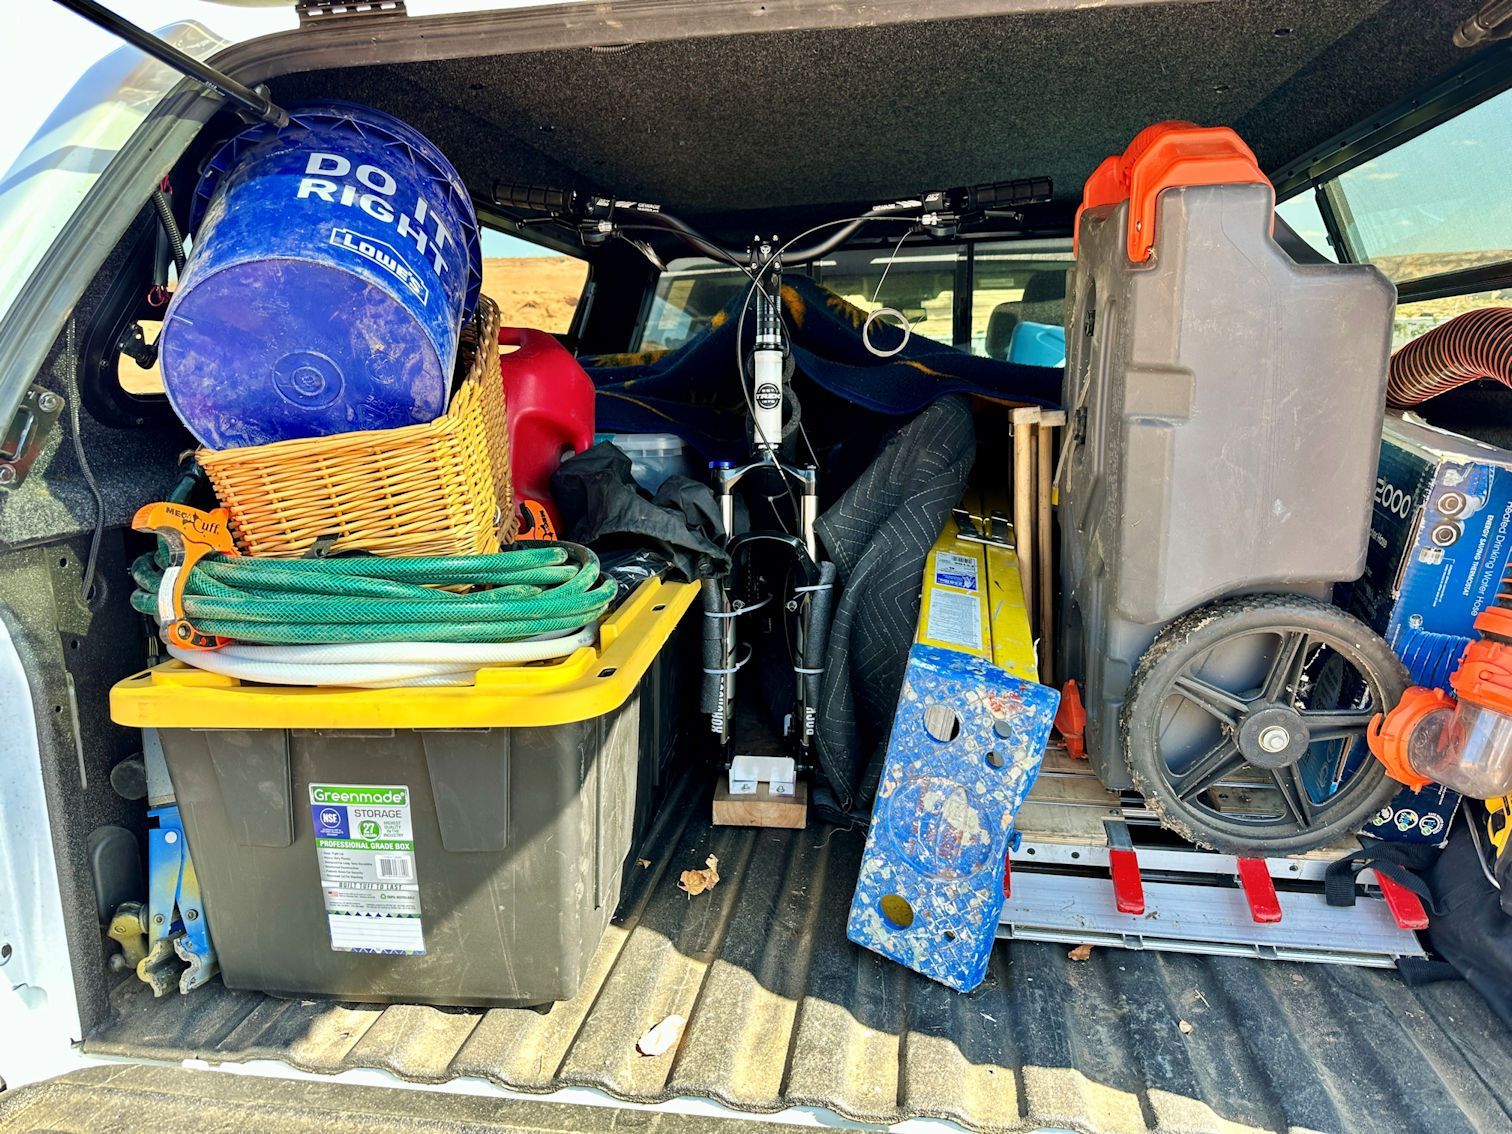
Here is the collection of parts and tools I took with me, ready to be loaded into the truck.
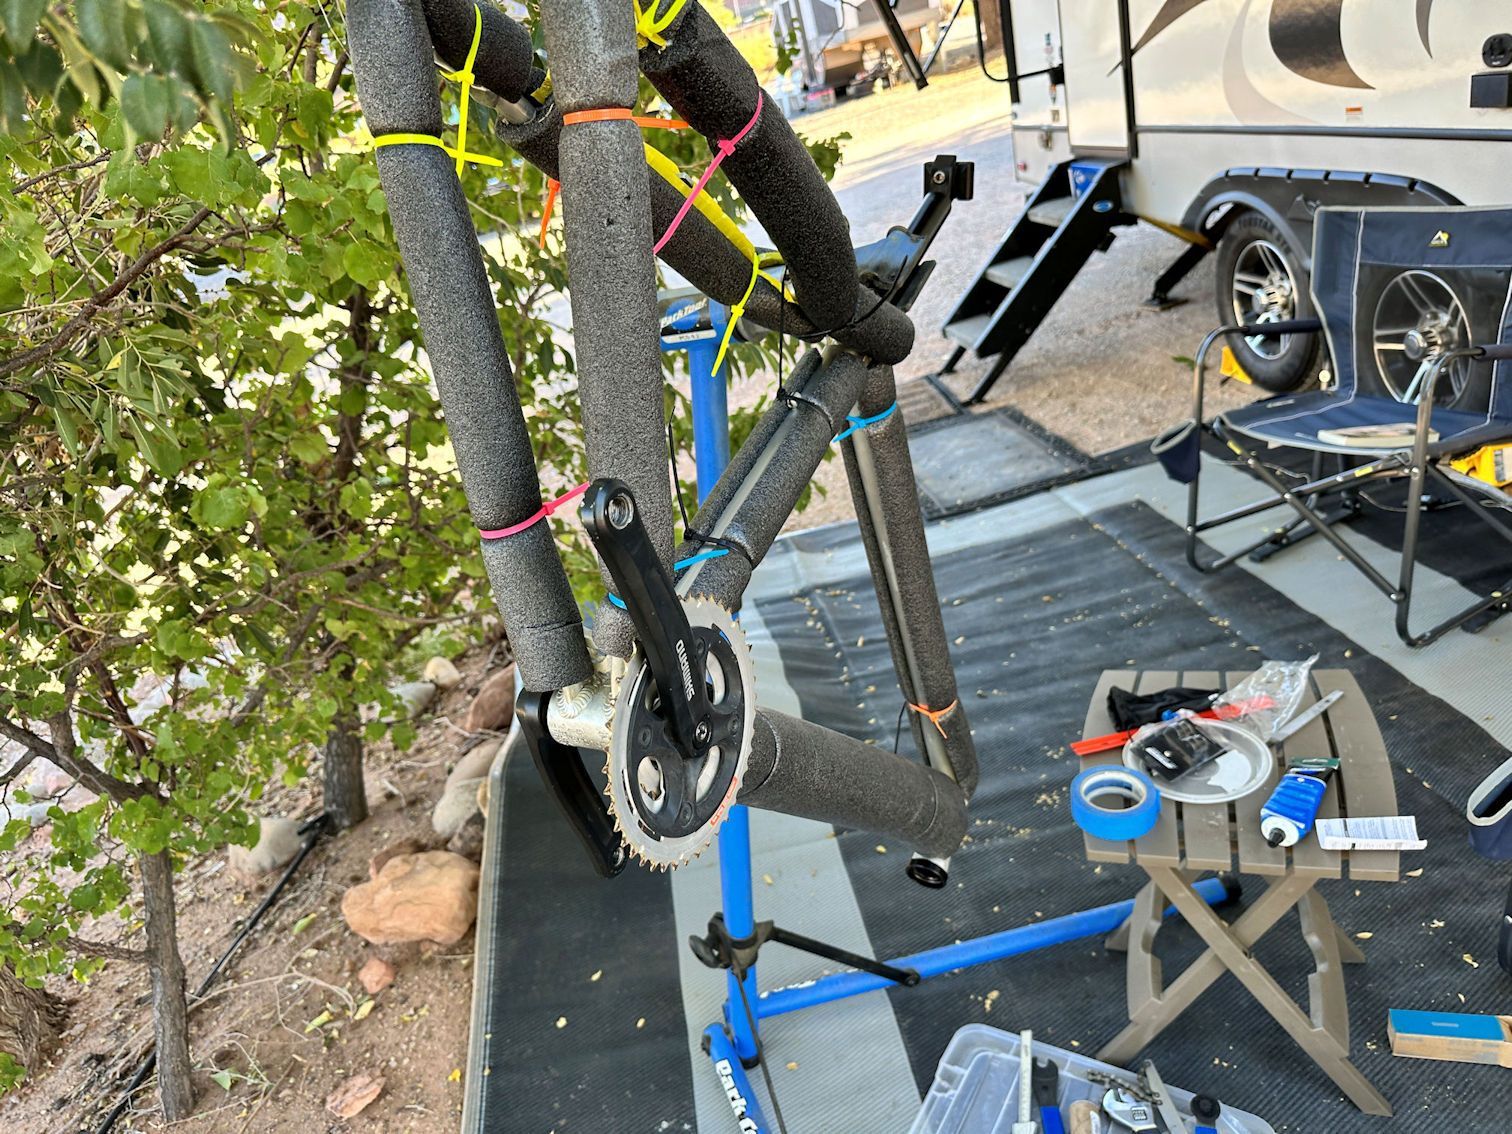
I started putting the bike together in Moab, Utah. I installed the head badge, headset cups, bottom bracket, crankset, and front derailleur. I also drove the headset race onto the fork steerer.
What better place to work on a mountain bike? If you have a pickup or Jeep there (and it seems everyone does), you�ll likely have a mountain bike or two hanging off the back of it.
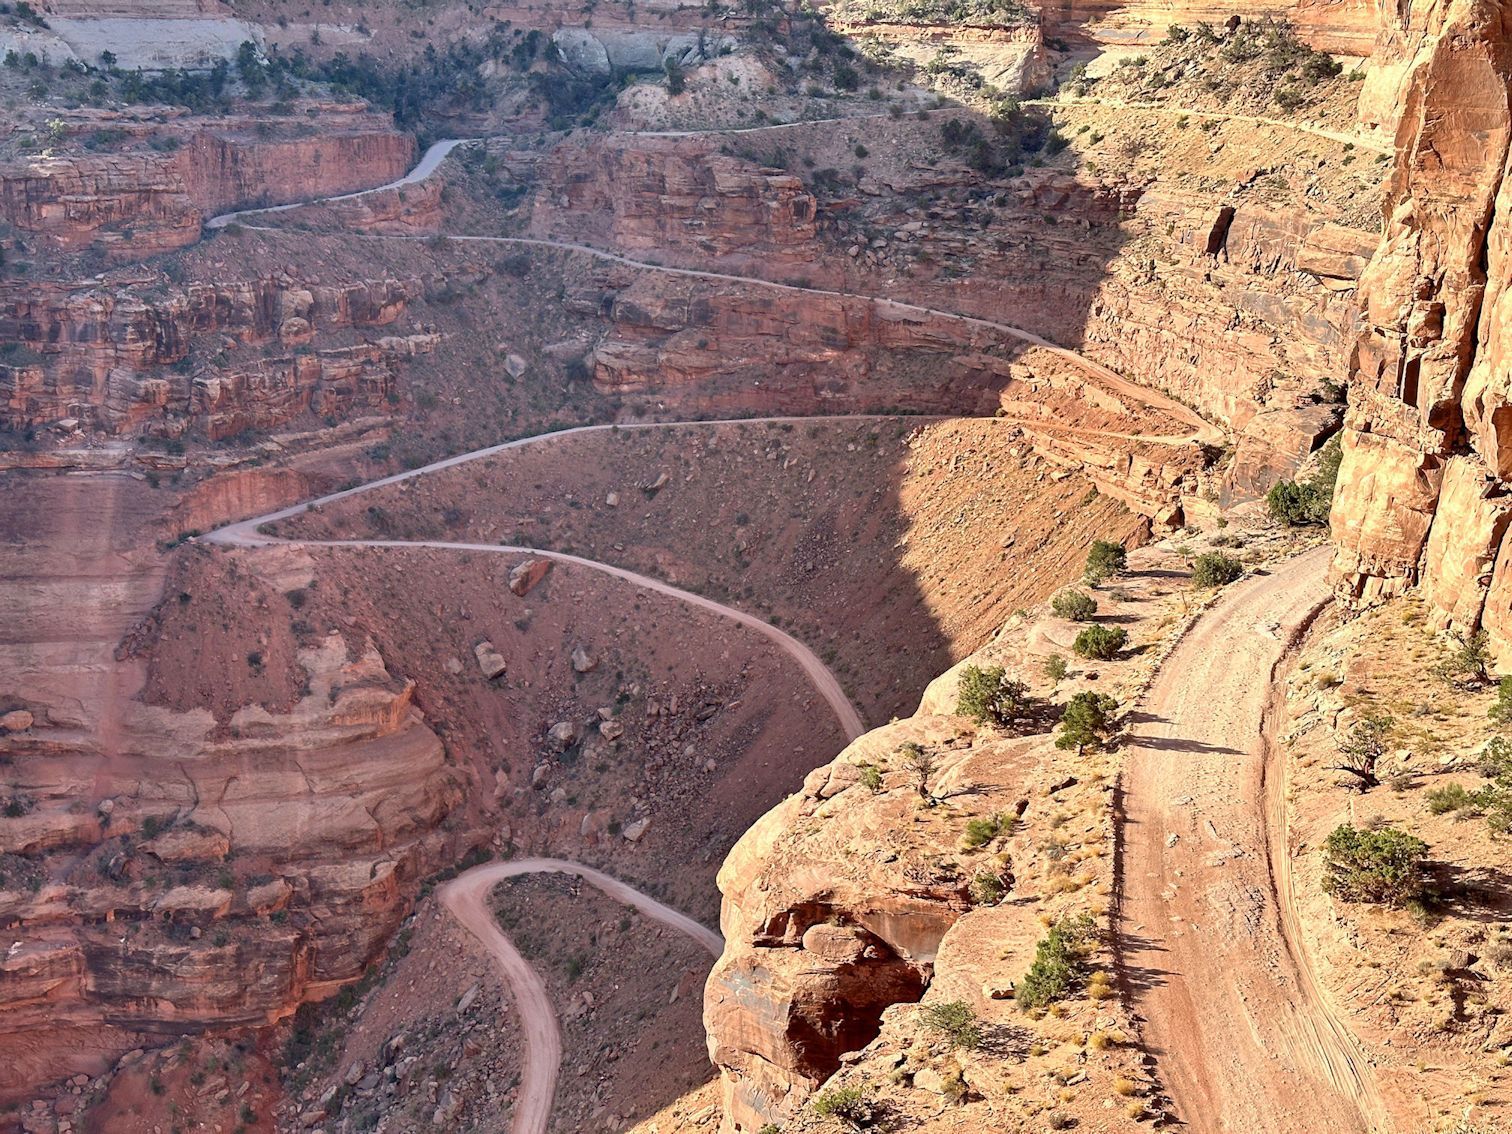
Near there, I saw a group of mountain bikers unloading from said pickups and Jeeps to tackle this road in Canyonlands National Park.
I picked up my project again where we were staying near Mesa Verde National Park in Colorado. There I installed the tires and disks on the wheels, and I installed the saddle, rear derailleur and hanger, the fork, brake calipers, stem, and handlebar, as well as the shifters, brake levers, and grips. I also cabled the brakes.

Once I had the rear wheel on and the fork installed, I could use the rack I made for sliding it into my pickup bed among the junk/necessities I take on long trips. The bike rack on the back of the trailer was already occupied by operational bikes. Also importantly, I could then dispose of several of the cardboard boxes I�d been carrying around.
In Page, Arizona I only managed to get the low and high limits roughed in on the derailleurs, and the shift cables installed. Our site there got the full brunt of the afternoon sun.

When we got to the Palm Desert area in California, I set up the shifting and I installed the chain, pedals, bottle cages, and kickstand. I then took it for a few short rides to get the cockpit set up to my liking.
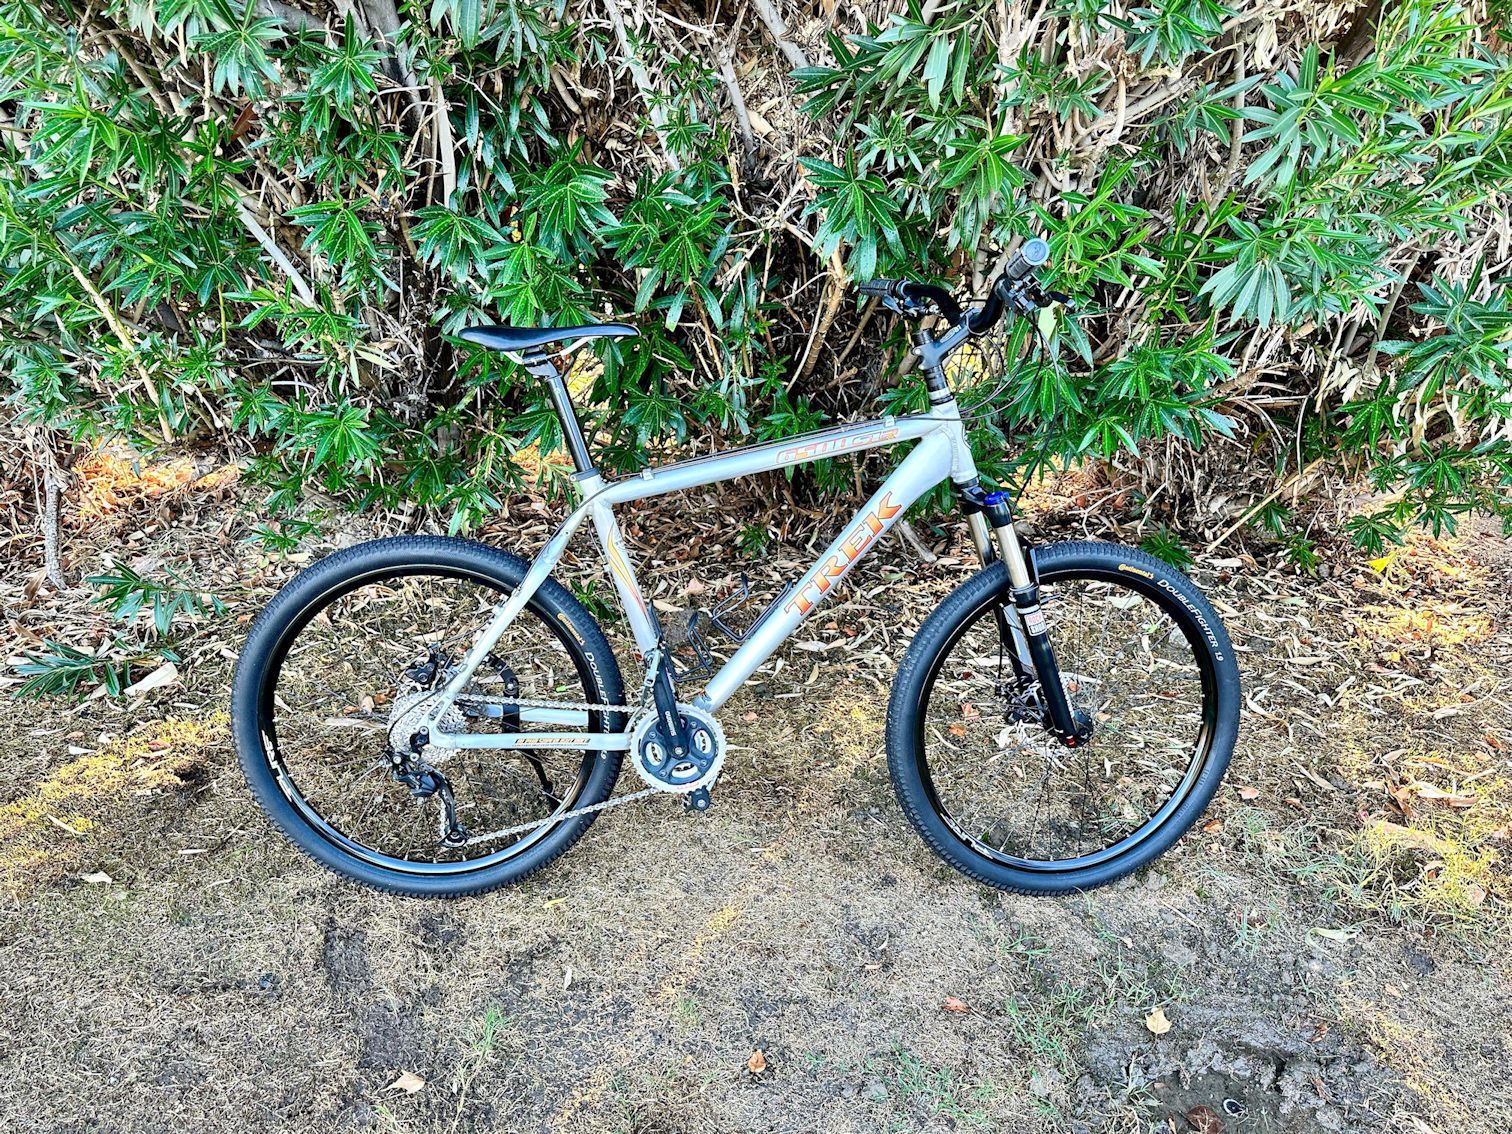
I outfitted it very close to the original configuration if not with the exact original components. I used several bits I had on hand. It has a 3X9 drivetrain with 42/32/22 and 11-32.
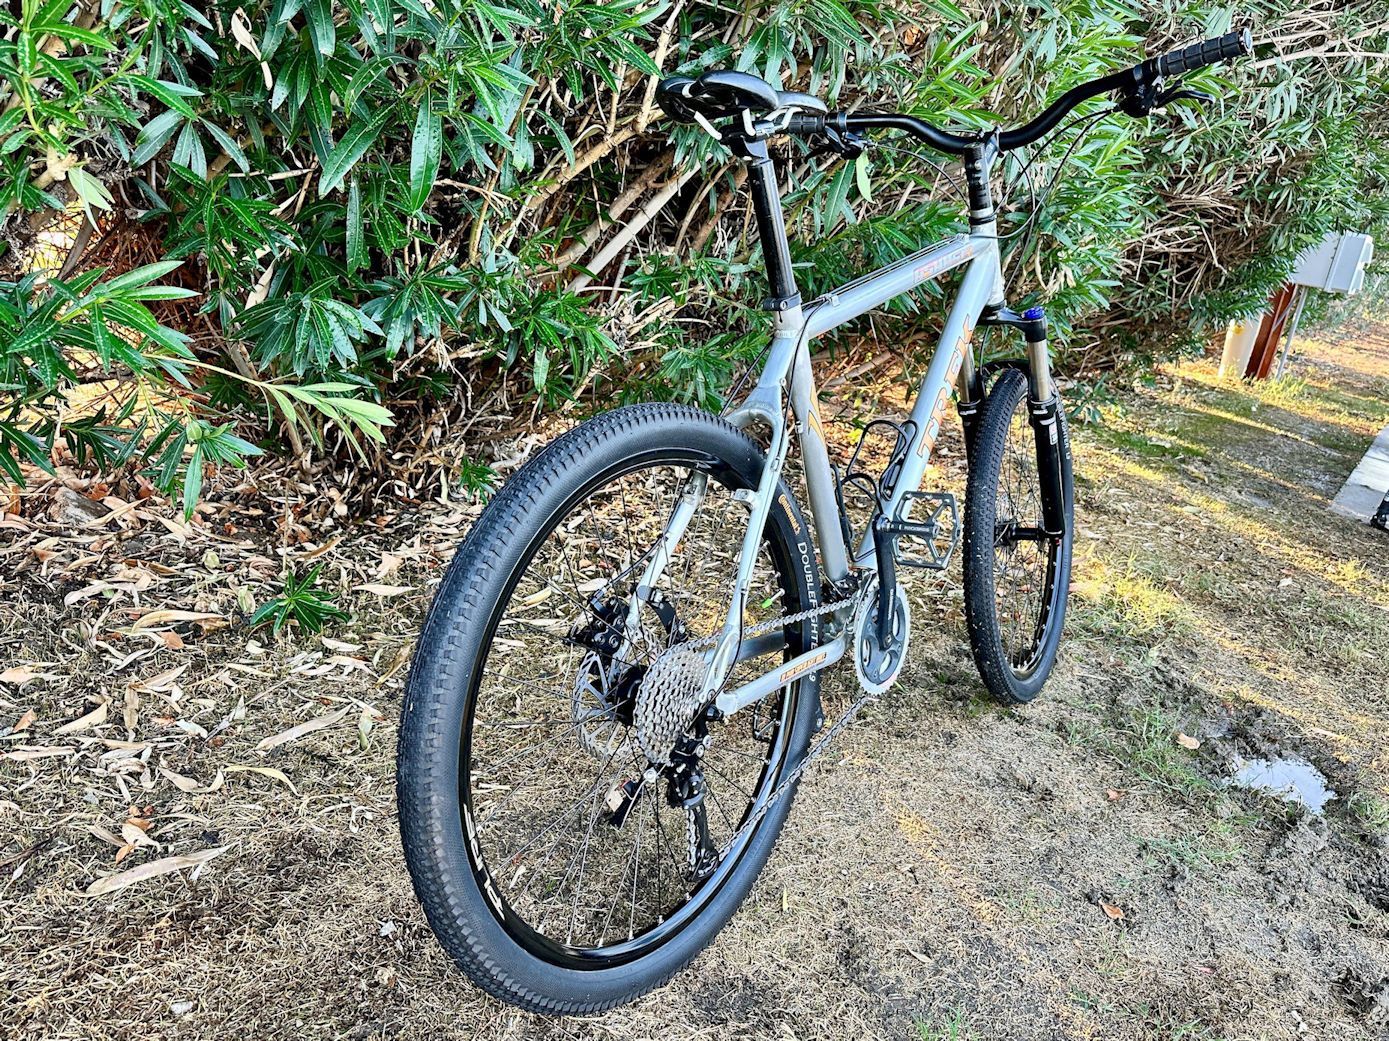
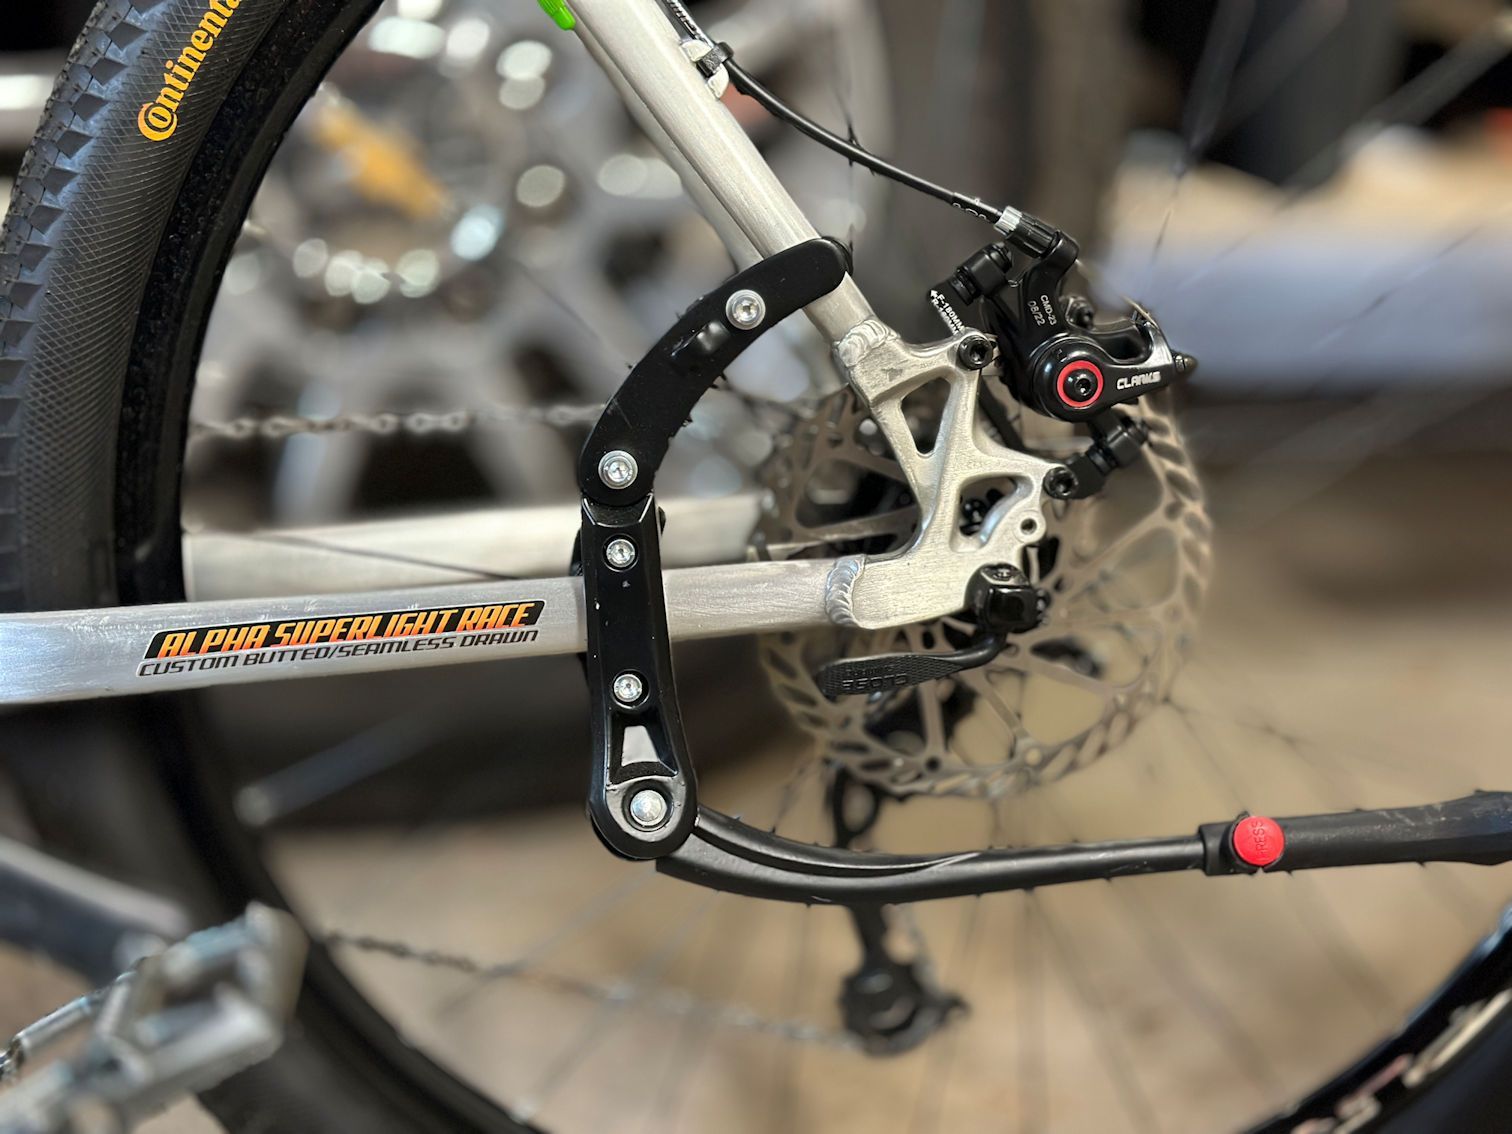
This frame can accommodate disk or v-brakes. Although it was originally the version that came with v-brakes installed, I used Clark mechanical disks with compressionless cable housings. It has Pure alloy wheels that I got on �overstock clearance� (who knows?) from a seller on eBay and Continental DoubleFighter tires I had on hand.
I put a new Rockshox Recon Silver fork on it to get air-adjustable spring, adjustable rebound damping, and manual lockout without spending more on the fork than the bike is worth. I haven�t yet cut down the steerer, waiting to see if I like this bar and stem setup.
This was fun and I�d definitely do it again. The main challenge was that we had a lot of other things to do on this trip and I didn�t have much down time to work on it. We visited 6 national parks, a couple of state parks with scenic wonders, 9 quilt shops (I'm not the only one in the family with a habit), a day of wine tasting, a bike shop, spent a couple of days visiting friends, and the usual travel days, shopping, laundry, and truck and trailer maintenance. As I look at this, I'm feeling better about not getting it done until our trip was nearly done.
Unseasonably hot weather in several places also made working on the bike challenging. It was often too hot to work on it in the afternoons after our morning hikes or sightseeing. But when I could work on it, it was fun that other campers stopped by to chat about what I was doing and about their own cycling.
The bike started with a 2006 Trek 6500SLR hard tail mountain bike frame I recently acquired. Before departure, I repainted it and remade the decals, using it as the basis for my recent thread about how I make my own decals.
Here is the collection of parts and tools I took with me, ready to be loaded into the truck.
I started putting the bike together in Moab, Utah. I installed the head badge, headset cups, bottom bracket, crankset, and front derailleur. I also drove the headset race onto the fork steerer.
What better place to work on a mountain bike? If you have a pickup or Jeep there (and it seems everyone does), you�ll likely have a mountain bike or two hanging off the back of it.
Near there, I saw a group of mountain bikers unloading from said pickups and Jeeps to tackle this road in Canyonlands National Park.
I picked up my project again where we were staying near Mesa Verde National Park in Colorado. There I installed the tires and disks on the wheels, and I installed the saddle, rear derailleur and hanger, the fork, brake calipers, stem, and handlebar, as well as the shifters, brake levers, and grips. I also cabled the brakes.
Once I had the rear wheel on and the fork installed, I could use the rack I made for sliding it into my pickup bed among the junk/necessities I take on long trips. The bike rack on the back of the trailer was already occupied by operational bikes. Also importantly, I could then dispose of several of the cardboard boxes I�d been carrying around.
In Page, Arizona I only managed to get the low and high limits roughed in on the derailleurs, and the shift cables installed. Our site there got the full brunt of the afternoon sun.
When we got to the Palm Desert area in California, I set up the shifting and I installed the chain, pedals, bottle cages, and kickstand. I then took it for a few short rides to get the cockpit set up to my liking.
I outfitted it very close to the original configuration if not with the exact original components. I used several bits I had on hand. It has a 3X9 drivetrain with 42/32/22 and 11-32.
This frame can accommodate disk or v-brakes. Although it was originally the version that came with v-brakes installed, I used Clark mechanical disks with compressionless cable housings. It has Pure alloy wheels that I got on �overstock clearance� (who knows?) from a seller on eBay and Continental DoubleFighter tires I had on hand.
I put a new Rockshox Recon Silver fork on it to get air-adjustable spring, adjustable rebound damping, and manual lockout without spending more on the fork than the bike is worth. I haven�t yet cut down the steerer, waiting to see if I like this bar and stem setup.
This was fun and I�d definitely do it again. The main challenge was that we had a lot of other things to do on this trip and I didn�t have much down time to work on it. We visited 6 national parks, a couple of state parks with scenic wonders, 9 quilt shops (I'm not the only one in the family with a habit), a day of wine tasting, a bike shop, spent a couple of days visiting friends, and the usual travel days, shopping, laundry, and truck and trailer maintenance. As I look at this, I'm feeling better about not getting it done until our trip was nearly done.
Unseasonably hot weather in several places also made working on the bike challenging. It was often too hot to work on it in the afternoons after our morning hikes or sightseeing. But when I could work on it, it was fun that other campers stopped by to chat about what I was doing and about their own cycling.
__________________
Living life on the small chainring.
Living life on the small chainring.
10-21-24, 05:28 PM
#8687
Senior Member

Join Date: Sep 2005
Location: Oakland, CA
Posts: 3,334
Bikes: '82 Univega Competizione, '72 Motobecane Grand Record, '83 Mercian KOM Touring, '85 Univega Alpina Uno, '76 Eisentraut Limited
Liked 1,292 Times
in
740 Posts
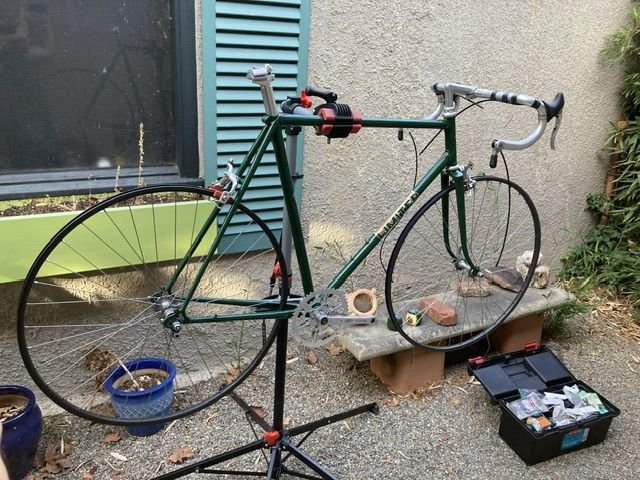
I finished painting this one a couple of years ago, and then we moved. It�s sat dormant in the garage ever since. I finally got around to rebuilding the rear wheel for 120mm, so away we go. Hoping to have it roadworthy within a couple of weeks.
Likes For noobinsf:

Thread
Thread Starter
Forum
Replies
Last Post
MetinUz
Long Distance Competition/Ultracycling, Randonneuring and Endurance Cycling
13
10-10-19 07:14 PM
Lovegasoline
Bicycle Mechanics
15
06-09-11 06:02 AM
