


Recover Your Saddle
 03-14-11, 08:46 AM
#76
Noob
Thread Starter
Join Date: Nov 2009
Location: Bay Area
Posts: 357
Bikes: '86 Schwinn Paramount
Likes: 0
Liked 5 Times
in
3 Posts
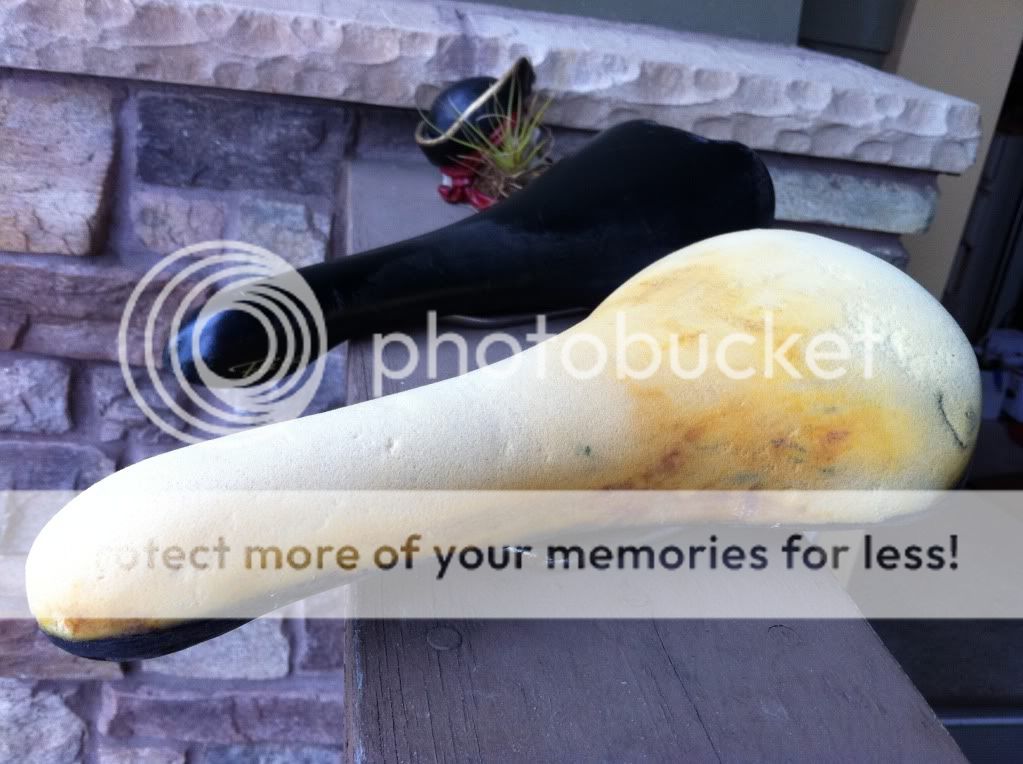
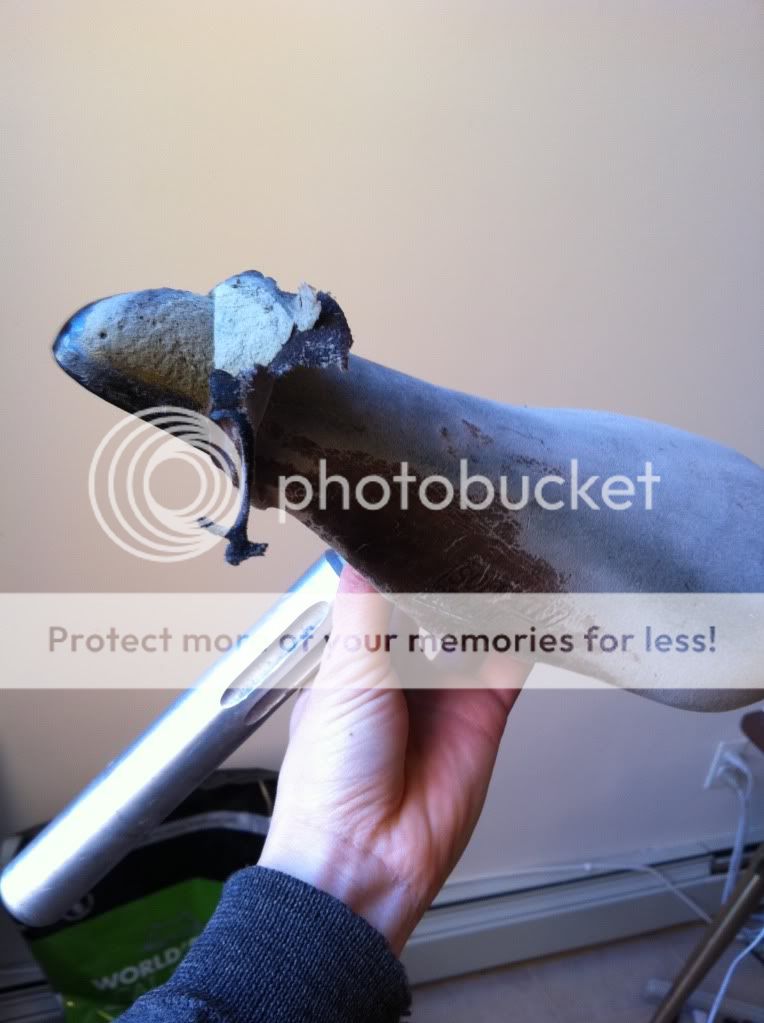
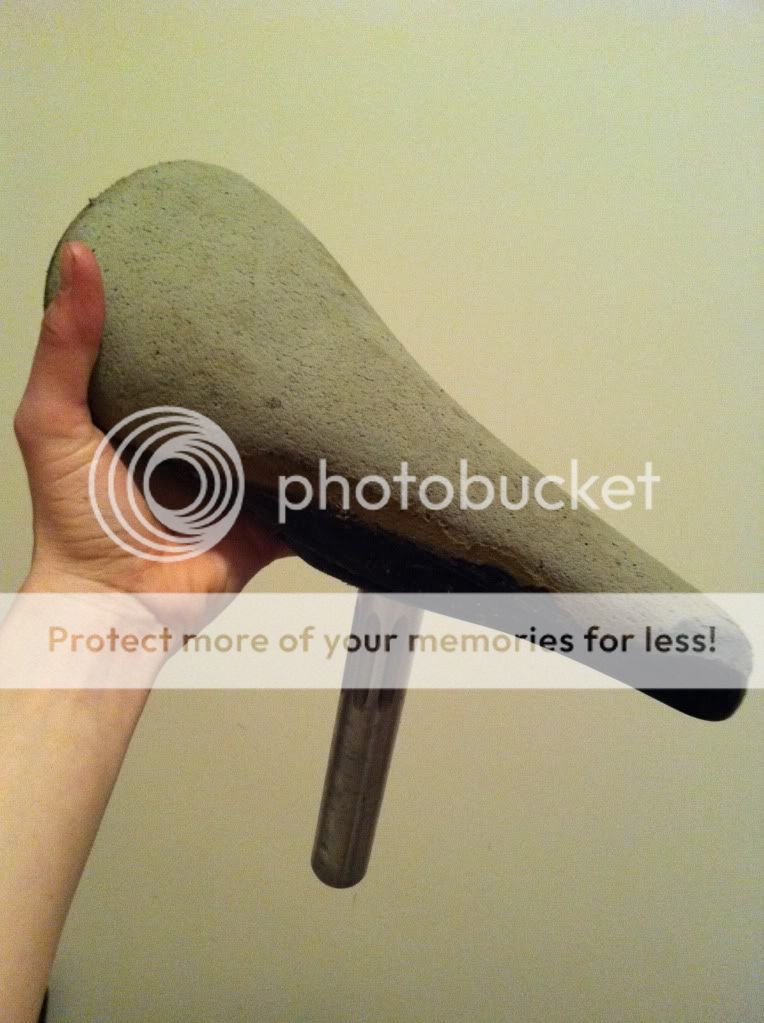
I didn't have my heatgun so I didn't get to test out if it helps pulling the old cover. The result? The cover pulled up some foam again. This time, I grabbed some 100 grit an a block and went to work. Foam shapes pretty quickly and I was able to get the low spots even with the rest of the foam. Here is before wrapping


 03-14-11, 10:22 AM
#78
Noob
Thread Starter
Join Date: Nov 2009
Location: Bay Area
Posts: 357
Bikes: '86 Schwinn Paramount
Likes: 0
Liked 5 Times
in
3 Posts
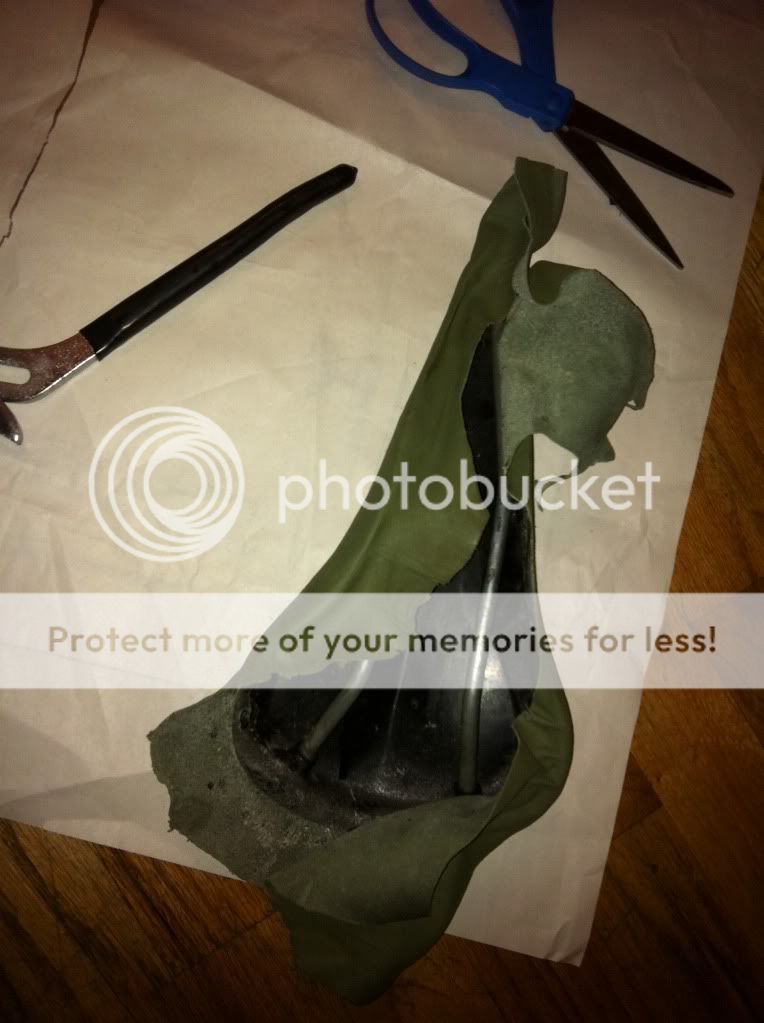
Eh, the Arione has a slightly bent rail. I could probably straighten it but I don't know if it could be trusted after. On the plus side, it was super easy to remove the old cover from it. Good luck!
03-14-11, 03:37 PM
#79

Stop reading my posts!

Heck, you're in the Bay Area, I'll bring all my old saddles to you! I don't think I can get better results, and the more you do the better you'll get...are you looking for a side business?
03-14-11, 04:32 PM
#80
Noob
Thread Starter
Join Date: Nov 2009
Location: Bay Area
Posts: 357
Bikes: '86 Schwinn Paramount
Likes: 0
Liked 5 Times
in
3 Posts
I thought about it, I even posted an ad on craigslist last year. The biggest problem I think I'll have is having a steady supply of quality material (leather) at a good cost. People like black leather, brown, tan, white and it would cost too much to get different colors because you have to buy a lot of each color it initially. Unless it's black, it wouldn't be worth it just to cover one saddle.
Another thing is people's expectations of finished product. It would be impossible for me to promise a perfectly recovered saddle because every saddle is different. Some old covers peel easily and some tear up the foam. I would feel bad if I messed up someones favorite saddle trying to recover it.
Until I get really good at it, I think I'll just buy cheap/worn ones and sell them when recovered. That way, I know how to price them depending on how they turn out. PM me if you want to work something out though!
03-14-11, 04:54 PM
#81
Stop reading my posts!
I thought about it, I even posted an ad on craigslist last year. The biggest problem I think I'll have is having a steady supply of quality material (leather) at a good cost. People like black leather, brown, tan, white and it would cost too much to get different colors because you have to buy a lot of each color it initially. Unless it's black, it wouldn't be worth it just to cover one saddle.
Another thing is people's expectations of finished product. It would be impossible for me to promise a perfectly recovered saddle because every saddle is different. Some old covers peel easily and some tear up the foam. I would feel bad if I messed up someones favorite saddle trying to recover it.
Until I get really good at it, I think I'll just buy cheap/worn ones and sell them when recovered. That way, I know how to price them depending on how they turn out. PM me if you want to work something out though!
Another thing is people's expectations of finished product. It would be impossible for me to promise a perfectly recovered saddle because every saddle is different. Some old covers peel easily and some tear up the foam. I would feel bad if I messed up someones favorite saddle trying to recover it.
Until I get really good at it, I think I'll just buy cheap/worn ones and sell them when recovered. That way, I know how to price them depending on how they turn out. PM me if you want to work something out though!
Still: there are some swapmeets coming this month in the greater San Jose area...hint-hint...
03-14-11, 05:21 PM
#82
Iconoclast
Join Date: Aug 2009
Location: California
Posts: 3,176
Bikes: Colnago Super, Fuji Opus III, Specialized Rockhopper, Specialized Sirrus (road)
Likes: 0
Liked 0 Times
in
0 Posts

So I stopped in the thrift the other day, picked up a nice black leather jacket, enough for probably 5 saddles. Got home, tried it on, now I'm totally rocking the Lou Reed look. Still need leather for the saddles. OK, plan B - I went to an upholstery shop and told them what I have in mind. She goes in the back room, comes back with a nice piece of black scrap, probably enough for 3 saddles and some yet to be contrived saddle bag, and gives it to me for free. So that's my recommendation. Of course, ymmv.

") 03-14-11, 05:50 PM
03-14-11, 05:50 PM
#83
Noob
Thread Starter
Join Date: Nov 2009
Location: Bay Area
Posts: 357
Bikes: '86 Schwinn Paramount
Likes: 0
Liked 5 Times
in
3 Posts
All good points, but I still think there could be some demand and some customers who wouldn't take you to court over an honest failure (especially if you make the terms clear at the start) and I was even thinking I'd supply the leather I'd want (you) to use...in this imaginary scenario. But I completely understand there are pitfalls and you should do the thing that's comfortable (and pleasant) for you: not every hobby has to be a business.
Still: there are some swapmeets coming this month in the greater San Jose area...hint-hint...
Still: there are some swapmeets coming this month in the greater San Jose area...hint-hint...
03-14-11, 05:58 PM
#84
Senior Member
03-14-11, 06:03 PM
#85
Senior Member
Join Date: Jul 2009
Posts: 11,128
Bikes: 1986 Alan Record Carbonio, 1985 Vitus Plus Carbone 7, 1984 Peugeot PSV, 1972 Line Seeker, 1986(est.) Medici Aerodynamic (Project), 1985(est.) Peugeot PY10FC
Likes: 0
Liked 33 Times
in
27 Posts
A couple people mentioned Concors so I'm going to keep the thread going with pics of my first attempt, and a couple notes. These saddles have some interesting curves. I was able to use the old cover for guidance, although it was pretty deformed from years of being stretched. The old cover was 1mm leather whereas the stuff I used was 1.3mm. That made the nose in particular a challenge and I don't think I could have used anything thicker. As it is I'm not 100% satisfied, but it certainly looks better than the old one and functionally it should be fine. I used Weldwood contact cement for the whole thing with no problems at all.


Why not try it with perforated leather on your next Concor re-cover.
Many are looking for such but I think they did not make them in the 80's, except for Laser versions. New re-issues are supposedly coming out with the perforated covers, but some find something not quite right with them when they see pics of the new saddles in the net.
1.3mm leather's pretty tough. 1.3 - 1.4 mm is typically the thickness they use on motorcycle leather racing suites, so your covers should last a lifeltime!
Chombi
Last edited by Chombi; 03-14-11 at 06:06 PM.
03-14-11, 07:03 PM
#86
Stop reading my posts!
April 3rd is at the Trailhead Cyclery , Union Ave. in San Jose
April 24th (Easter Sunday) is at the Cupertino Bike shop on De Anza Blvd., Cupertino
03-14-11, 10:22 PM
#87
Senior Member
Anyone ever attempted to add leather to an original uncovered Unicanitor? I have a pre-Cinelli one in good shape that would be perfect for my coming Molteni homage!
Thoughts???
Up for a side job THEJAPINO?
Thoughts???
Up for a side job THEJAPINO?
03-18-11, 11:25 PM
#88
vintage motor

Join Date: Sep 2008
Location: Tepic, Nayarit, Mexico
Posts: 1,608
Bikes: 48 Automoto, 49 Stallard, 50 Rotrax, 62 Jack Taylor, 67 Atala, 68 Lejeune, 72-74-75 Motobecanes, 73 RIH, 71 Zieleman, 74 Raleigh, 78 Windsor, 83 Messina (Villata), 84 Brazzo (Losa), 85 Davidson, 90 Diamondback, 92 Kestrel
Likes: 0
Liked 108 Times
in
84 Posts
I have an old Kashimax I'd like to use for a first try. It's very worn-down suede, although there are no rips and it is perfectly smooth. Any reason I couldn't just glue a new layer of thin leather right over the old?
03-19-11, 08:55 AM
#89
Senior Member
This thread has inspired me to bring a couple of my beater saddles back to life. But before I tried my hand at recovering my Avocet Touring II, I thought it would be a good idea to test the waters first with a "practice" saddle and I wanted to share how that went.
I began with this Vetta saddle, covered with some kind of human-made, stretchy fabric. This is my "before" photograph.

The earlier suggestion of using a leather "donor" jacket for the covering was an idea I hadn't previously considered, but it's a good one. I stopped at the Goodwill Thrift Store and picked up this jacket for six bucks.

It was very easy to remove the leather. I used an X-Acto knife to rip the seams and it came apart without a hitch. Time elapsed to completely strip the coat of leather: less than ten minutes. Once removed, I found that there is enough leather in the two sleeves to recover four road saddles. There is enough material in the remainder of the jacket to experiment with a lot of different ideas, including bar wrap, toe clips, and customized brake levers.

I stripped the remaining stretchy fabric from the Vetta and double coated the foam and allowed it to dry; I also double coated the leather and also allowed it to dry. Happily, the leather was very thin and very stretchy. I had spoken with the folks at Tandy Leather Company a couple of weeks ago to price out leather for this project (before reading the excellent advice about using a donor jacket from a Thrift Store) and discovered how pricey a chunk of leather was going to be. I also found out that some leather is much more pliable than other kinds - Elkhide, for instance, tends to be very pliable I understand. Anyway, I'm not sure what my donor jacket is made from, but it stretched around the form just fine. I won't repeat all of the steps already outlined in this thread, but I tried to follow the spirit of the OP's excellent instructions. Here are the "After" photographs:


I was apprehensive about recovering the saddle - I really hate it when things look jury-rigged. But I'm very pleased with the result (hopefully it will stand the test of actual usage!) ... in fact, this turned out far, far better than I imagined - especially for a first attempt. And it was much quicker than I imagined too. From the time I laid out all the materials onto my drawing table to the time I photographed the finished saddle, time elapsed: less than thirty minutes.
Thanks for the inspiration, OP!
I began with this Vetta saddle, covered with some kind of human-made, stretchy fabric. This is my "before" photograph.
The earlier suggestion of using a leather "donor" jacket for the covering was an idea I hadn't previously considered, but it's a good one. I stopped at the Goodwill Thrift Store and picked up this jacket for six bucks.
It was very easy to remove the leather. I used an X-Acto knife to rip the seams and it came apart without a hitch. Time elapsed to completely strip the coat of leather: less than ten minutes. Once removed, I found that there is enough leather in the two sleeves to recover four road saddles. There is enough material in the remainder of the jacket to experiment with a lot of different ideas, including bar wrap, toe clips, and customized brake levers.
I stripped the remaining stretchy fabric from the Vetta and double coated the foam and allowed it to dry; I also double coated the leather and also allowed it to dry. Happily, the leather was very thin and very stretchy. I had spoken with the folks at Tandy Leather Company a couple of weeks ago to price out leather for this project (before reading the excellent advice about using a donor jacket from a Thrift Store) and discovered how pricey a chunk of leather was going to be. I also found out that some leather is much more pliable than other kinds - Elkhide, for instance, tends to be very pliable I understand. Anyway, I'm not sure what my donor jacket is made from, but it stretched around the form just fine. I won't repeat all of the steps already outlined in this thread, but I tried to follow the spirit of the OP's excellent instructions. Here are the "After" photographs:
I was apprehensive about recovering the saddle - I really hate it when things look jury-rigged. But I'm very pleased with the result (hopefully it will stand the test of actual usage!) ... in fact, this turned out far, far better than I imagined - especially for a first attempt. And it was much quicker than I imagined too. From the time I laid out all the materials onto my drawing table to the time I photographed the finished saddle, time elapsed: less than thirty minutes.
Thanks for the inspiration, OP!
03-19-11, 10:15 AM
#91
Senior Member
I would use Weldwood contact adhesive as mentioned earlier, and have brushes you can toss.
I suggest 3M Blue tape Also. The way the frame and underside was masked off was terrific but a big user of time, I would think it through a bit to simplify the masking and make removal easier too.
The leather will vary, and with vinyl especially a dart may be needed up front.
The original Cinelli saddles all used a dart forward.
Be careful with saddles that have "gel" inserts, often that Gel does not age gracefully.
03-19-11, 11:01 AM
#92
Noob
Thread Starter
Join Date: Nov 2009
Location: Bay Area
Posts: 357
Bikes: '86 Schwinn Paramount
Likes: 0
Liked 5 Times
in
3 Posts
Azorch, looks great! Plus you got a good deal on a jacket that size. It seems like prices of clothing went up in the thrift stores in my area. Let's see pics of your non-practice saddle when it's finished!
03-19-11, 11:42 AM
#93
Banned
Older Cinelli Volare, which had some decay of adhesive, so came right off..
Barge Vinyl stick glue in a tin , brush in cap (ordered thru local shoe store).
and Chamois from Auto Care Department, Chosen for heavier thickness .
Applied black dye, also from shoe store, when I was done..
Barge Vinyl stick glue in a tin , brush in cap (ordered thru local shoe store).
and Chamois from Auto Care Department, Chosen for heavier thickness .
Applied black dye, also from shoe store, when I was done..
03-19-11, 09:08 PM
#94
Banned.
I picked up a beat up Concor today, so I decided to use this thread to do a practice run first. I've had this Bontrager saddle for awhile, and hated the design. I had some material from a fuel tank cover off of a snowmobile.


I'm not completely satisfied with it, but that's my own fault not having enough patience.


I'm not completely satisfied with it, but that's my own fault not having enough patience.
03-21-11, 10:50 AM
#95
"Every day is Superbowl!"
Join Date: Apr 2007
Posts: 53
Likes: 0
Liked 0 Times
in
0 Posts
Thanks to THEJAPINO and everyone else for the info in this thread.
Here's my first two attempts.
I used spray adhesive on the topside and Weldwood on the underside. I was worried the Weldwood would soak into the foam and change the density (not sure if this is a valid concern). Also, I figured Weldwood would not let me remove the leather from the foam if I need to recover at some point in the future.
The black leather came from an old jacket I had. This leather was pliable and easy to work with.
The blue leather was a scrap I got from ebay for about $8 and was a little thicker. Thinking I trimmed too much on the black seat, I left more to wrap around the underside here. You can see the extra material and the thickness of the leather made it difficult to even out the creases, expecially under the nose. This seat is for a BMX bike and has bash protectors that will cover my work front and back so I wasn't too concerned. But now I'm thinking I may leave the bashguards off and wish I had taken a little more care here.
Some things I learned. Both the adhesive and the Weldwood allow time to adjust things. If it isn't laying right, you can pull it up and lay it down again. I did get a drop of the Weldwood on the top of a seat and I was able to rub it off with my thumb after it dried.
04-04-11, 08:59 PM
#97
Junior Member
Join Date: Jul 2006
Location: In Brooklyn between Dumbo and the Navy Yards, right next to the Farragut Houses
Posts: 3
Bikes: Maruishi touring bike
Likes: 0
Liked 0 Times
in
0 Posts
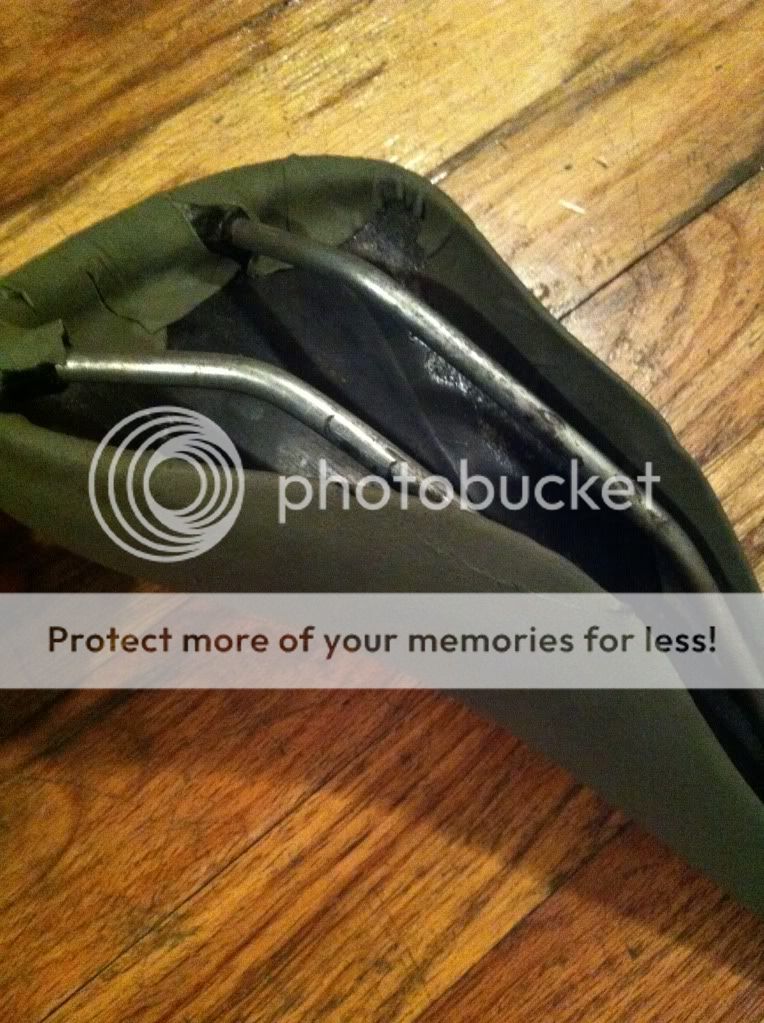
Done and done!
My apparently off-brand Soffatti pro-am saddle which I totally love has gradually been giving up its ghost:
A friend of mine who's always looking out for my ride alerted me to this thread, and it got to the point where I figured I had everything to gain by attempting to recover my saddle. I happened to have some leather lying around, and he bought a can of Super 77, so we were all set.
I painstakingly pulled off the old leather--this took ages, like an hour, because I was being really meticulous and the foam was pulling up the whole way. I used the screwdriver method:
My little scrap of leather was just barely large enough to work:
Once the rails and underside were masked, I sprayed both the leather and the saddle--if you go outside to spray, which you should because it's really stinky, make sure it's not too windy out because otherwise your leather might blow onto itself and stick together like mine did! The glue hadn't gummed up much yet so it was no problem to pull it apart again, but still. I probably let about 2 minutes elapse before I got back inside and placed the saddle down onto the leather and started stretching and smoothing. I found it easy to fix wrinkles just by pulling up and re-smoothing. I realized part-way through this process that cutting out triangular darts from the excess folded-over leather (at places like the nose and the back edges) is a good way of decreasing the underside bulk, but things still ended up looking pretty messy down there, also because I didn't bother uniformly trimming the edges before gluing (I was worried I would screw myself because I didn't have much leather to spare). This part took about 5-7 minutes, from the moment I started spraying until everything was in place:
The end result turned out great I think!
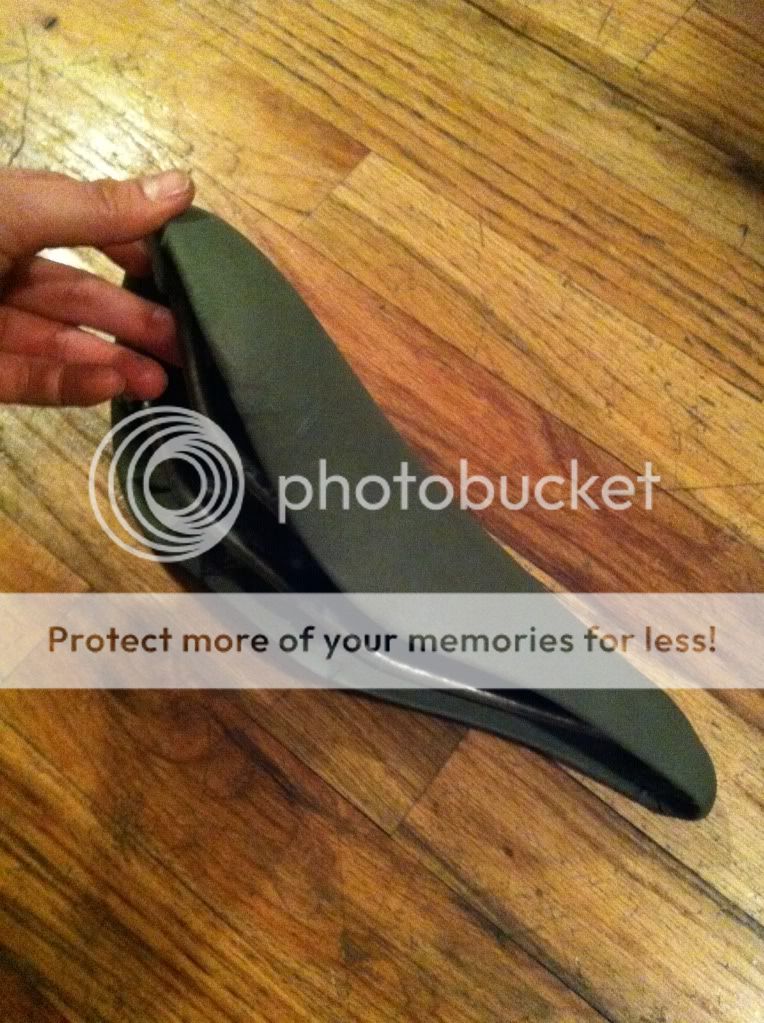
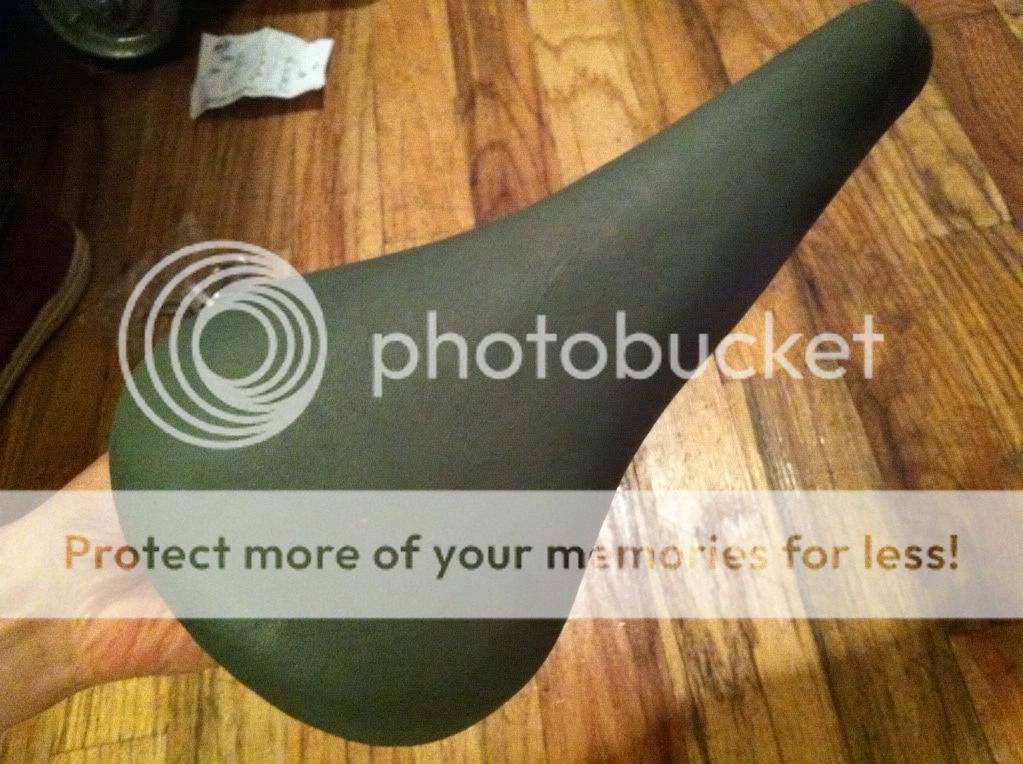
Thanks THEJAPINO!!
A friend of mine who's always looking out for my ride alerted me to this thread, and it got to the point where I figured I had everything to gain by attempting to recover my saddle. I happened to have some leather lying around, and he bought a can of Super 77, so we were all set.
I painstakingly pulled off the old leather--this took ages, like an hour, because I was being really meticulous and the foam was pulling up the whole way. I used the screwdriver method:
My little scrap of leather was just barely large enough to work:
Once the rails and underside were masked, I sprayed both the leather and the saddle--if you go outside to spray, which you should because it's really stinky, make sure it's not too windy out because otherwise your leather might blow onto itself and stick together like mine did! The glue hadn't gummed up much yet so it was no problem to pull it apart again, but still. I probably let about 2 minutes elapse before I got back inside and placed the saddle down onto the leather and started stretching and smoothing. I found it easy to fix wrinkles just by pulling up and re-smoothing. I realized part-way through this process that cutting out triangular darts from the excess folded-over leather (at places like the nose and the back edges) is a good way of decreasing the underside bulk, but things still ended up looking pretty messy down there, also because I didn't bother uniformly trimming the edges before gluing (I was worried I would screw myself because I didn't have much leather to spare). This part took about 5-7 minutes, from the moment I started spraying until everything was in place:
The end result turned out great I think!
Thanks THEJAPINO!!
04-04-11, 10:06 PM
#98
aka Tom Reingold

Join Date: Jan 2009
Location: New York, NY, and High Falls, NY, USA
Posts: 40,686
Bikes: 1962 Rudge Sports, 1971 Raleigh Super Course, 1971 Raleigh Pro Track, 1974 Raleigh International, 1975 Viscount Fixie, 1982 McLean, 1996 Lemond (Ti), 2002 Burley Zydeco tandem
Liked 2,646 Times
in
1,536 Posts
I've heard that BMX saddles are covered with kevlar. Sounds like an excellent idea. Thoughts?
I think the Avocet saddles were leather-covered, not vinyl. Am I wrong?
I think the Avocet saddles were leather-covered, not vinyl. Am I wrong?
__________________
Tom Reingold, tom@noglider.com
New York City and High Falls, NY
Blogs: The Experienced Cyclist; noglider's ride blog
�When man invented the bicycle he reached the peak of his attainments.� � Elizabeth West, US author
Please email me rather than PM'ing me. Thanks.
Tom Reingold, tom@noglider.com
New York City and High Falls, NY
Blogs: The Experienced Cyclist; noglider's ride blog
�When man invented the bicycle he reached the peak of his attainments.� � Elizabeth West, US author
Please email me rather than PM'ing me. Thanks.
 04-04-11, 10:21 PM
#100
Noob
Thread Starter
Join Date: Nov 2009
Location: Bay Area
Posts: 357
Bikes: '86 Schwinn Paramount
Likes: 0
Liked 5 Times
in
3 Posts
Halfie: is that green leather? I've been scouring the local goodwills for off color leathers so I can have variety. You did good!
Drietz: no problem, I can always use material.
Drietz: no problem, I can always use material.